
The Secret Underwater World of Nudibranchs
Clang, clang, clang! It was the last dive of my trip to Lembeh Strait, the famous ‘Critter Capital of the World’ on the northeastern tip of Northern Sulawesi, Indonesia. My dive guide Yap was frantically banging his cylinder to let me know he’d found something for me to photograph.
I eagerly swam over and peered at the green leaf he was pointing to. There, in the middle of the leaf, was the tiny nudibranch I’d been searching for, that had been on the top of my bucket list for several years! The butterfly nudibranch, Cyerce nigra.


Trying to control my excitement, I dialled in my settings, adjusted my strobes, and focused on the tiny nudibranch that was racing across the leaf, making focusing on it rather challenging.
After a few minutes (that felt like seconds), Yap tapped me on the shoulder, pointed at his computer, and indicated that it was time to ascend.

Our bottom time was up, and our dive was over. I was disappointed to end the dive, but ecstatic to have finally photographed this beautiful nudibranch.
I’d travelled to Lembeh Strait in search of the weird and wonderful: the crazy critters and beautiful nudibranchs that are known to inhabit the reefs and sandy slopes of this passage of water.

I’d hoped to find butterfly (or Cyerce) nudibranchs, as well as Ceratosoma tenue, Phyllodesmium parangatum, Hypselodoris apolegma, and Thecacera picta.
I did not leave disappointed!
Starting to photograph nudibranchs
Nudibranch hunting is a popular pastime for underwater photographers, especially those who, like myself, love macro underwater photography. Many of us travel the world in search of the rare, the unique, and the beautiful.
We have a bucket list of species we would like to see; we research where to find them, and we dream of how we are going to photograph them when we do! When I started diving, I was amazed and enthralled by the variety, colour, and textures of nudibranchs in our home waters of Gordon’s Bay, just outside Cape Town, South Africa.

At first, ‘nudi hunting’ was a bit like train spotting, and I went about trying to find and photograph every nudibranch listed in our local nudibranch book. New ones are constantly being discovered and, twenty years on, I am still excited to find nudibranchs I’ve never seen before here in Gordon’s Bay.
With the purchase of my first DSLR and macro lenses, I was able to get a closer look at the delicate and intricate details of these beautiful creatures.

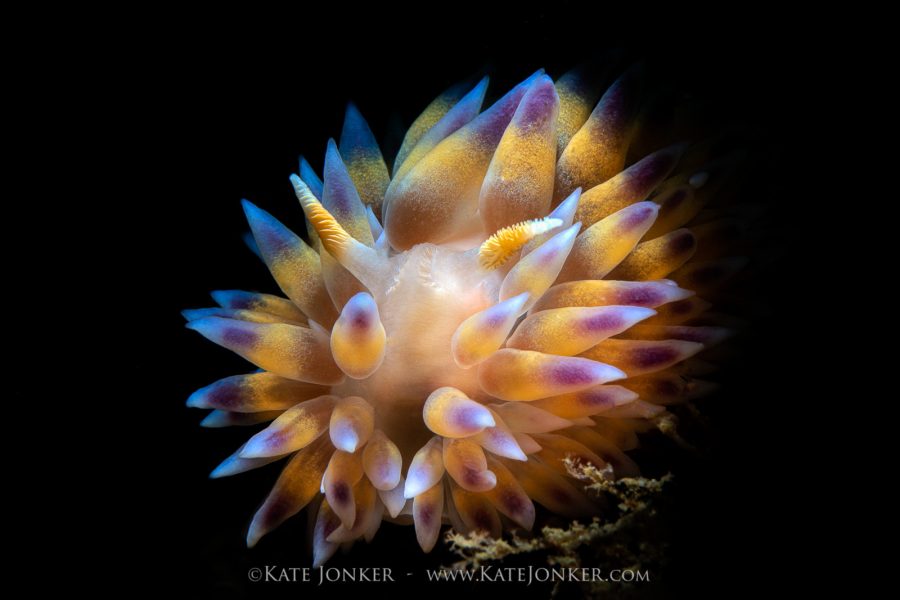
I noticed that some nudibranchs have eye spots, and others have patterns where their eyes would be.
They are quite human-like! Some have such comical faces, some are cute, and a few even look quite menacing. Today, I try to capture the different personalities and characteristics of the nudibranchs in my photos by using different photography techniques.
Equipment for photographing nudibranchs
As nudibranchs range in size from 1mm to over 10cm, this is macro photography at its best. Point and shoot cameras, such as Olympus TGs, are wonderful for beginners as they have the superb microscope mode, and even compact cameras have macro modes.
DSLR and mirrorless camera owners need a dedicated macro lens, and a flat port with a 67mm thread for their underwater housings.
The most popular macro lenses are the 50mm or 60mm for a wider field of view and shorter working distance, or 90mm, 100mm, or 105mm macro lenses for a narrower field of view and a greater working distance.
For tiny critters, compact camera, DSLR, and mirrorless camera users will need a wet diopter. This is an underwater magnifying glass that attaches to the 67mm thread on the front port of the camera housing. They come in different strengths, from +5 to +25, and the larger the number, the stronger the magnification.

To really make the colours pop, adding artificial light in the form of a video or focus light helps, but nothing beats the quality of light from a strobe, as it provides sharper edges and finer details.
I use the Nikon D850 with Nikon 60mm and 105mm macro lenses. I use a +5 diopter with my 105mm macro lens, and a +12.5 diopter with my 60mm macro lens. I use an Isotta housing and ports, with Scubalamp (SUPE) D-Max and Inon Z240 strobes.
Preparing to photograph nudibranchs
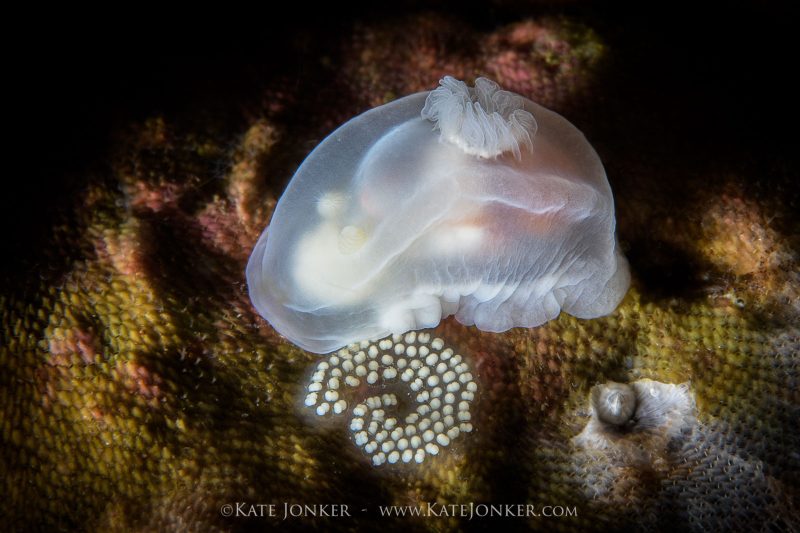
Whether at home or abroad, I do a lot of research to find out which nudibranchs can be found where I am diving, what they look like, what they live on, what their egg ribbons look like, and what they eat. This helps me to find them.
It’s also important to make a note of their size, as macro photography is misleading – in reference books and photos, a 1mm long nudibranch may appear to be the same size as a 10mm long nudibranch!
When travelling, I will also tell the dive guide what I am looking for, so that they remember to show it to me if they see it. What might be common to them is not necessarily common to me, so I want to make sure that they don’t swim over it whilst searching for something less ‘ordinary’.

I also mention that if they see it, great, but if not, it is no big deal. This takes the pressure off everyone and results in a much more enjoyable and stress-free diving holiday.
Best photographic techniques
When photographing nudibranchs, always shoot from the front and try to be level with your subject. Focus on the rhinophores and use a low ISO, a fast shutter speed, and a small aperture for best image quality.
Fortunately, where I live and dive there is an endless supply of nudibranchs to photograph.

This gives me the opportunity to try different techniques. Some of my favourite techniques include super macro, shallow depth of field, snooting, and creative underwater photography.
1. Super macro
Super macro involves using a wet diopter to magnify subjects to larger-than-life size. The stronger the diopter, the greater the magnification. The greater the magnification, the shallower the depth of field.
This is countered by using a high aperture. This results in the sharpest image and the best depth of field. I will also use two strobes, positioned either side of my port, close to my diopter, so that the cones of light coming from my strobes intersect just as they touch the subject.
Precise focusing is vital, and this can be quite challenging when diving in surging conditions. I try to steady myself by placing two fingers on a bare rock close by.
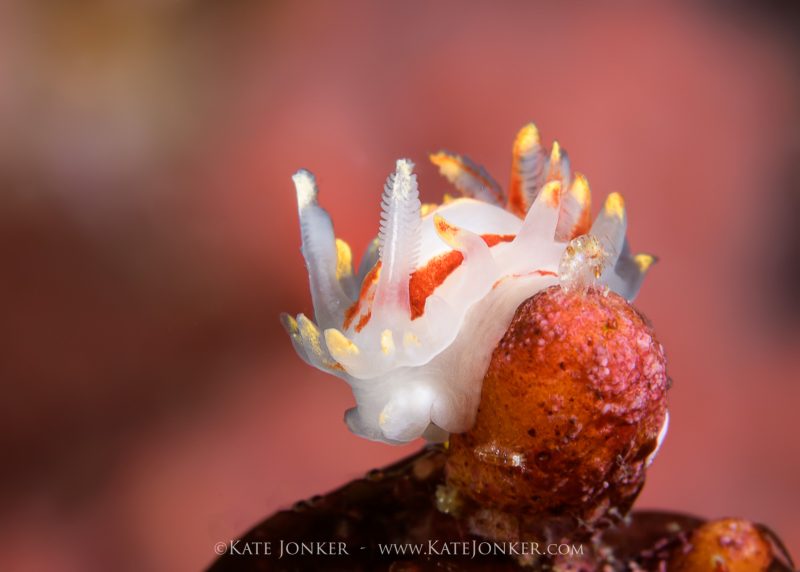
2. Shallow depth of field
Shallow depth of field can be used to separate your nudibranch from its background, especially if it is positioned on a messy reef or gravelly seabed. This can also be used quite creatively, using such a shallow depth of field that only the nudibranch’s rhinophores are in focus.
With different cameras and lenses, the depth of field will vary quite dramatically. For example, with my crop-sensor Canon 7D Mark II and 60mm macro lens, f/5.6 would be my go-to aperture for shallow depth of field.

However, with my Nikon D850 (which is a full-frame camera), and my 60mm macro lens, my go-to aperture for shallow depth of field is f/9.
Something to bear in mind is that, with such a wide-open aperture, a low ISO and a fast as possible shutter speed are needed to control the light. Strobes also need to be turned down so that they are bright enough to light your nudibranch without overexposing it.
3. Snooting
Snooting is probably the most challenging technique, but also the most rewarding. Snooting is done by attaching a light shaping device to the front of a torch or strobe.
This narrows the beam so only your nudibranch is lit. It is a great way of separating your nudibranch from its background, making the colours pop and the details stand out.
I personally prefer snooting with a strobe, as the amount of light can be controlled by adjusting the power of your strobe. I use two different snoots, Iardino’s ‘Snooty’ with my Inon Z240, and the Scubalamp SUPE OSD with my Scubalamp D-Max strobe.

Both produce a great quality of light, which is essential for good results. A strobe with a strong focus light is vital, as it is the focus light that will give you an indication of where the light will fall when you press the shutter.
I use my Nikon D850 with a 60mm macro lens for most of my snoot work, as the wider field of view makes it easier to find the focus light through my viewfinder. Once I can see the focus light, I adjust it so that it is centred in the frame, where I know my nudibranch will be in focus.
Once it is centred, I lock focus, tighten the strobe arms, and take photos. As we want to eliminate all ambient light, a fast shutter speed of around 1/250th of a second, and a low ISO of around ISO 100, is best. We want to use a small aperture to have good depth of field.

Snooting in surging conditions is really challenging, as spot-on positioning when you’re being washed around is difficult. I tend to leave my snoot on the boat if I know it’s going to be very rough.
4. Creative underwater photography
From using mirror tubes, to sparkly backgrounds, slow shutter speeds, colour filters, mirrors, reverse ring macro, and retro lenses, the only limit to creative underwater photography is your imagination!

I love a challenge, so the more technically complicated for me, the better. My favourite creative techniques when photographing nudibranchs include using colour filters, reverse ring macro, and retro lenses.
In conclusion
Searching for, and photographing, nudibranchs can become quite addictive! There is always a new nudibranch to be found and photographed, and a new way to photograph an old favourite.
This, coupled with their incredible colour combinations, shapes, and sizes, makes it easy to understand why nudibranchs are such a favoured subject for macro underwater photographers!


