
9 Tips for Creative Underwater Photography

In the realm of wildlife photography there is very little today – as compared to even thirty years ago – that is yet to be photographed. Since the age of digital, there are millions more images being taken by millions more people using incredible new technology.
Sure, there can be different angles and techniques. But from a sales perspective at least, the editorial market is saturated. Imagine the awe once inspired by the image of a mandrill before it had been a popular subject for photography. Google “mandrill” today and the choice of images is yours.
1. Shoot something original
Firstly, I studied as a marine biologist at Bangor University. I consider myself a naturalist and conservationist – I have been at least a naturalist my whole life.
For me, underwater is the last realm. But, if we all head out to Raja Ampat in Indonesia to photograph pygmy seahorses and nudibranchs, we are left back in the same boat of the over-saturation of certain images.

Personally, I don’t ever need to see another picture of a pygmy seahorse – not even my own. Yes, I have shot a few – not great but I do have some. The problem, unfortunately, is that it is what magazine editors want: the familiar, which keeps the spiral going.
Try to be original with your work, and look for something unique in the underwater photography space.
2. Be very comfortable in the water
Starting with the basics, you should first be very comfortable and competent in the water. When using SCUBA with a high-end camera, it is very easy to become totally distracted by the photography and you might easily put yourself in danger by not monitoring depth, bottom time, air, currents, or obstacles.

The art of diving should be second nature beforehand. I shoot both on SUBA and snorkel, and I would guess that more than half my underwater images have been taken while free-diving. It keeps me in the photic zone of natural light, it is certainly cheaper and more accessible, and personally gives a greater sense of freedom.
I would strongly recommend a free-diving course, something that I myself want/need to do to improve my breath holding. Practice, practice, practice… as often as possible, even without a camera.
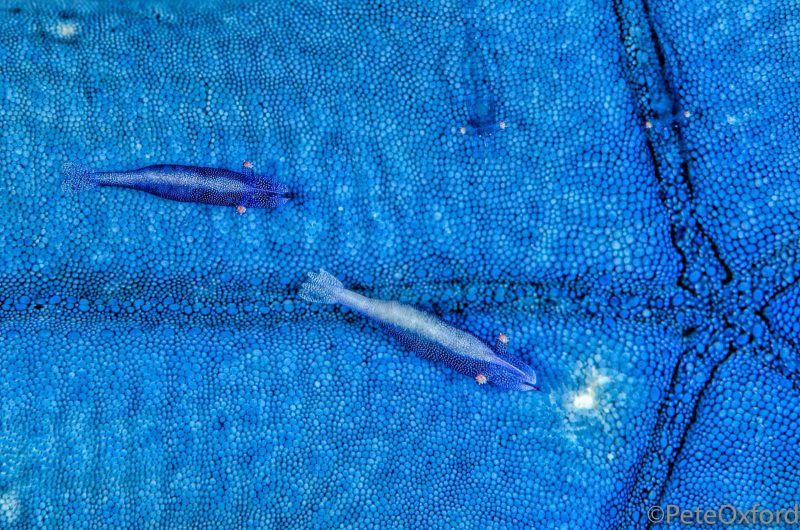
3. Take your time to be a naturalist first
I shoot both topside and underwater. In fact, in my career I have specialised in being a generalist which has helped to keep me going. What draws me underwater is the incredible wealth and diversity of life about which we know so little about.
There are areas, such as Raja Ampat for example, that are as diverse as tropical rainforests. They are spectacular. The more time you take with a subject or a small patch of substrate, the more you will see, the more you will learn, and the better you will become at photographing a subject’s behaviour. It then becomes addictive… so be prepared!
4. Get as close as possible to the subject
As a general rule, there are two types of underwater photography: wide-angle or close-up. Both techniques require a very close approach to the subject.
If you have to go slowly in, to not scare the subject, then you should leave slowly too. This shows a necessary respect, but also allows for a second and third non-threatening access.
The water acts like a blue (hopefully) filter and, when using natural light, the more distance through water that light has to travel from the subject to the camera the bluer and less contrasty the image. It is often a big surprise to novice underwater photographers how close you actually have to be for better reproduction of colour.
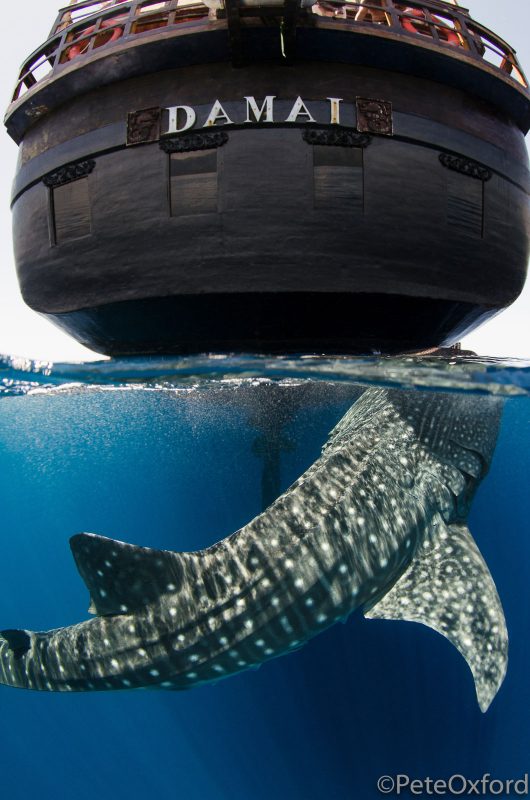
5. Make sure both halves of a split image have strong subject matter
A third style, of course, is to split the difference between underwater and topside – images we refer to as ‘over-under’, ‘half-and-half’ or ‘splits’.
For the best chance to make them work, it is necessary to have a wide-angle lens (the wider the better), and as large a dome port as possible. High sun is easier when the light penetrates further into the water. Probably topside will tend to be over exposed and below slightly under. This can usually be corrected in post production.
Read more: Underwater Split-Shots – Top Tips for Over-Under Photos
Always focus on the underwater subject, but have a small enough aperture (f/16 or smaller) so that the topside is focused as well. Water conditions should be smooth. To keep droplets off the port, everyone has their own cure. ‘Sea drops’ or similar used to keep masks from fogging are fairly convenient to rub on the dome before immersion.
Another idea to make it easier is to get in the water to shoot splits specifically and rest the camera on a life jacket or similar to help with the weight when you lift half of it into the air. SCUBA is not necessary for splits.
Crucially, ask yourself why you are splitting the image in the first place. Is there interest in both halves? If not, make sure you find some or don’t bother.
6. Practise strobe positioning for different effects
To restore colour to a subject, it is the norm to use one or two strobes to light the scene. Most underwater images, in fact, are shot with some form of flash. The idea is to illuminate the subject but not the water between it and the lens.
Read more: How to Choose a Strobe for Underwater Photography

Any light falling in this region will bounce off any particulate matter and be visible in the image as backscatter. Strobes should be positioned behind the dome or port of the camera. Usually, they should be pointing outwards to use the edge of the strobe’s angle of illumination to hit the subject. As a general rule, the closer the subject to the camera the closer the strobes should be.
7. Change lenses between dives at the same site
When diving with a camera, it is natural to see everything on the dive from the perspective of the lens that is mounted. Certainly in my case I cannot help visualising what the subject might look like as an image.
But you miss a lot. I don’t mean images necessarily, but you miss the whole other aspect – either wide-angle or macro, whichever one was not mounted at the time.
I recommend repeating a location, but swapping the two systems between both dives.
8. Search for ‘God light’ and backlighting opportunities
One of my favourite times and places to be is in clear shallow water at morning or evening. What I am looking for is the Sun’s rays through the water – also known as ‘God light’.
A close focus, wide-angle shot with some fill-in flash is then my preferred technique. I ensure to get low enough to include the burst of light in the frame; usually I am on snorkel only in these cases.
Read more: 8 Tips for Creating Amazing Lighting in Underwater Photos

9. Be respectful
Lastly, it’s not really a tip but more of a state of mind and way of thinking: simply be respectful. Not only do you not want to disturb any subjects or substrate, but you will also find much greater acceptance within reputable dive circles if you demonstrate an active conservationist approach to diving.
Remember, some of the dive sites are often visited every day – sometimes more than once! We all need to leave it just as we found it.


