
How to Publish Your First Nature Photography Book
All photographers like to get recognition for their work. For many these days, this comes in the form of likes and comments on social media. Others seek recognition by trying to do well in photography competitions. However, most photographers would probably agree that nothing quite matches the satisfaction of seeing your images in print. Seeing your work in a magazine is great, and getting the cover is even better, but the ultimate aim for many is to publish a photography book.
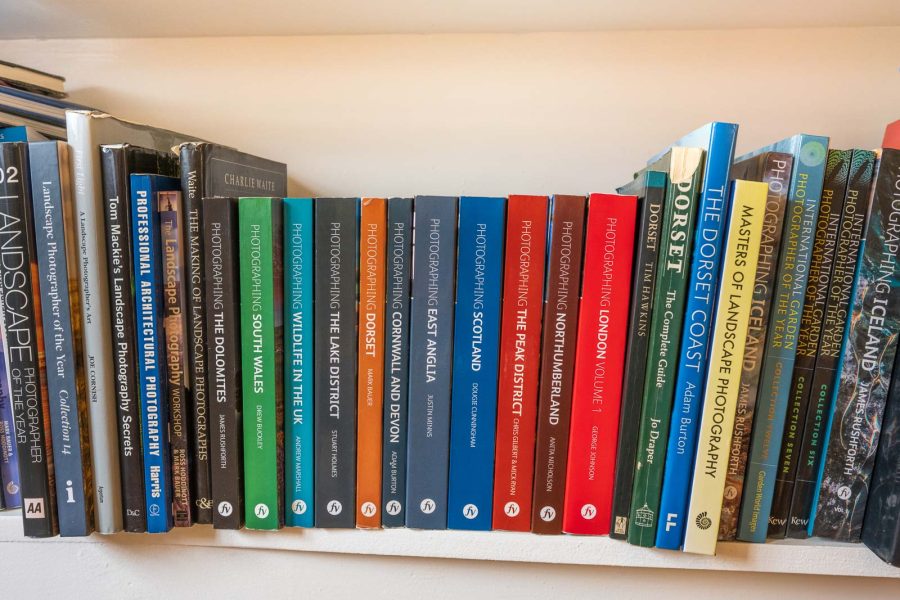
Getting a photography book published certainly generates a great feeling of satisfaction, especially if you’re ever lucky enough to see a book you’ve written on the shelves of retailers like WHSmith or Waterstones. Make no mistake – getting to this stage requires an awful lot of hard work.


Nikon Z7 II, 14-30mm f/4 at 16mm, 10 seconds at f/11, LEE polariser, 4-stop IRND
Writing a book is, frankly, a slog. There’s no other way to put it. The writing process is tedious, and there will be times when the very thought of sitting down in front of your computer will make you want to scream. Though, that’s only part of it.
If you’re publishing a book, you’ll also have to deal with the demands of the publisher, editor, and designer (whose ideas about the book may conflict with yours), and be prepared to go through proof copies with a fine-toothed comb. If you self-publish, you’ll also need to consider marketing, sales, and distribution.
Still up for the challenge? Well, I can’t make the writing process any easier for you, but I can offer some advice to help with the other aspects of publishing a photography book.
Self-publish vs publisher
There are essentially two routes to publishing a book: approaching a traditional publisher or self-publishing, with each one having advantages and disadvantages.
1. Working with a publisher
The main advantage of going with a traditional publisher is that you have no up-front costs as they are the ones taking all the risk; if they are a decent organisation, you should also get an advance against future royalties to keep you going while you’re writing the manuscript.
Although be warned – the advances which are offered to writers of photography books won’t pay your bills for more than a week or two (literally). You’ll also be working with an experienced team, who will provide editorial support, as well as taking responsibility for the layout, design, marketing, and distribution of the final product. Providing your chosen publisher is good at their job, this is not to be underestimated.
The main disadvantages of going with a publisher are primarily that low risk also means low reward. You’ll get royalties in the form of a percentage of the wholesale price of each copy sold, and you’ll have no control over that price. One of the deals my publisher made resulted in my getting just a few pence per copy. At those rates, you have to sell a lot of copies to get a decent return for your hard work.
The other disadvantage is that you have virtually no control over the process. For example, you might have a preference for which images should be used for the cover, but ultimately the decision will be made by the publisher.

This lack of control even extends to the words you’ve written. For one of my books, the publisher insisted – despite my and my co-author’s fierce objections – on using American spelling and vocabulary. This irritated many UK readers and resulted in some negative comments in Amazon reviews.
2. Self-publishing
The advantages of self-publishing are mainly that you retain complete control over the creative process and get to keep a larger share of any profits. This sounds attractive, but it has to be weighed up against the not-insignificant drawbacks: the process can be costly and you’ll take quite a financial risk.
It will also result in considerably more work. Not only will you have to write the book and choose the images, but you’ll also need to work on the layout and design. On top of that, you’ll also be responsible for marketing, sales, storage, and distribution.
Read more: How to Make Money From Your Photos
Which route you take is largely down to your personal preference and will depend on how important you think it is to keep control of all stages of the project. External factors may also influence your decision: for example, whether or not you have enough money to invest in a self-published book, or whether or not you can interest a traditional publisher in your idea(s).
It’s also worth thinking about the type of book you are writing, because some are more suited to one method or the other – in my opinion, at least.

For example, if you’re planning a photography technique book, I’d suggest that trying a traditional publisher is the best choice. The reason for this is down to cost, due to economies of scale.
A large publisher will always be able to produce a book more cheaply than an individual can. A self-published book will need to be sold at a much higher price to make any profit and there’s a limit to what readers are prepared to pay for a technique book.
Given the choice between one costing £17.50, for example, and another costing £45, most would choose the former. However, suppose you’re selling a beautifully printed and presented coffee-table book, especially if there is some element of personalisation such as being signed by the author. In that case, people are often prepared to pay a little more.
How to approach a publisher
For a publisher to be interested in your book, they need to believe it will sell enough copies to generate a decent profit. You’ll therefore need to identify a gap in the market. Given that nature and landscape photography are well-covered topics, this will require a lot of effort and thought.
It’s unlikely that you’ll find some aspect of photography which has not been covered at all, but you may find that there’s a way of packaging the information which is unique. I’m not going to make any suggestions here; being completely candid, if I stumble upon a good idea (and they are few and far between), I’ll be working on it myself.

Having had your moment of inspiration, the next step is to have a good look at what books are out there and make sure that no one else has beaten you to it. You then need to put together a proposal.
This should include a brief review of existing publications, what their shortcomings are and how your book would fit into the gap you’ve identified. List the possible contents – this could be chapter headings or simply a list of topic areas. Then explain who you are and why you are the person to write this book. Include references to any previously published material.
So who should you send the proposal to?
First, you need to choose a publisher. Look at your favourite photography books (or have a browse in your local library or bookshop) and make a note of the companies involved. Then find out who the commissioning editor is: this information may be available on their website, or you can always contact the company and ask.
Then send your proposal to them. You can do this via email, but I always think that for an initial approach, sending an old-fashioned letter has more impact.
Be prepared to be patient. Editors are busy people and it may be some time before they get back to you. They are less likely to respond favourably if you keep nagging at them.
Self-publishing
I’ll be honest: I have very little personal experience with self-publishing. However, some of my photography colleagues have, and they were happy to share their experiences with me.
First, don’t get confused between vanity publishing and self-publishing. Vanity publishers will charge a large fee, produce your book and send it to you. You’ll have no control over the design or quality; the book will often be produced fairly cheaply, and you’ll be offered no help with marketing or distribution. Vanity publishers are best avoided.
Legitimate self-publishing companies will offer a range of services, going all the way through to sales and distribution and are clearly a better choice. For a detailed explanation of the differences, see this article.
Of course, you can always go completely solo and do the whole thing yourself, employing help as and when you need it, with design, editing, proofreading, and so on. The advantage here is that this should work out less expensive than going through a self-publishing company. Although, it will be a lot more work and you won’t have a project manager to liaise with and get advice from.
If you go down this route, you’ll need to find your own printer and designer. There is the option of doing the design yourself, but unless you have experience in this field, it isn’t recommended. It’s not just the appearance of the book, but also sorting out issues such as the layout for printing. This is a real minefield if you’ve not done it before.

Finding a good printer or designer is not an easy task. People I know who’ve self-published either used personal recommendations or found out who the printers were of books which they liked the look of. They also recommend using a printer that is as local as possible (at the very least, in the same country as you!) so that you can visit, inspect proof copies, and suggest adjustments.
There are lots of decisions you’ll need to make: hardback or softback? What type of binding? What quality of paper? The size and aspect ratio of the book?
Things that I would never have thought of, but which were highlighted by friends include making sure you get an ISBN (International Standard Book Number), otherwise you’ll never be able to sell it on Amazon, for example. As well as researching how the size and weight of the book will affect postage and delivery costs. By the way, to get an ISBN, visit the Nielsen ISBN Agency for UK & Ireland.
If all of this sounds a bit much – and it does to me – then going with a reputable self-publishing company is the best choice. The big question, of course, is how to know who is reputable and reliable. One of the best resources, which offers advice on this topic and many others, is the Writers’ and Artists’ Yearbook – their website also has a lot of information and resources.
Create an e-book
One other way of self-publishing is to produce an e-book. It has to be said that e-books do not necessarily sell as many copies as physical books. I think that many people still prefer to see a printed page, and this is especially true for books where photographs are an important part of the content.
However, I can say from experience that they do still sell, and there are several advantages. First, the cost of production is lower. Second, the design is simpler: you’re not limited to specific numbers of pages. Third, it’s financially viable to produce a short book. This allows you to produce a book on a really niche subject, such as shooting long-exposure landscapes, or a guidebook which covers a very specific area. Fourth, there are no storage issues as there are with physical books, and distribution is easier.
While e-books are still less popular than traditional books, they are becoming accepted and have some benefits for the reader, which can be used when marketing them. For example, the fact that you can keep a copy on your phone to use as a handy reference when out in the field.

Writing and designing your book
At some point, you’ll get to the nitty-gritty of actually writing your book. If you’ve gone with a publisher, they’ll tell you how many pages, how many chapters, how many words per chapter (and possibly each individual spread), and approximately how many images per spread/chapter. If you’re self-publishing, you’ll decide this yourself, possibly in consultation with an editor. Once you know this, I’d recommend producing a detailed plan.
Map out the contents of each chapter. Break it down into individual double-page spreads and work out which information can be put into ‘boxes’ or ‘sidebars’. Designers like these, as it breaks up the page and makes the text easier for the reader to digest. Smaller ‘tip boxes’ are also popular in modern photography technique books. If you’re working in collaboration with another writer, assign chapters according to your strengths and interests and at the planning stage, discuss content clearly and in detail, so that you avoid repeating information.
You’ll also need to select images to illustrate your book. With a coffee-table book, this will be picture-led, so you’ll be looking to choose your best, most striking images. Whilst also aiming for plenty of variety – so make sure they’re not all long-exposure seascapes, for example.
With a technique book, you’ll find that you don’t necessarily choose your best or favourite images; what you’re looking for are images which best illustrate the particular point you’re making. If you’re co-authoring, liaise regularly with your collaborator, and share your choices with them. This is so much easier than finding out at the proofing stage that you’ve chosen numerous very similar shots.

Nikon Z7 II, 24-200mm f/4-6.3 at 104m, ISO 64, 1/5 second at f/22, LEE polariser.
When selecting images, try to choose a balance of landscape and portrait orientation, as this will make the designer’s job easier. Also, images which can be cropped without upsetting the composition will be appreciated.
Chapters will often begin with a double-page spread of an image. Choose images which have plenty of room for text to be overlaid. If you’re working with a publisher, you may not have the final say over the front cover, but you should have some input.
Select images that will fit the aspect ratio of the cover, have impact, and have plenty of room for the title and any other text. Images which are not too busy, and with a restricted range of colours often seem to be prepared.

Fuji GFX 50R, 23mm f/4, ISO 200, 2.6 seconds at f/16, LEE 6-stop IRND
In conclusion
So ultimately, writing a photography book is really hard work, especially if you go down the self-publishing route – and you won’t make a ton of money, either. I hope this doesn’t put you off, as there are many benefits that publishing a book brings.
It’s a great marketing tool, which helps to establish – or confirm – your reputation as a photographer. If you’re a professional or aspiring professional, this can be a real boost to your business.
Also, there really is nothing quite like seeing a book with your name on it on the shelves of a bookshop…


