
8 Tips for Freediving Underwater Photography

Freediving underwater photography offers up a huge array of incredible moments, and after reading this guide, you might be switching from tanks to fins and a simple snorkel!
The underwater world is an exciting place filled with photographic opportunities that impress even the most fastidious of photographers. But a question often asked is what is the best way to go about capturing such images?

The debate of scuba diving vs freediving as it relates to underwater photography has been going on for a long time and will no doubt continue for many years to come.
When I first started underwater photography, I refused to give up my scuba tank. I assumed that being submerged with marine life for hours at a time would surely result in better interactions.
It wasn’t until years later that I was introduced to freediving and the quality of my images rose to new heights.
The following guide explores the world of freediving photography in a little more detail before discussing my top 8 tips to capture beautiful images in a single breath.
Freediving vs scuba diving
For those who are unaware, freediving is the act of diving down without the assistance of any breathing apparatus.
This is of course in contrast to scuba diving which involves descending to depth with specialised equipment such as a tank, regulator, and buoyancy control device.
The answer to which one is more favourable for underwater imagery will largely depend on personal preferences and abilities.
However, freediving offers a level of manoeuvrability and poise in the water that, I believe, sets it apart – particularly when working with larger marine animals.

On the other hand, scuba diving allows much more time to adjust your camera settings and review images, making it more suitable if you are working with smaller macro subjects.
Scuba is also suitable when you are in the early stages of learning underwater photography and may need more time to get your settings right.
Ultimately, if you’re serious about underwater photography, you should plan to become well-trained in both methods. But if you’re all about the big animals and have to choose, freediving is undoubtedly the way to go!
Read more: How to Photograph Ocean Giants
Safety first
Like scuba, freediving can be a very dangerous activity. It should only be performed after completing the required learning and training through a reputable and accredited dive centre.
Risks including (but not limited to) blacking out and barotrauma are very real; it is important you do the proper training, dive within your limits, and always go with a buddy.
Do I need to be a pro?
One of the myths around freediving photography is that you must be an experienced diver with a massive breath-hold before even considering taking a camera underwater.

The reality is, the very best underwater images of animals like turtles, rays, and dolphins, typically take place in shallow water.
While an impressive breath-hold will certainly help, many underwater encounters require little more than 20 to 30 seconds to dive down, compose an image, and return to the surface.
However, being calm, composed, and comfortable in the water is absolutely required for safety and achieving nice images.
Read more: An Introduction to Underwater Photography
Top 8 tips for freediving photography!
Here are my top tips for free diving underwater photography.
1. Get certified and get comfortable
This is the most important tip to consider when starting out as a freediving photographer.
Working with relaxed subjects is the only way to capture good photographs, and your subjects will be relaxed if you can dive with them slowly and calmly.
Safety is everything – as already mentioned, the risks are very real. It’s imperative that you learn the rules and techniques that will keep you safe and comfortable when diving.
There are several organisations to choose from when getting certified, some of the more common ones include PADI, AIDA and SSI.
Read more: 8 Essential Skills and Techniques for Underwater Photographers
2. Downsize your camera system where possible
As a free diver, you will spend a lot of time searching for marine life while snorkelling on the surface. The last thing you want is to be slowed down by a heavy and cumbersome camera setup.

Before entering the water, look to downsize your system as much as possible. This will reduce drag in the water and significantly enhance your ability to swim quickly with minimal effort, as well as dive down with greater ease.
If working with strobe lighting, consider using small strobe arms, or even consider leaving them at home altogether and shooting with natural light instead.
The easier your camera system is to handle in the water, the better equipped you will be to get into position and focus on composing beautiful images.
Read more: What Equipment Do You Need for Underwater Photography?
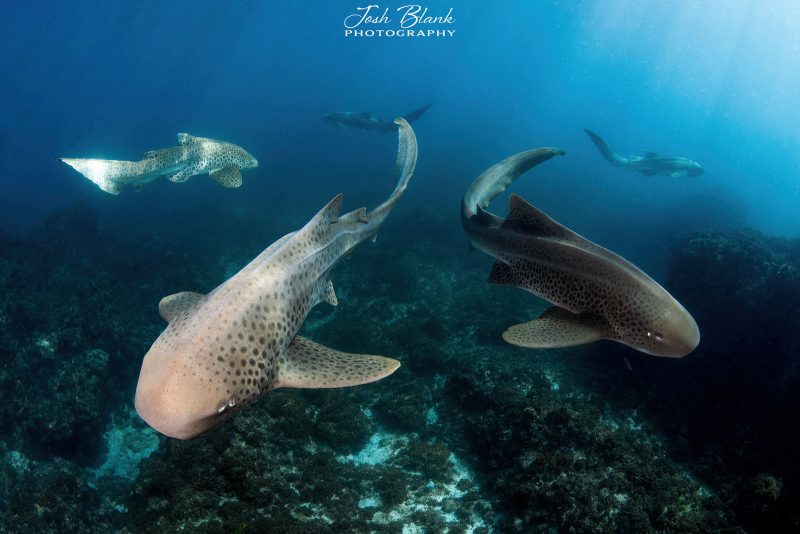
3. Know your subject
The more you know about your subject, the better equipped you will be to photograph them in a way that connects with your audience.
This is particularly true when freediving as you tend to get much more total time with each animal as it is easier to stay within sight of your subject.

If you happen to come across a manta ray when snorkelling, you can easily track its movements and follow from a safe distance. If scuba diving, however, once the manta swims away, it is often very difficult to find again.
By knowing your subject’s usual behaviour and tendencies you can better position yourself to capture interesting compositions. For example, after taking a few breaths on the surface, sea turtles will almost always swim a direct line down to the sea floor.
Knowing this will allow you to observe the turtle, get in position, and then time your dive to photograph the reptile as it swims towards you, resulting in some spectacular compositions.
Read more: Underwater Photography Ethics and Code of Conduct
4. Have a plan
Having a plan for how you aim to photograph certain species is paramount! One of the biggest benefits of freediving is the number of different compositions and perspectives possible.
When scuba diving, the majority of your images will be taken either from a front-on position or from below. When freediving, the potential compositions truly are endless.
In addition to being able to compose from any position or direction, it is also much easier to use natural light exactly how you want it for each capture.
Before entering the water, spend some time thinking about specific photographs you wish to create for the different subjects you are hoping to find.
If diving with sharks, you may want to capture some front-on sunburst images for dramatic compositions, or maybe shoot them from above to highlight their sleek and slender anatomy.
Whatever your goal, having a plan will go a long way to ensure you come home with quality images.
Read more: 8 Tips to Create Beautiful Underwater Animal Portraits
5. Shoot shallow
Working at shallow depths offers a number of advantages over deeper water.
Firstly, the shallower you are, the more natural light that’s available, and with more light available, the greater the potential for very sharp and detailed images.

Secondly, shooting between one and three meters allows you to use the surface of the water to enhance compositions.
Sometimes turbulent waves or an animal’s reflection can take an otherwise dull photograph and turn it into something special.
Lastly, diving to just a few meters is much less taxing on your body and safer than diving to 10 meters and beyond. As a general rule of thumb – the shallower you are, the better the image!
6. Fast shutter speeds & narrow apertures
In order to exploit the additional light close to the surface, you will need to shoot with faster shutter speeds and narrow apertures (high f-stops).
Since many of your images can be taken in shallower water when freediving, the additional light available allows for much more favourable camera settings.

If your goal is to capture highly detailed, tack-sharp images, fast shutter speeds and narrow apertures are key! When working with strobes, consider selecting shutter speeds of 1/200 or faster (if your camera permits) and f-stops of f14 and above.
When working with natural light, look to raise your shutter speed to 1/800 or faster and notice the difference!
7. Equipment is key
Being comfortable and efficient in the water is very important as it affects both the quality of your images and your safety when diving.
Always make sure you are well equipped when entering the water; this includes a well-fitting wet suit, appropriate mask and snorkel, and a comfortable set of freediving fins.
Freediving fins are much longer and more powerful than their scuba diving counterparts. They will greatly enhance your ability to move through the ocean and manage challenging conditions such as strong currents.

You will also require a weight belt which will allow you to offset the positive buoyancy of the wetsuit so that you can dive down with ease.
It’s important to note that diving with weight can be very dangerous and must only be done once you have completed the required training with an accredited freediving instructor.
8. Stay fit
Freediving is a very strenuous activity within itself, combine it with photography and it becomes even more physically challenging.
Underwater camera systems are often heavy and create a lot of drag. If you’re planning to spend multiple hours in the water, which is the case for many locations and dive sites, you will need to be aerobically fit, strong, and a good swimmer.

Additionally, shooting while snorkelling can become even more demanding when searching for large animals such as whales, sharks, and other pelagic life.
You are often required to get in and out of boats quickly so you will need to be in good shape if you’re going to last – particularly if doing multiple days in a row!
In conclusion
There you have it – my guide to freediving photography, including my top eight tips to maximise your underwater imagery when shooting while snorkelling!
If you’re passionate about underwater photography, there is no doubt that learning to free dive should be high on your to-do list.
The close interactions with aquatic wildlife, coupled with the ability to work from shallower depths with more light, allow for truly spectacular images!


