
Landlocked: How to Practice Your Underwater Photography Without Going Diving

In early 2020 the Covid-19 pandemic swept across the globe and underwater photography, like many other hobbies, came to a grinding halt as lockdown restrictions were imposed across the UK and many other parts of the world. Strict limits on daily exercise and reasons to leave your home, along with the closure of non-essential industries, left many of us confined to our homes for the most part of the day.
In the UK, the authorities and the coastguard advised against using any large bodies of water, including the sea, for exercise or recreation, which meant no underwater photography, freediving, or scuba diving – at least not in any natural environments.
Dive shops and places to get air fills closed, as diving agencies such as BSAC and PADI recommended we cease diving during this time, leaving many of us regulars twiddling our thumbs. We were forced to search for alternative ways to be creative and practice our underwater skills within the limits of a national lockdown.
With government advice restricting travel here in the UK to within a few miles from home for exercise, those living in cities, and those without outdoor space, began to feel the isolation of the pandemic. I was fortunate enough to be living in a coastal town in Cornwall, only a few minutes’ walk from the sea where I would normally spend most of my week under the waves, taking photographs.
But restricted to land, I could only walk alongside my usual diving spot and admire it from above, longing for restrictions to ease so I could return to the sea.

Typically, the lockdown brought some of the best diving conditions I have ever seen, with beautifully clear waters making the sea look ever so inviting. It was the longest period I have spent out of the water since learning to dive, and a drastic change to my daily life.
“Under Bathwater Photographer of the Year”
After some frustration and lack of motivation to create underwater images at home during the first few weeks of lockdown, a wonderful competition by Fourth Element, Alex Mustard, and Saeed Rashid appeared on my social media feed, aptly named the “Under Bathwater Photographer of the Year”.
This challenged underwater photographers of all abilities to create their best underwater photos at home in their bathtubs, sinks, buckets, and anything else you can fill with water and get a camera in. The competition attracted the pros who consistently win awards in international competitions, alongside newbies who had recently discovered photography.
It was perfect timing; myself and my flatmate immediately started thinking of ways we could be creative with what we had. We had purchased and filled up a paddling pool within 24 hours of discovering the competition, so we donned our dry suits and got stuck in.

Having a paddling pool was a great way to practice using a wide-angle lens for close focus wide angle and photographing people. The weather was glorious, which helped with lighting. It was the inspiration we needed to pick up our cameras and get creative.
It’s easy to assume that skills can’t be transferred from underwater photography to home, but the controlled environment of a pool or bath actually makes for a great place to practice new techniques and strobe positioning.
Read more: 9 Tips for Creative Underwater Photography
Be creative with your water source
You don’t just have to use a bath for your photography at home, it can be done without getting wet– as long as the camera can be submerged, it counts. Toilets, sinks, boxes, and bins give you the ability to take underwater photos by just submerging the camera, whilst you stay relatively dry out of the water.
Paddling pools, larger swimming pools, or even a garden pond (with permission) can give more space, enabling you to enter the water or have a friend model for you. They give you much more space to work with a larger subject, or experiment with wider lenses.
Choosing what to photograph
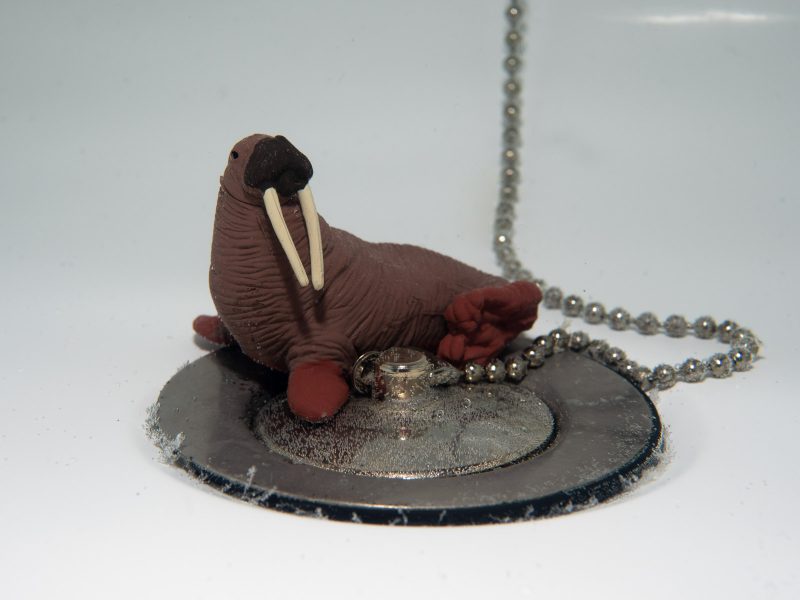
Subjects can be anything and everything, and I would encourage you to make use of everyday items in the home, such as towels, flowers, clothes, and fabrics, or something more realistic like fishing lures, aquarium ornaments, and plastic toys (which work particularly well when looking for a more natural scene).
Small, realistic subjects work particularly well for practicing your macro techniques; I find experimenting with shallow depth of field very rewarding in this environment. As the subjects are stationary, you can really master the basics of the technique without the subject moving or swimming away.

You want to aim to have the eye or focal point of the image nice and sharp, with a blurred background to remove distractions. Static subjects also provide the opportunity to test the limits of our equipment, and get as close as possible to these subjects. The mastery of these techniques will only improve your images next time you venture into the sea.
Lego was a firm favourite across the competition; the bright colours immediately created striking contrast against the white background of the bath, and ocean themed Lego sets seemed to make the perfect subjects for more comical scenes in the bathtub.
Self-portraits and reflections are certainly another technique worth a try, with many photographers utilising the flat, calm surface of the bathwater to create near perfect reflections under the surface – although be warned that it can look too fake if you have an exact reflection.
I preferred to slightly agitate the surface to create ripples in the reflection, mimicking waves in the sea. This can be achieved by tapping the surface of the water with your finger; the harder you hit the surface, the larger the ripples will be.
Wide-angle can also be used creatively in a small space, but a macro, such as a 30mm or 60mm, leaves enough space around a small subject to show the background in limited space. If using a wider lens or a fisheye in a small area, then close focus wide-angle may be more suited. You don’t want to overwhelm your subject with a wide, empty background, or include distracting elements that a macro lens would crop out.
You can introduce fabrics, coloured inks, and creative lighting, such as snoots or coloured gels over your light source. If you hold a torch above the water whilst agitating the surface to cause ripples, you can recreate the dappled light effect often encountered in the sea as the light passes through the uneven surface.

Some people even decided to take their creativity to a whole new level, and create their own model sea creatures. In particular, making clay nudibranchs became a lockdown challenge amongst local marine enthusiasts, and they also double as great macro photography subjects with their crazy patterns and intricate detail.
The competition also encouraged photographers to delve into the world of black and white photography in the category “Positive/Negative”. Many entrants decided to use toy marine life with strong contrasting patterns, such as orcas or rays, combined with subtle lighting to accentuate their monotone patterning.
Black and white photography in the bath or sink is a great way to create strong contrast. The white background will naturally occur due to the white colour of the bath, and you need to choose a subject which is dark in colour, or has a pattern that mixes dark and light colours.
You can also use the white bath to reflect your strobes or light source around the subject, making the white background even and reducing the chances of distracting shadows.
Read more: How to Achieve a Black Background in your Underwater Photography
Using strobes
Surprisingly, the bathtub became the perfect place to work on new underwater photography techniques without getting in the water. Strobes can be mounted to the camera or placed externally, giving you more control over the direction.
One strobe is usually enough in limited space, especially in a white bath or sink, as the light will be reflected around the tub. You shouldn’t have to worry about backscatter, so we can bring our strobes forward and aim them directly at the subjects without fear of creating a field of backscatter in our images.

For even lighting across both sides of the subject, try placing your strobe above the camera, in line with the port in the 12 o’clock position. If you would prefer to cast a shadow and draw attention to one side of the subject, then try to place the strobe in either the 10 o’clock or 2 o’clock position.
These are good positions in which to start with your strobes, and you can then make small adjustments until you are happy with the lighting on the subject.
Being able to stand above your camera and analyse your strobe positioning without moving the camera, allows you to learn where to position strobes in relation to the subject. This is a great place to really get to know your strobes, as it can be difficult to do this in the sea, where it’s rare to have your camera in a fixed position.
Top tip: remember, if your bath is white, the flash will reflect and could overexpose your image. So, try to use your strobes on a low power setting to avoid this.
Read more: How to Choose a Strobe for Underwater Photography
Using remote controlled settings
Many cameras now have the ability to connect to a phone or app via Wi-Fi. This is something I never thought I would use in an underwater camera – but is the perfect solution to bathtub photography. Anyone who has ever tried to put their underwater camera in the water without getting their head wet will know the struggles of the technique.
It becomes almost impossible to see the composition of the frame through the surface of the water. An angled mirror showing the reflection of your live view screen is one way around this problem, but a far more ingenious solution involves connecting your phone to the camera.

My Olympus camera has a handy app called OM Share, which allows remote control of the settings, shutter, and a real time view through the viewfinder. It is by no means the most refined method, and does require some patience, but it is certainly a solution to not being able to see your viewfinder due to refraction.
It will also save you a lot of wasted time dealing with blurry, out of focus images, whilst trying to get the subject in frame.
Read more: 4 Ways to Fix and Edit Underwater Photos
Just have a go!
The pandemic brought an abrupt and sudden change to the normal routines of underwater photographers, immediately affecting both professionals and hobbyists who longed to return to the sea.
Amongst all of the uncertainty and boredom, a competition which involved taking photos of fake marine life in the bathtub sparked the imagination of the nation’s underwater photographers, and generated a whole new genre of underwater photography, as well as inspiring a new way for people to practice their skills when they can’t go diving.
It was the spark the underwater photography community needed to continue creating work when routines had changed, and we could no longer visit our favourite dive sites. It was amazing to see the level of creativity across the amateur and professional categories, and I would encourage you to find a bathtub and get involved.
I myself rediscovered techniques I hadn’t had the confidence to try in the sea, and began to expand my knowledge of more advanced lighting. Experimenting with coloured lighting is something I had never previously tried, and I look forward to applying these skills in the sea to create colourful backgrounds behind subjects.
Mastering the focal range of my camera and lenses in a controlled environment has helped me to find the focal point on a subject much more quickly. I can also consider the limits of my equipment when choosing subjects, speeding up the process, and improving my chances of taking successful photographs underwater.
Read more: 8 Essential Skills and Techniques for Underwater Photographers
In conclusion
We are still living in uncertain times, with hesitancy to travel and many restrictions still in place at some of our favourite travel destinations. Being forced to find a way to be an underwater photographer at home has allowed many of us to master new, or more complex, techniques in a controlled environment.
Restrictions have been easing for a while now, but returning to the bath to learn techniques should still continue. By applying the ideas above, you can always find a way to work on your underwater photography skills, even when you’re ‘landlocked!’


