The Basics of Editing Black and White Wildlife Photographs
Editing your photos is as much of an art as taking them, sometimes more so. Processing a black and white photo is not as simple as a one-click conversion from colour. In this tutorial, I’m going to show you how to properly process black and white wildlife photos.
There are multiple editing softwares, from Adobe’s renowned Lightroom and Photoshop, through to Skylum’s Luminar or Google Nik’s Silver Efex Pro. For this article I’m going to be using Adobe Lightroom, exploring the effects of each editing tool on an image. However, you can use similar tools in other editing softwares to achieve the same effects.


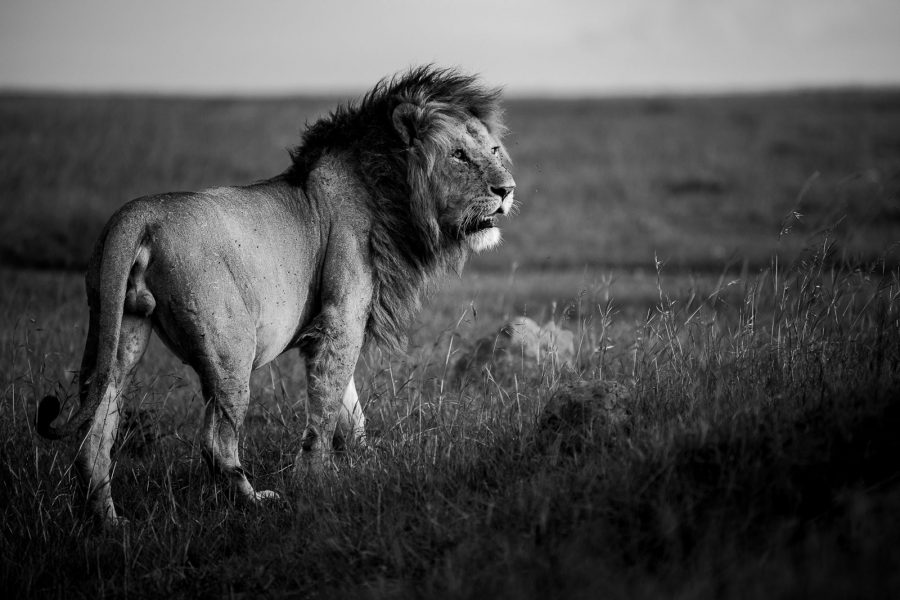
This is the raw format file we’re going to work on together – originally starting as a colour image of a lion.

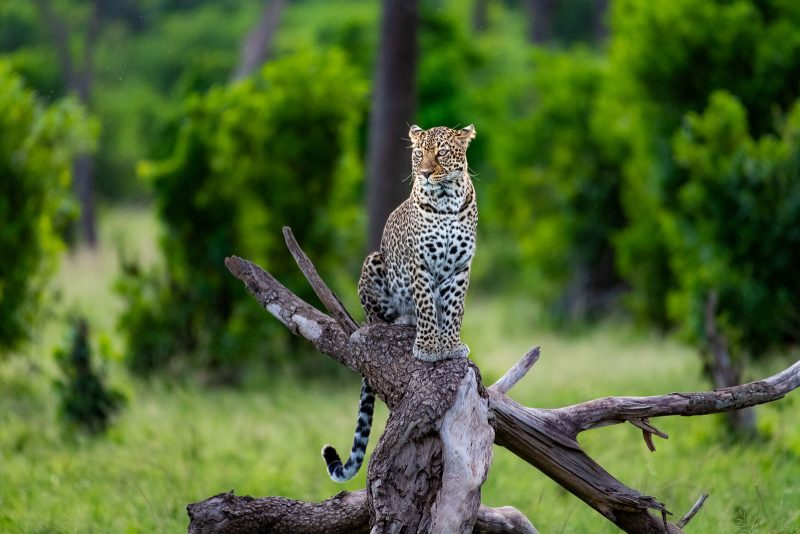
Read more: How to Photograph Wildlife in Black and White
Before you start editing
There are a few important factors to consider before you start editing. The first is that there is no wrong move or bad idea; it all comes down to personal style and taste. Some photographers stay as true to the image as possible, while others take a more abstract approach.
In black and white, a few consistent themes do prevail however. For example, high levels of contrast between your dark and light areas creates a brilliant dramatic feel for your image, and I’ve personally always looked to keep my images as simple as possible.

Another trick is to not edit all of your photos in one sitting. Doing so tends to create a series of very similar edits or even makes you start to rush when reaching the end of your image collection. I often find that if I edit an image immediately after a shoot I tend to completely change it a couple of days later. Take time over your editing and do not do it all in one go -especially if you’re anything like me where sitting at a computer for too long drives you mad!
Remember that just because a photo looks brilliant in colour does not mean it will look great in black and white. Often people make the mistake of creating a beautiful colour edit and then converting it to black and white, assuming it will still look great. Black and white images require a different editing process to those in colour, and so must be edited accordingly.
Organising your images
Before starting, I copy all of my images from the memory card to an external hard drive so as not to have to store thousands of raw files on my computer. From here I then import them into Lightroom and begin the editing process.

Once your images are imported, you’ll be on Lightroom’s ‘previous import’ page. Here you will be able to see all of your new images as thumbnails with the metadata and histogram for each individual image in the right hand panel.
Before I start editing, I delete the photos I know I won’t use. Then I go through and rate what I feel are my best images as five stars (simply select the image you like and hit the ‘5’ key on your keyboard to do so).
Once I’ve done this I’ll organise my library to show the highest rated images first (in the toolbar at the top select View – Sort – Rating). This allows me to quickly access and edit my better images. Alternatively, you can create a ‘smart collection’ of all of your five star images through the ‘collections’ tab in the left hand panel.
Choose an image to edit, select it, and hit the ‘develop’ option in the top right corner – this will take you to where all the magic happens.
The workflow of editing a black and white wildlife photo
Cropping
My first editing step before converting to black and white is to crop the image. Sometimes this can be to straighten the horizon, to ensure my subjects eyes are level, or to cut out some of the ‘dead’ ground below my subject. For this image, it’s a very minor adjustment to straighten the horizon in the background and crop in on my subject. Seemingly minor changes like this can make an enormous difference to your image.

Converting to black and white
Now it’s time to convert the image to black and white. There are two ways of doing this. The first is to completely lower the saturation, thus removing all colour from the image. However, this is not the most effective method.
Instead, just below the histogram there is the choice of colour profiles: Colour or Black and White. Selecting black and white will give much greater scope for editing the image later down the line.
Having done this, I now focus on the ‘Basic’ selection. This is where you can make adjustments to the overall image and, most importantly, your contrast, exposure, whites, black, highlights and shadows.

What do all of these mean though? Here is a breakdown for how each of these options affects your image:
Exposure: This is just how it sounds. Increasing the exposure of an image is going to make it brighter; decreasing it will make it darker. It is a ‘global feature,’ meaning it will affect your entire image. Provided I’ve done a good job of exposing the image properly when taking it, I stay away from major changes here.
Contrast: A vital part of the black and white arsenal. Increasing contrast will add more emphasis to the subject and ensure clear definition between dark and light areas (this is also a global feature).
Whites: Often confused with performing the same role as highlights, but in fact has a very different duty. Adjusting this slider will set the brightest point in your image. The further to the right the slider is positioned, the brighter that point becomes. Ansel Adams always said that for an image to be perfect it must have a point of true white and one of true black. The whites slider is your way of setting true white.
Blacks: Has the exact opposite effect of the whites slider, as it sets the darkest point of your image.
Highlights: Highlights are used to recover lost detail in the lighter areas of your image, or to raise their brightness level (slide left to recover details or right for added brightness). The highlights will never be made brighter than the maximum white point.
Shadows: Sliding it to the right recovers lost detail in the darker areas of an image, while sliding it to the left will darken them, adding more contrast to your black and white images.
Clarity, Dehaze, Sharpening and Lightroom’s newest tool Texture are all ways of altering the contrast within groups of pixels. Sharpening focuses on the smallest area, usually just the areas around the edges of shapes. Texture, clarity and dehaze affect larger areas respectively. All of these tools are brilliant for your black and white images, but be careful about being too heavy-handed with any of them.
Now it becomes a case of trial and error. While some photographers will sell Lightroom editing presets (essentially posh Instagram filters for raw images), I find every image requires different levels of treatment and manipulation.
The result
As you can see from the image below, I’ve made a few simple changes – look at the positions of the sliders on the right.
The main colour I’m trying to avoid having too much of is grey (too much of it prevents you having any dramatic contrast in your image). Therefore the first step was to slightly decrease my exposure, while increasing the contrast.
Next I increased my whites and decreased my blacks. Creating a greater contrast between the brightest and darkest area of my image. I then dropped my highlights to rescue any lost details in brighter areas, and raised my shadows to save some of the details in darker areas (particularly the lion’s mane).
Finally, on the Basic section I made minimal changes to texture, clarity and dehaze; just enough to ensure my subject appeared more defined against the background.

These are just some basic alterations you can make to an image that result in a huge difference between the original and where you are now. It has, however, only scratched the surface on the capabilities of the software. There are numerous, slightly more advanced tools that can be used to edit images but this was just a tutorial addressing the basics.

Finally, and most importantly, experiment with your editing. You can always go back to square one and start again, so don’t be afraid to try and create something completely different.