
Lightroom Tutorials: How to Use Lightroom to Edit Photos
Lightroom, the popular photo editing and cataloging software from Adobe, is a fantastic way to organise your photos and process them. Getting to grips with any editing software, however, can be challenging. This is especially true if you aren’t a computer wizard, and it might seem quite difficult to know where to start. But don’t worry! We’ve got some fantastic Lightroom tutorials for you to harness the power of this Adobe software, and in this article we’ll cover everything you might want to know.
![]()


Lots of people don’t bother editing their photos, leaving them to be saved as JPEGs straight out of the camera. We strongly recommend that you’re shooting in raw file format, unless you’re just starting out, and consequently you should be editing all of your photos. Lightroom is your digital darkroom.
Why should you use Lightroom?
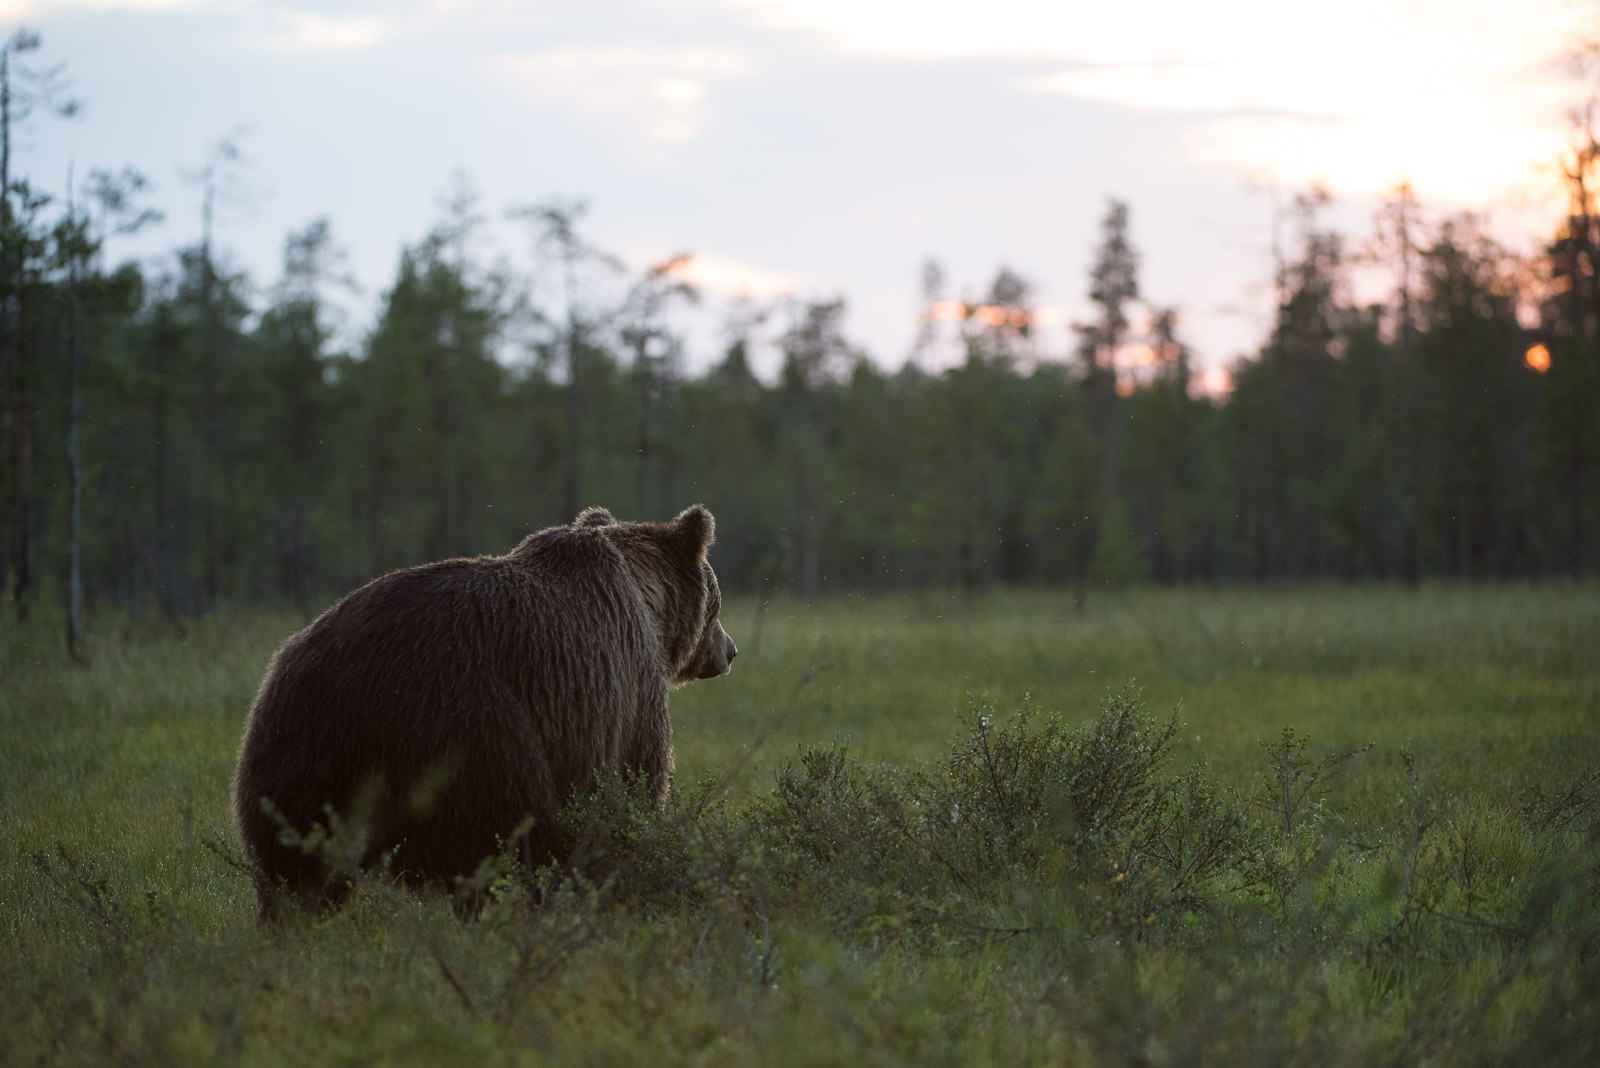
Before we get onto some of the Lightroom tutorials that can help you, let’s look at a quick overview of Lightroom. It is an application, available for both Windows and Mac users, which allows you to organise, edit, and retouch a large number of photos in one place. You can even do batch edits, applying adjustments to multiple images at the same time. Here’s a photo before and after its trip through Lightroom (move the slider to see the change):

Crucially, Lightroom’s edits are non-destructive, meaning the original file is left intact. This doesn’t mean duplicating and using up storage space either – instead, Lightroom stores small instructions that record your adjustments that it applies within the software when you load up an image. If you want to save a file with these adjustments, you have to export it separately to the original – there’s no overwriting involved.
If you find it hard navigating between thousands of files, or difficult to delete the ‘rubbish’ frames, then Lightroom is probably the thing for you. Key-wording allows you to quickly search a huge archive, and smart collections automatically group together images based on set rules.
Further Reading: How Does the Lightroom Catalog Work?
Lightroom is a subscription based software, under the Creative Cloud banner from Adobe, and comes packaged with Photoshop. There’s no way to subscribe to just Lightroom alone, but Photoshop is an essential partner in crime. The two work relatively seamlessly together, allowing you to conduct more fine-tuned edits in Photoshop directly from Lightroom. A subscription can be prepaid over 12-months (equivalent of £8.50 / $9.99 per month), or paid monthly at an increased cost from Adobe.
Lightroom tutorials that you need to read
We’ve got loads of Lightroom tutorials on Nature TTL looking at every stage of processing a photo. Since each single adjustment warrants its own write-up, I’m going to pull them together in one ultimate collection for you here. This is everything you need to know if you’re bringing a photo into Lightroom for the first time.
We’ll look at the tutorials in the ideal order of application, taking you through the individual stages of a processing workflow. The headings of each section link to the tutorial they are referencing, allowing you to delve into further information and more specific instruction should you wish.
1. Making Basic Adjustments in Lightroom
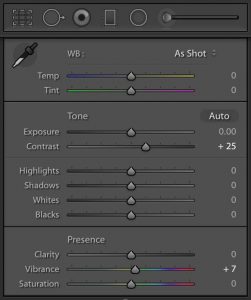 If there’s one Lightroom tutorial that you need to read, it’s probably this one. It forms the foundation of any processing session in Lightroom. Open up the Develop window, and the first thing you’ll be faced with is the ‘Basic’ panel. This is where you can make all of your initial adjustments. You have sliders available for the following:
- White balance
- Exposure
- Contrast
- Highlights
- Shadows
- Whites
- Blacks
- Clarity
- Vibrance
- Saturation
If you’re used to editing in Photoshop, you have all the sliders you’ll recognise from the Adobe Camera Raw window that pops up when you open a raw file there.
Learn how to make these basic adjustments: All You Need to Know to Process a Raw File in Lightroom
2. Advanced Colour Adjustments
One of the really cool adjustments you can make in Lightroom uses the very specific colour correction tools available. Rather than creating blanket edits to colour using the vibrance or saturation sliders, you can isolate specific colours and tones across the photo.

These tools are under the HSL / Color / B&W panel. They’re fairly self-explanatory, but there are some less than obvious tools you can utilise to make the process a little smoother.
Learn how to perform advanced colour correction: Hue, Saturation, and Luminance Adjustments
3. Sharpening Photos
Even the sharpest images need sharpening before they’re ready for use online. Photos from the crispest lenses still warrant a slight tweak in the Details panel, refining the edges in the image and giving it a final punch. Your sharpening changes should ideally be applied after you’ve made your local adjustments, but since Lightroom is non-destructive you have the luxury of going back and changing these later should you wish.

Lightroom’s sharpening tools are excellent. I’ve found that the results of my sharpening efforts in Lightroom are actually better than what I can achieve in Photoshop. I think this is down to the quick and easy masking available in Lightroom, as well as how sharpening works closely with the noise reduction tools.
Give your photos an extra punch: Learn how to sharpen images with this Lightroom tutorial
4. Noise Reduction
Digital noise is a real pain. It comes from increased ISO values, and can really hammer the quality of your final image. Luckily, you can reduce this noise to some degree in post production. Just like with the sharpening tools, I’ve found my success in Lightroom to be even greater when it comes to ridding a frame of those gritty spots in the background.
Clean up your photos: Reducing digital noise easily in Lightroom

5. Remove Vignetting and Distortion
Some lenses, particularly older ones, can cause dark edges in the photo, as well as distorted perspectives. These are easily removed and accounted for in Lightroom. Just tick a few boxes, select your lens that you used, and voila!
Remove ugly vignetting: How to quickly apply lens corrections
Other Lightroom tutorials that are worth reading
We also have some great tutorials that address less common questions from photographers. These involve more specialist techniques, and adjustments that are specific to one or two situations. No doubt, they are definitely worth understanding and you may find they answer some questions you’ve been having.
6. Rescue Over or Underexposed Photos
We all make mistakes, and sometimes they’re unavoidable. If you’ve got an over or underexposed image, and you’ve taken it in raw, then chances are you can make some pretty major recovery of the lost details.


This is a total lifesaver, particularly for scenes that had an extreme variation in the dynamic range, allowing you to recover blown highlights and dark shadows.
Save photos from the delete button: Recovering lost highlight and shadow details
7. Make Localised Adjustments with Brushes
Perhaps you want to make any of the basic adjustments to one specific area of the photo. You don’t need to run away to Photoshop for this, as it can be done in Lightroom by utilising the brushes and other selection filters.
This is a quick and easy way to mask a photo, painting over areas you want to include or exclude from your adjustment. Simple!
Limit the effects of your adjustments: Make localised changes using brushes
8. Merging a Panorama

Lightroom can be used to create panoramic photos, stitching together multiple frames to create one long, megapixel-heavy image. It might be of the night sky or a large, expansive landscape, but in any case panoramas are impressive feats.
Capture it all on camera: Merging and creating panoramas in Lightroom
9. Organisation: Flagging Photos for Edits and Deletion
Known for its ease in organisation and workflow, Lightroom has a fantastic flagging ability. You can flag images for deletion, or highlight them as your favourites from a shoot.
This makes pruning your catalog, as well as later finding the ‘chosen ones’ a doddle.
Speed up your workflow: Flagging photos and organising your catalog
10. Exporting PNG Files from Lightroom
This will be very useful for some photographers. PNG files are the best format to upload to Facebook in, retaining as much quality as possible. However, Lightroom does not natively support PNG files. There is a workaround however, as outlined in this tutorial.
Lightroom workaround: How to Export PNG Files from Lightroom
In Conclusion
Hopefully these Lightroom tutorials have helped you to process a photo in what I’d argue is the best Adobe software for photographers. Following the advice in all of the articles above, you’ll soon be a post production wizard! Got any edits you’re particularly proud of? Post them in the comments below!
We’re always adding new tutorials for post processing to our website, as well as camera technique and gear advice. If you’d like us to send you our tutorials as soon as they’re published, you can subscribe to the website for free below:
[optin-monster-shortcode id=”siitp1ze4lani3o4qecz”]


