
Flagging Photos in Lightroom for a Quick Workflow
If you’re anything like me, then your Lightroom library is full of photos. I have about 23,000 images in my Lightroom library – and that’s not too bad, but that’s only a handful of shoots imported since I recently made the transition to Lightroom from Photoshop.
It’s important to keep on top of your library, carefully preening it and removing the photos you don’t want. It keeps things tidy and your hard drives free of clutter. However, deleting photos one by one can seem a long and tedious process. But like everything in Lightroom, it is built for efficiency and ease of use. Lightroom gives us the ability to flag photos, either for rejection or to stand out amongst the rest.


How to Flag Photos
If you want to flag a photo, then it’s really simple. Here are the keyboard shortcuts to the flagging system – just highlight a photo and hit the corresponding key:
- P = Flag
- U = Unflag
- X = Flag for Rejection
These flags will quickly become your friends, as they make the process of organising photos in your library very simple.
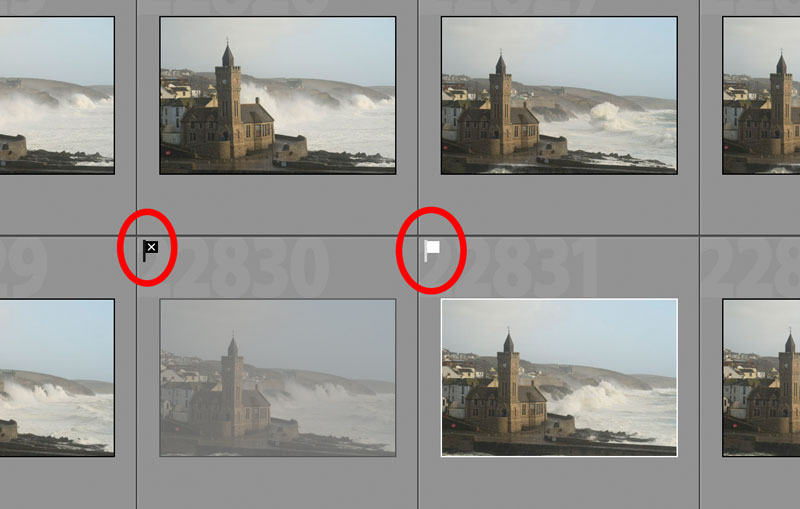
You can see the different flags above, and if you wish to remove them remember you just need to hit ‘U’ on the keyboard.
Filtering by Flags
Once you’ve flagged your shots you will no doubt want to filter your library this way. Again, this is simple. Just go to the bottom-right of your Lightroom window and you should see this:

Next to ‘Filter:’ you’ll see three small flags. You can turn these on and off to give you your required filter. The flag on the furthest left (with a small tick) will show you all the photos which you’ve picked out with the ‘P’ option. The next one along will show you unflagged photos. Finally, the flag to the right will show you all rejected photos. You can use these filters in combination with each other, or alone.
Deleting Rejected Photos
Once you’ve flagged photos for deletion, then you need to actually delete them. Before you do this I would recommend having a quick scan through all the photos you’ve marked for rejection. There is nothing worse than accidentally deleting a photo that you find yourself looking for later on. This is something that can happen due to the nature of the flagging system; keys can be pressed accidentally, or incorrect photos can be selected whilst in the grid view.
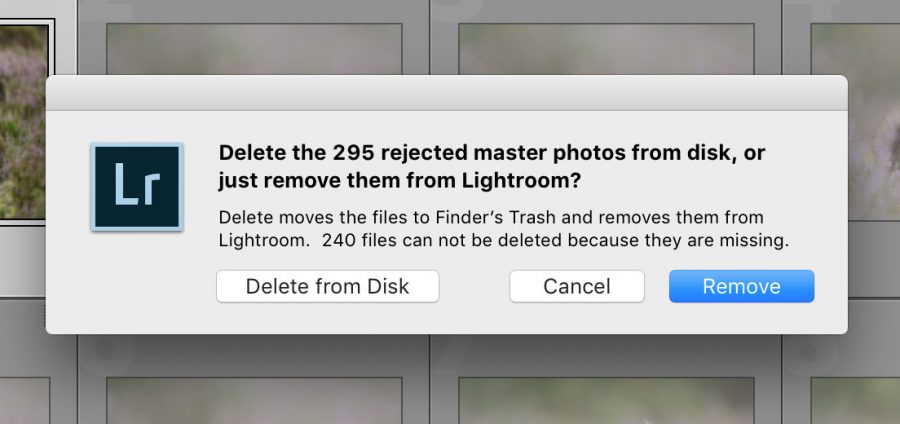
Once you’ve reviewed and confirmed that you do want to delete the flagged images, navigate to ‘Photo > Delete Rejected Photos…’ in the toolbar menu. You’ll be faced with the following pop-up window:
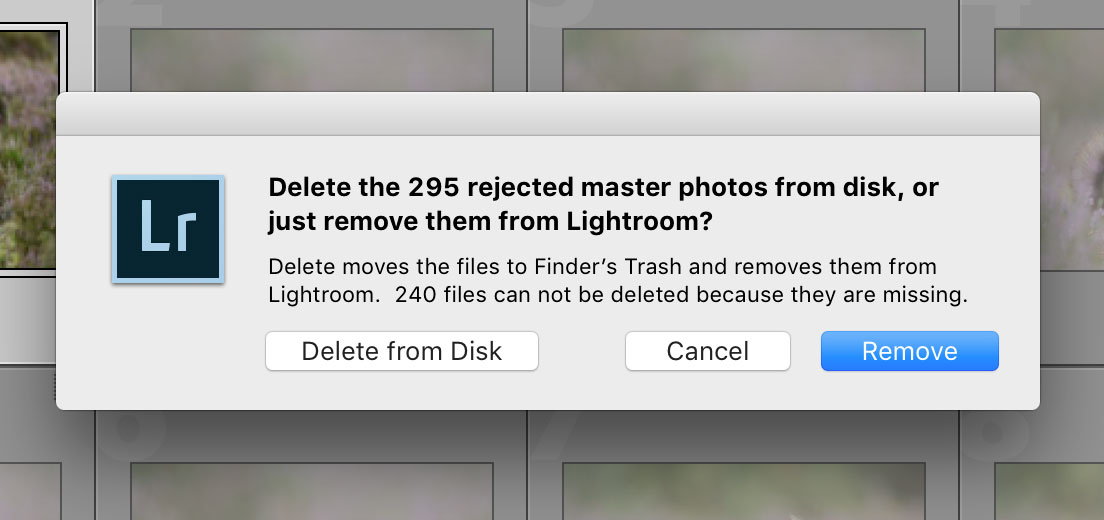
You have two options: ‘Delete from Disk’ or ‘Remove’. Delete from Disk permanently removes the photos from your hard drive as well as your Lightroom catalogue. This is the option you should choose if you’re positive you never want to see them again.
The Remove option just clears them from your Lightroom catalogue, but they’ll remain on your hard drive. They still take up space, but your Lightroom library is less cluttered. The disadvantage here is if you only use Lightroom to organise your photos, you’ll likely forget about most of them and they’ll sit wasting space. Think carefully about if you really need a photo, and don’t be scared to remove them permanently – especially the blurred, out of focus ones!


