
Correct Vignetting & Distortion with Lens Profiles
Adobe Lightroom is filled with many different sliders for you to play with during processing. In the Develop window, there are lots of different sections, each bringing with it different possibilities for adjusting and editing your photo. But if you scroll down the sidebar of tools, you’ll eventually reach the Lens Correction section. This is a handy tool that can be used to counteract vignetting and distortion in your photo caused by your lens.
Vignetting is the darkening of the corners of an image. Sometimes we may wish to add this to a photo for a particular effect, but it is easily overdone and is therefore often avoided. However, your lens may well introduce vignetting into your photo due to its nature. This is particularly evident when shooting with a wide aperture. Distortion can also be a problem, particularly with wide lenses, causing an apparent bulge in the centre of the photo. Luckily, Lightroom will quickly counteract these effects with Lens Corrections.


You can see vignetting clearly present in the following photo:

Using Lens Correction
The good news is, using lens profiles is very quick and easy. Open up your photo in Lightroom and move to the Develop window (you can do this quickly by selecting your photo and hitting ‘D’ on the keyboard).
Navigate down to the Lens Corrections section. You’ll be faced with the following window:
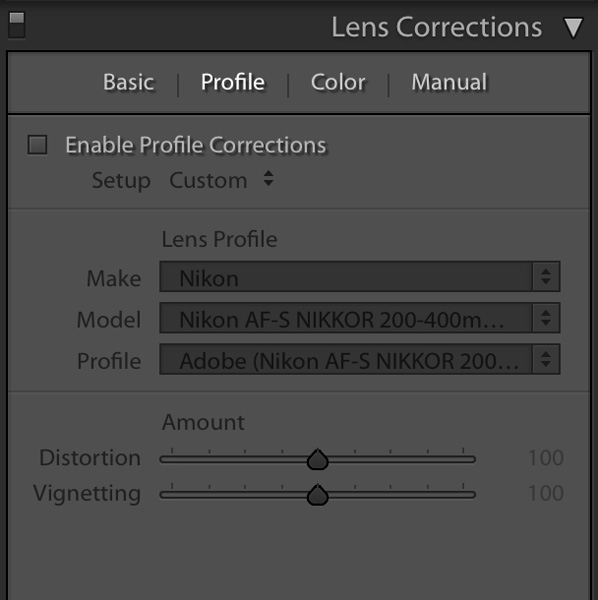
If you’re lucky, your raw file will be embedded with information about the lens that you’ve used. Lightroom comes with different lens profiles already in the software, each with pre-determined adjustments made for different lenses. If you’re using a particularly old or new lens, then Lightroom may not have your lens listed.
You can either upgrade your software with the hope that a newer version has the profile installed, or you can import them manually. If you’re importing and creating profiles yourself, you’ll need to use some tools from Adobe.
It’s Really This Easy
 All you need to do is hit ‘Enable Profile Corrections’. As soon as you do that, provided your lens data is loaded in, you’ll see your photo flatten out and lose any vignetting. It’s really that simple.
If your lens isn’t already selected in the drop-down menu, you can search through the list and find it. Make sure you pick the correct model of your lens – the list is huge and there are lots of different models.
You’ll see a couple of sliders under the ‘Amount’ subheading. These will be set to 100 by default. My advice is to leave them there. You can move them around to adjust the level of adjustments made, but they’re pretty much spot on at 100.
Take a look at the result. This is my original image with lens corrections applied – much better!:

Manual Adjustments
Now it is possible to make these adjustments manually. If you select ‘Manual’ from underneath the Lens Corrections panel, you’ll see all the individual sliders to make vignetting and distortion adjustments yourself. There’s no real reason that you’ll need to do this, and lens profiles are pretty much always going to do it better than you. However, if you wish to adjust things manually, then the following video has some excellent advice.
https://www.youtube.com/watch?v=sua4u_3Khmo
Chromatic Aberration
Lens Corrections has one more trick up its sleeve. You may find that you’ve got chromatic aberration in your photo. It’s a coloured hue around the fringes of objects in your photo. For my photo this is particularly obvious against the white background – see that purple hue?

Now, select the ‘Color’ section from the Lens Corrections portion of Lightroom that we’ve been working in. You’ll then see a box like this:
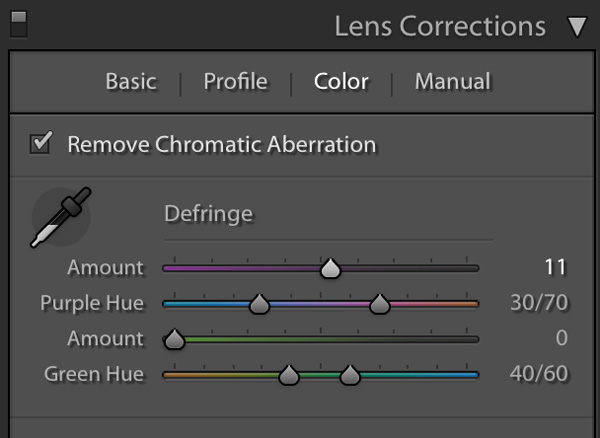
I’ve already made my adjustments here. Ticking the ‘Remove Chromatic Aberration’ box may sort out the problem for you completely. If not, you may need to add a little more correction. As the fringing I’m experiencing is purple, I have moved the ‘Amount’ slider corresponding to the purple hue along. You can see the effect this is having as it happens in Lightroom. Straight away I found that all the fringing disappeared.

It’s really that easy. Applying lens profiles and looking to remove chromatic aberration should now become a normal part of your workflow in Lightroom. It’s extremely quick and easy to do, and will help to increase the quality of your photos.
Further Reading: “Editing Your Photos: How Far Should You Go?“


