
Control the Viewer’s Eye with Vignetting
One big impact an image can have depends on where the viewer’s eye looks to first. There are a lot of aspects that can lure the eye to an area, such as leading lines. However, one effect that can be applied in post production is a vignetting effect. This darkens the extremities of a photo so that the eye instantly looks to the middle. It can have quite a dramatic effect, even when done subtly.
Adding Vignetting to an Image
It should be noted that before you add this effect, it is important that you have made all other alterations beforehand. This should be the last thing you do to a photo.


Step 1: Splitting into Layers
Firstly, make sure to flatten your image completely (you need to do this if you have multiple layers). To do so, right-click on one of the layers and select “flatten image”. Simple!
Next, click and drag the layer onto the new layer icon just below it. This will make a duplicate so that there are no transparent areas of the image caused by later steps in this tutorial.
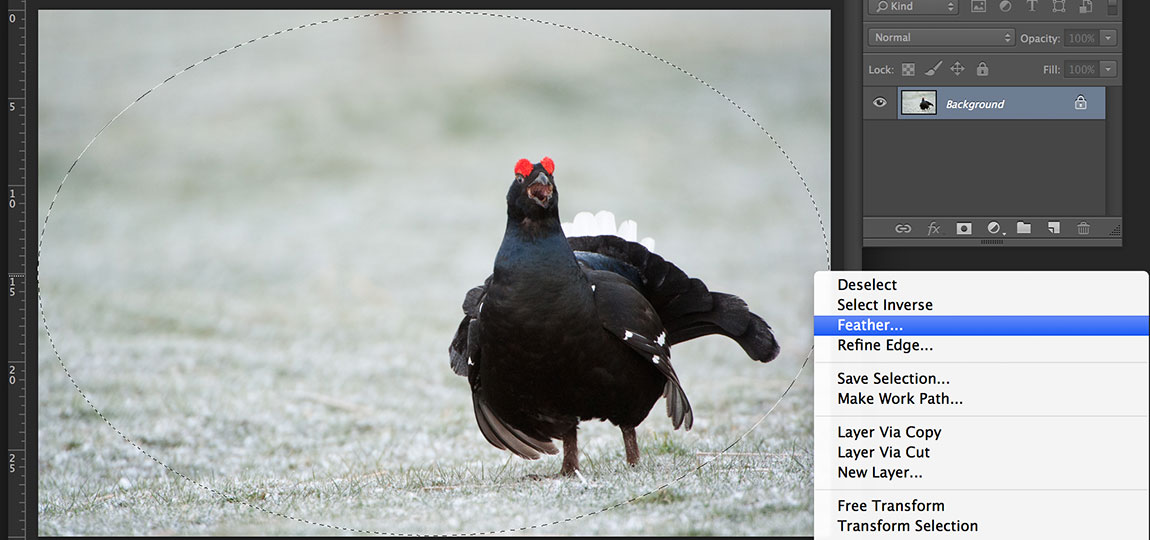
Step 2: Creating the Vignetting Area
We need to create the area that is going to be darkened for the vignetting. To do this, click and drag from the top-left corner of your image to the bottom-right corner.

Next, right-click your selection and select “Feather…”. This will bring up a box asking for the radius; type in 200 pixels. This smooths the edges of your selection so that the darkening is very gradual.

After you’ve done that, right-click again and choose “Select Inverse”. This will now select the area outside of your circle.
You now need to cut and paste the selection. Windows users can press Control + X followed by Control + V on their keyboards. Mac users need to press Command (Apple) + X followed by Command (Apple) + V.
You should now have your layers looking like this:

Step 3: Darken the Extremities
Now all that’s left to do is darken the surrounding area. It’s really simple. Make sure you have the top layer selected (the one with the outer area in – it’s probably called “Layer 1”). Click the drop-down box above it – it will say “Normal” at the moment. Then select the “multiply” option.
You’ll see the vignetting appear at its most extreme setting. Some people may like it like this, and choose to leave it very dark. I used to be a fan of vignetting (but not anymore), and I preferred it to be much more subtle.
To change its strength, look to the opacity text field next to the drop-down. Replace 100% with something between 20% and 40% (or if you need more/less depending on the image, go for it).
The Result
So here is the image with a little vignetting applied. First before, then after.
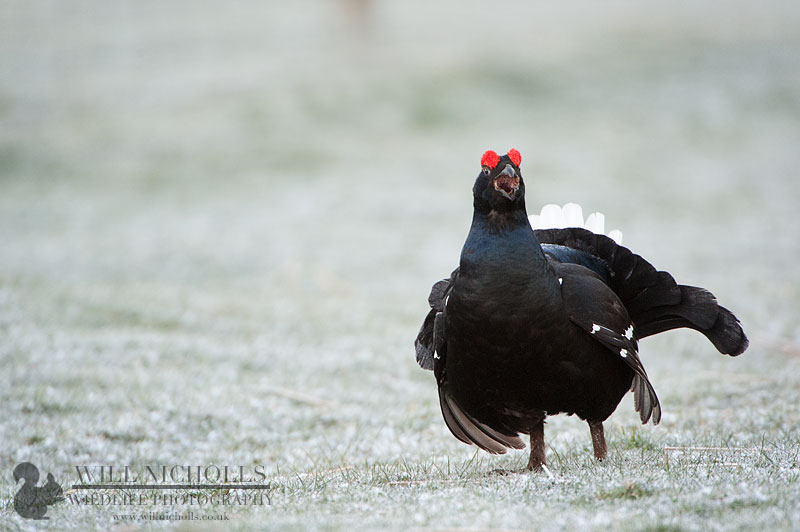

You probably can’t see the difference, since I’ve decided to do it subtly, but you should feel your eye being drawn to the grouse quicker in the second image. Look to the corners of the image to see the difference most strongly. If you’re finding it hard to spot the difference, try applying this tutorial to one of your own images.
Vignetting works best subtly, so it is almost unnoticeable. Be careful not to get “addicted” to using this effect, as it can become a habit. Most images will work well without it!


