
An Introduction to Using Strobes in Underwater Photography

When I first started underwater photography I was equipped with just my camera in a dive housing and nothing more. Like many photographers, I was determined to capture all the beautiful colours that exist beneath the sea to create the kinds of images that really make an impact and wow fellow ocean-lovers.
It took just one dive for me to realise that I was missing something. My images were completely washed with blue and green hues and lacked all of the vibrant colours I was so desperately wanting to capture.
Through a little research, I quickly discovered that, if my goal was to create high contrasting, vibrant images, it would serve me well to invest in a set of strobes.
This guide delves into the world of underwater strobe photography and answers a range of questions, including explaining what strobes actually are, key characteristics to look for when choosing a strobe, and optimal settings and positioning for various situations.
What are strobes and why use them?
The term strobe refers to specialised lights that can be easily mounted to your camera system. They are designed to fire a very short but powerful burst of light onto your subject.
Ocean photography introduces a range of difficulties, with one of the most frustrating being the increasing loss of colour and image sharpness that occurs as you descend underwater.

While this loss of colour is somewhat noticeable even at shallow depths, it becomes significantly more apparent as you descend deeper; typically, beyond about 5 metres. It’s at these deeper depths that strobes really become very useful.
Read more: How to Photograph Dolphins Underwater
When to use strobes
The answer to this question may vary depending on who you talk to. Some photographers will say strobes are only required when diving deep, whereas others will swear by them even when shooting on the surface.
Personally, I agree with the latter and will use my strobes almost every time I enter the water.

Even when diving at very shallow depths where there is plenty of ambient light available, the extra burst of light can really enhance your images by giving them an extra boost of colour, as well as image sharpness.
One complication of shooting with natural light is the loss of detail that arises as a result of shadowing on your subject. Using strobes solves this issue and ultimately opens up a range of interesting compositions, including the ever-popular sun burst image.
When to leave strobes behind
Despite the many benefits, there are some situations where it’s best to leave your strobes behind. More often than not, strobes are large, heavy, and a little awkward. This makes them more hassle than they are worth for any ocean encounter that requires speed, or involves getting in and out of the boat frequently.
The last thing you want is to be left behind, trying to position your strobes, as your dive buddy speeds off ahead of you to photograph the incoming whales!

It is also important to consider the marine life you’re planning to photograph. Some species, such as whales and some sharks, spend much of their time in deep water and are therefore extremely sensitive to light.
In these instances, always leave the strobes behind. If you’re unsure whether strobes are appropriate for a particular dive site or encounter, ask the locals or the nearest dive operation.
Read more: Underwater Photography Ethics and Code of Conduct
What to look for when buying strobes
Strobes have become increasingly popular over the years and there are a number of options available at various price points. It can be a little daunting at first but, if you know what you’re looking for, the task is made that much easier.
There are a number of factors to consider. Key aspects to be aware of include how the strobes will connect to your camera, strobe power, beam angle, and recycle rate.
1. Connection (fibre optic vs electronic sync cable)
There are two main methods via which strobes can be connected to a camera, each with their own pros and cons. One method uses a fibre optic cord, whereas the other utilises an electronic sync cable.

Fibre optic cords rely on the camera’s internal flash to transmit light to the strobe and ultimately trigger the device. A big advantage of this method is that the cord connects to the outside of both the housing and strobe, meaning there is no risk of flooding.
Using a fibre optic cord also allows for the strobes to be removed or added quickly at any time without fear of damaging your equipment. The disadvantage of fibre optic cords is their reliance on the camera’s internal flash, which drains battery life and also limits strobe recycle time and speed.
Electronic sync cables connect directly to your camera through bulk heads on both the housing and strobe. This method does not affect camera battery life, and also allows for increased recycle time and speed. Disadvantages include more potential flood sites, as well as not being able to add or remove strobes from your system while in the field.
2. Strobe power
The more power you have available to you, the more potential scenarios you will be well equipped to photograph. With that being said, the overwhelming majority of underwater encounters will be well served with a short, quick burst of light.
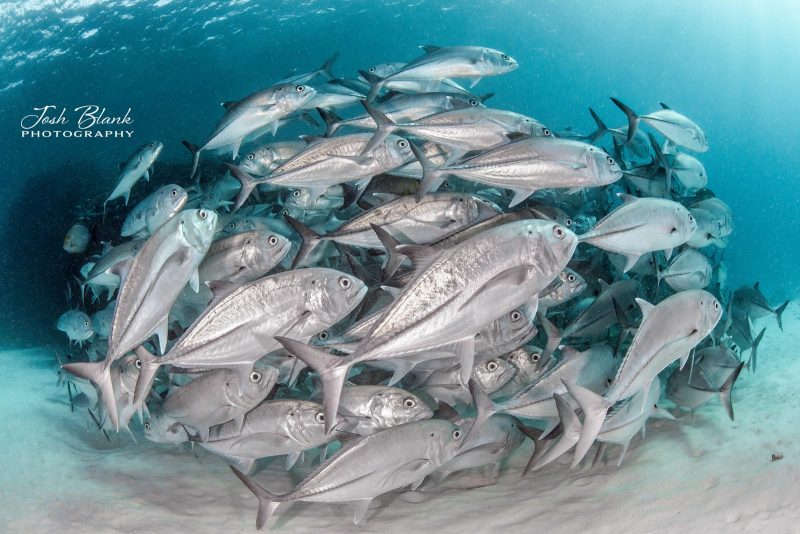
If shooting wide reef scenes, large schools of fish, or very big animals, strobes capable of higher power are very helpful.
Strobe power is measured by a guide number, with a higher number indicating greater power. Choosing strobes with a guide number of 20 or greater will ensure that you are prepared for all situations.
Read more: How to Take Charismatic Portraits of Marine Life
3. Beam angle
Beam angle refers to the spread of light that is produced from a strobe and should be a key consideration, particularly if you enjoy shooting wide-angle.

Generally speaking, a greater beam angle is desirable as it will allow you to expose a wider area when composing an image. A beam angle of at least 90-100 degrees is optimal for wide-angle photography, whereas 90 degrees or less is suitable for macro.
Wide-angle photographers will want to consider shooting with two strobes to maximise their spread of light.
4. Recycle rate
Recycle rate refers to the speed at which you will be able to fire your strobes in succession. If capturing fast moving action, such as sharks or sea lions, is your goal, this will arguably be the most important factor and well worth spending the extra money.

When purchasing a strobe, recycle rate is usually measured as the time it takes for it to recycle after firing at full power. A very quick strobe will have a recycle rate of 1-1.5 seconds, whereas a slower strobe will be listed as about 3 seconds or longer.
Since individual animals like sharks or turtles will be captured on a lower power, you can expect high end strobes to be capable of firing very quickly to ensure you nail the shot.
Shooting with strobes
Whilst shooting with strobes improves colour and image sharpness quite dramatically, it’s important to note that they can be tricky to use, let alone master. Underwater photography already introduces a number of variables; adding external lighting to the mix complicates things a little bit more.
Photographers should understand what backscatter is and how to reduce it, the importance of strobe positioning and power adjustments, and also the need to be close to the subject.
Backscatter and how to minimise it
Underwater photographers who use strobes will likely tell you backscatter is the bane of their existence and the cause of many ruined images. The ocean is full of small particles that float throughout the water column, and strobes have a knack of illuminating them. This can create a mess of ugly spots in your image.
Backscatter can be present in small amounts even in excellent visibility. However, it’s during poor conditions that it becomes increasingly difficult to manage.
While small amounts of backscatter are not a big concern and can be easily cleaned up in Photoshop, moderate to large amounts can take an otherwise lovely image and render it unusable. Luckily lots of practise, combined with the below tips, will have you happily using your strobes regardless of the conditions.
Read more: 5 Easy Ways to Avoid Backscatter in Underwater Photos
Strobe positioning and power
Learning how to appropriately position your strobes and adjust power is the single most important skill to master when it comes to minimising backscatter. Generally speaking, backscatter can be reduced either by reducing power or moving your strobes further away from your lens. This is explained in more detail below.
Get as close to your subject as possible
By getting as close as possible, you are reducing the amount of water, and therefore particles, that exist between your subject and the lens. This is also explained in more detail below.
Consider shooting upwards
Shooting at an upwards angle is a great way to capture beautiful images on days where visibility is poor. It’s quite common for vertical visibility (looking straight up or down) to be noticeably clearer than horizontal visibility (looking forwards through the water).

Take advantage of this increased clarity and look to compose images from an upwards angle.
Get close!
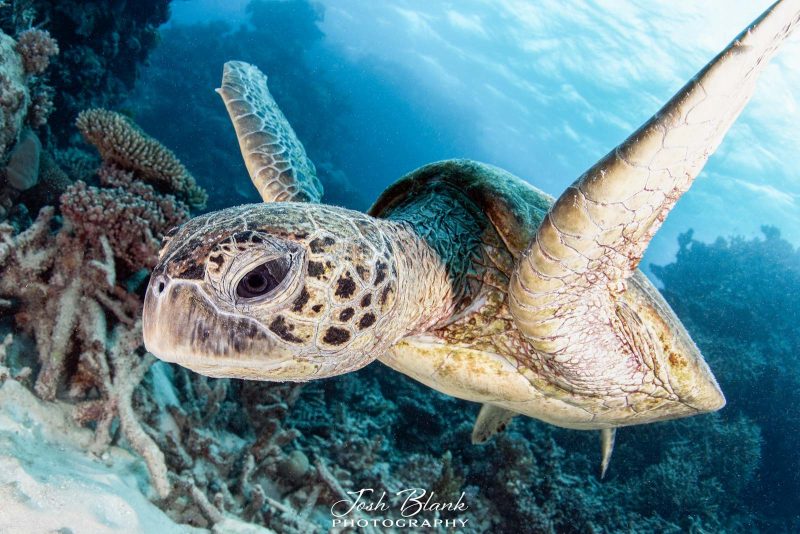
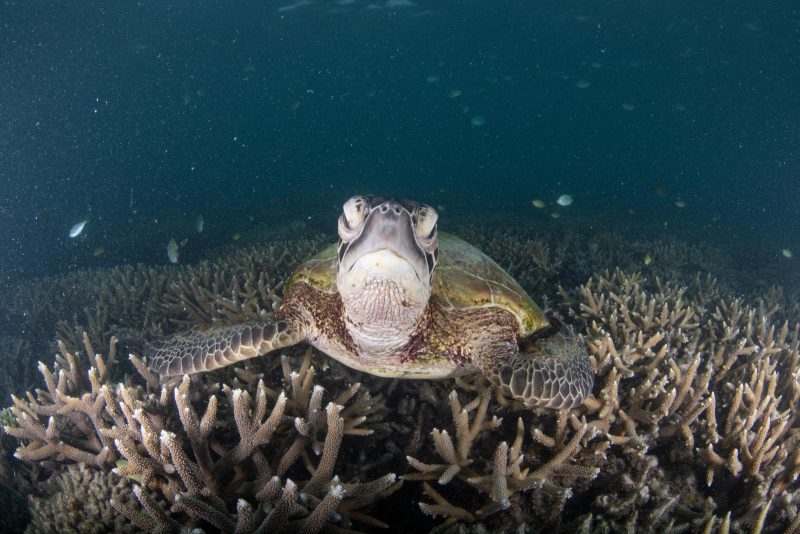
Getting as close as possible to your subject solves many issues in underwater photography, and this certainly remains true in relation to strobes.
Light emitted underwater dissipates much quicker than on land; this means your strobe lighting won’t travel far at all. Generally speaking, you will always require your subject to be no further than 1 metre away, and ideally much closer.
This will ensure a sufficient exposure and nice, even lighting, while also boosting variables such as image sharpness, contrast, and overall detail, as well as reducing backscatter.
Strobe positioning and power
As mentioned above, being able to correctly position your strobes for various underwater encounters is one of the most important skills to develop. Unless you’re blessed with pristine conditions of 20 metres+ visibility, the margin for error can be quite small. Having your strobes just centimetres out of place can sometimes result in a mess of backscatter or an insufficient exposure.

Firstly, it helps to understand that light from strobes will fire in a cone-like shape, starting narrow and spreading wider as the light travels through the water. The goal is to use the inner edges of these cones to expose your subject.

Before starting a dive, position your strobes in line with the housing – about 5-6 inches either side, as pictured above, and set the power to low. From this position, you will only need to adjust your strobes either closer to the housing or further away, depending on how close or far the subject is from your lens.
If your subject is within just a few centimetres you may need to pull each strobe in towards the housing, and consider reducing power. If your subject is further away, you will need to extend each strobe away from the housing and consider increasing power.

Lastly, always be in a continuous state of shooting, reviewing, and adjusting as required. An understanding diving buddy who enjoys having their picture taken is an invaluable resource!
In conclusion
There’s certainly a lot to think about when introducing strobes to your kit, but I promise they are well worth the effort! With a bit of practise, you will see big improvements to colour, detail, and contrast in your images, as well as a range of new and exciting compositions.
Happy shooting!


