
How to Photograph Fish

When it comes to underwater photography, not all fish are created equal. The term fish is used to categorise over 33,000 species worldwide, from bottom-dwelling catsharks and crevice loving blennies, to predatory grouper and mid-water shoaling mackerel.
So, when it comes to photographing all these different species, there is no specific ‘one size fits all’ approach. There are, however, a few key things to keep at the forefront of your mind so that you can be adaptable when you head out in search of our finned friends.


Diving practice
I often refer to underwater photography as hostile studio photography. This isn’t intended to illicit fear, but to put emphasis on the fact that in order to get the most out of our underwater photography practice, we need to navigate the trials of entering a foreign environment first and foremost.

If you are new to diving and still fine tuning some aspects of your dive practice, then this is something to take into consideration when choosing a subject you want to photograph underwater. Trying to capture something that puts a strain on your diving abilities will take your focus away from the process of taking a photograph.
Search for subjects that you are able to approach and afford you time to tune your photography skills comfortably. The overall aim is to ensure our dives are safe, manageable and geared towards success.
Equipment for photographing fish
Whether you are shooting on top of the range equipment or an entry level ‘point and shoot’ camera, the most important question to ask yourself here is “how familiar are you with using the equipment you have, particularly when it’s in a housing?”.

Take the time to get acquainted with your gear and learn its limitations:
- How far can you push your camera’s ISO before you notice noise?
- Can you change your focus point easily or at all whilst underwater?
- Can you change your aperture and shutter speed easily and quickly?
- Are you working with strobes or dependent on natural light?
These are key things you don’t want to be figuring out when you’re in the water and staring at a subject. Underwater photography is an exercise in our ability to anticipate and identify opportunities.
Whatever equipment you are sporting, you can photograph fish. It’s just a matter of adjusting your approaches to suit what you have to work with relative to your subject.
Read more: What Equipment Do You Need for Underwater Photography?
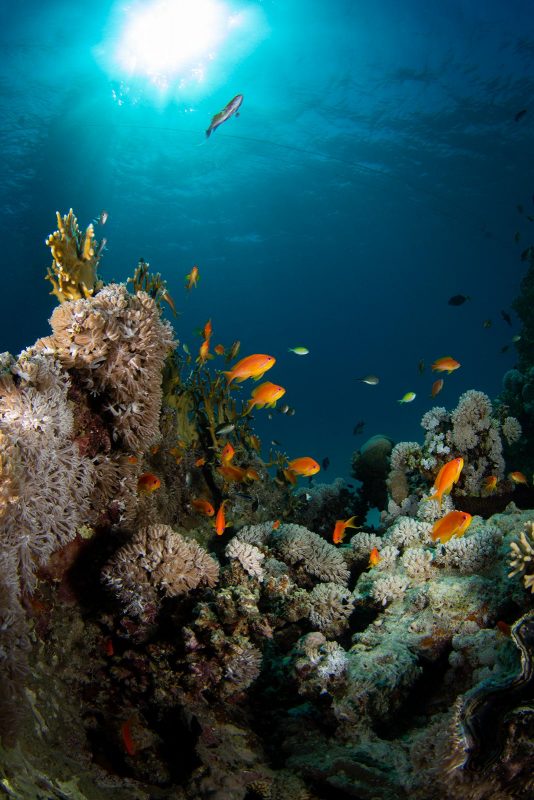
Planning your fish shoot
It’s always worth taking some time before your dive to research what you might find at any given site. This could be as simple as having a conversation with your dive guide if you are utilising an operator, or jumping onto Google to get an idea of what other people have encountered in that habitat.
If you are new to underwater photography, then subject choice is really key.
Midwater subjects will typically be erratic and more demanding of your skills than finding a subject that reliably frequents coral heads or kelp fronds – though these subjects may require more patience of you (and your buddy).
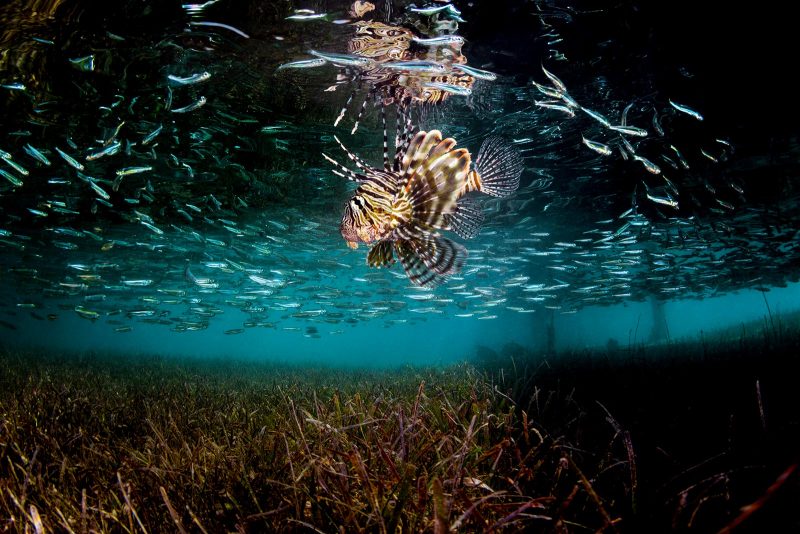
If you want to get the most out of a photography dive, pick a subject that allows you enough time to consider what you are doing with your equipment. Lionfish are a fantastic example. Inquisitive, slow moving and with an enticing colour pallet, they’ll afford you the opportunity to experiment with strobes, natural light, macro and wide-angle setups.
Setting an image goal
Once you have identified some likely subjects, then you can set yourself an image goal. Imagining the shot you want to achieve before you get underwater is a great way to keep your focus. It will also help you position yourself and your kit faster when you do find a subject, as you will already know the outcome that you want to achieve.
Don’t aim to shoot an entire photographic portfolio when you get down there. One well-considered shot is far more gratifying and progressive than 20 rushed snaps. It takes the pressure off and you can focus solely on bringing your ideal shot to fruition.

These are some good things to consider when you’re planning the composition of your shot:
- Do you have a species in mind?
- Do you have a choice with your equipment as to how you can shoot the subject (wide-angle / macro)
- What colours between subject and habitat could you have to work with?
- Would your subject be represented best in portrait or landscape?
- Do you want to focus on the species alone or include some of the habitat in the background?
- What kind of depth of field would you like?
Build the image in your mind. You may or may not achieve your exact shot, but that critical thinking will seep into your photographic practice and start to become second nature. There’s always the chance this preparation will position you to capture something unexpected.
Setting up your camera for underwater photography
Once you have an idea of what you would like to photograph on your dive, it’s a good idea to select and set up your kit in anticipation. This isn’t an exact science, but it will give you more time to focus on your subject if your equipment is only in need of some fine-tuning once you are underwater.
Conditions will also play a role in selecting your setup. Poor water and weather conditions will likely make for a difficult dive on a wide-angle lens, where we want to make the most out of natural lighting and minimise the dreaded backscatter – this is where our strobes illuminate the particulate in the water column between your subject and your lens, producing a busy snow effect in your image. To mitigate this, aim to light only your subject with your strobes and not the water in between.

Get your equipment set with a rough aperture, shutter speed, and ISO relative to your ‘goal’ image beforehand – and test that everything is working as expected before you get wet.
If I’m struggling to identify something I would like to photograph, I generally pre-set my equipment to f/11, 1/160th, ISO 200 and set my strobes to ¼ power, whilst aligning them symmetrically around 1 inch behind the glass of my port and around two inches horizontally away from the body of my camera.
Making this a ‘go to’ set up means I can change settings and position my strobes quickly and confidently when I do find something interesting. Simple oversights, such as your camera being set to auto ISO without you realising, will cost you time and potentially the perfect shot on your dive. Set up and test everything thoroughly before you enter the water so you don’t miss a fleeting photographic opportunity.
How to approach fish underwater
Approaching your subject requires patience. It’s all too easy to get excited and rush into a situation to grab your shot. Whilst this technique can produce results, you are more likely to scare away your subject than you are to grab a great photo of it, resulting in a succession of ‘fish bums’ filling your memory cards. The best research you can do about your subject is to observe it firsthand.

Taking the time to watch your subject from a non-threatening distance will give you a good idea of how, when, and in what manner to approach it. Or, even better, how to bring it to you.
Take a slow approach, moving minimally and with purpose, to get your subject accustomed to your presence. You can also use this time to evaluate your subject and recall your pre-dive plan as to how you would like to photograph it.
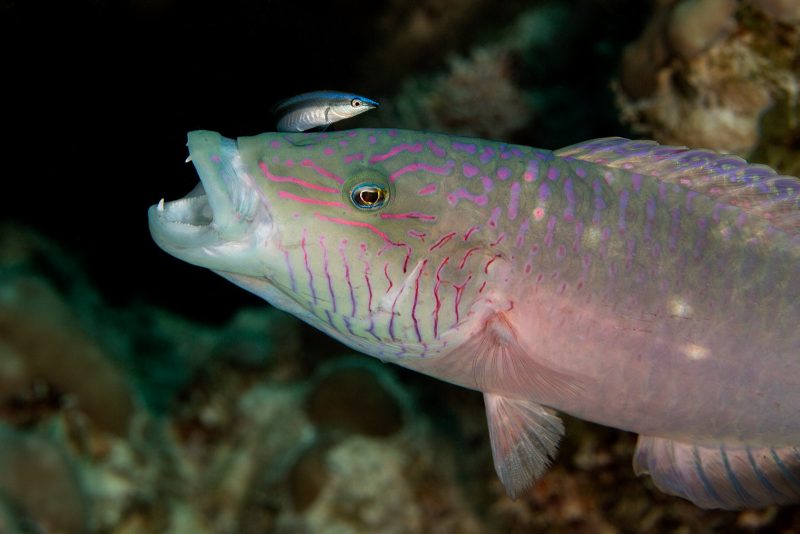
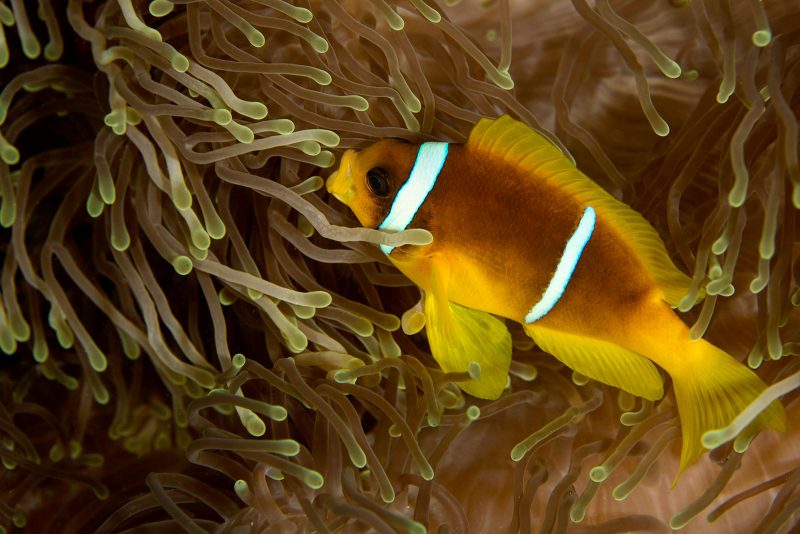
Shooting portraits of fish
Composition and colour are key when working with portraits or close-up photography. Understanding the rule of thirds and when to use or break this rule can be the difference between a good shot and a great one.
The priority is to ensure your focus is squarely on the eye of the subject. From there you need to make a decision as to how you want to portray your subject relative to its habitat. Perhaps the background is too busy to do your subject justice. In which case you can stop down your aperture to f/16 (or narrower) and explore shooting ‘black water’, where we use our strobes and a smaller aperture to eliminate the natural light and produce a black background.

You can achieve a similar effect by trying your hand at inward lighting. With this technique, you will turn your strobes inwards to face each other – or back towards your port – with your subject in-between. This is a great technique if you find yourself struggling to avoid lighting undesirable background items.
You can also play with casting shadows and creating textures using just a single strobe, to pop your subject out of the background. This works well when shooting fish that camouflage to their habitat such as cuttlefish on the seabed.
Read more: 9 Tips for Creative Underwater Photography

Evaluate what is available to you, or not, in terms of colour and context and try to use it where possible to make your subject stand out. Remember though, get close and keep your focus on the eye!
Photographing shoals of fish
As discussed earlier with planning, mid-water schooling fish are going to challenge your underwater photography and dive practices – but the rewards can be spectacular.
Whilst smaller reef dwelling fish may be more tolerable of your approach, shoals typically will respond to your actions much more swiftly and dramatically, which can make getting close to them extraordinarily difficult.
The answer to this is… don’t! Negative space used with intent, or utilising other underwater artifacts, such as reef heads or other divers, can be a great way to add scale and impact to your photography.

Keep a bit more distance and take the time to watch how the shoal moves. Again using this time to evaluate the style of image you want to achieve. You may find, as with mackerel, that the group establishes a pattern of movement. To save you chasing your subject into the blue, observe and try to position yourself strategically in their direction of travel to bring the subject to you. Keep in mind that you want to be as still as possible when they move towards you. Keep your breathing long and slow and be sure you are not having to micro manage your buoyancy whilst you wait.
Keeping our distance highlights other areas of consideration. When working at increased distances, there will be more of the water column between you and your subject, increasing your chances of picking up backscatter. This is exasperated by the temptation to turn your strobes to full power to reach your subject. Instead, when shooting at a distance make the sun a primary light source if you can, and use your flash as ‘fill’ lights as opposed to ‘key’ lights. This means checking the direction of the sun and moving yourself into a position to use it appropriately. Doing this will lessen the impact of your strobes on particulate the water.
Behaviours to look out for
Whichever approach you take towards photographing fish, keep in mind that ultimately you want your work to stand out and create impact. Whilst working towards creating visually striking images through your technical craft, remember that documenting interesting behaviors is what can really separate you from the crowd. Speak to others and research your habitat to establish any points of specific interest or seasonal spectacles. Wait, watch, and evaluate your opportunities.
It’s not all about diving
Some of my most successful underwater photography excursions have been less than two feet underwater or taken whilst free-diving. You don’t always need to be using Scuba gear for a good underwater image.
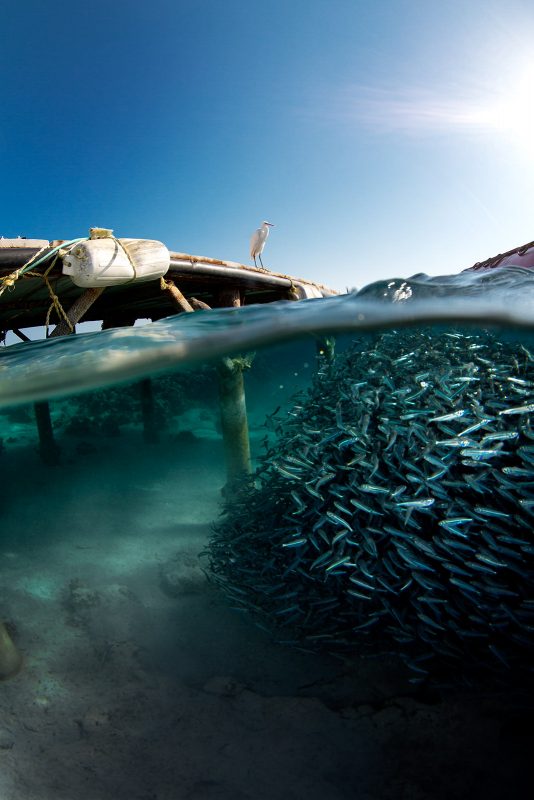
Working in shallow water in particular affords you the opportunity to maximise your use of natural light and removes the time constraint of a finite air supply. One of my favourite locations to shoot in the shallows is underneath docks and jettys. These areas typically are easy to access and provide a shelter for numerous species.
Read more: Underwater Split-Shots – Top Tips for Over-Under Photos
In conclusion
Photographing fish is a broad subject area, but this also means there’s an expanse of opportunities for underwater photographers. The best place to begin is where you are comfortable and with the equipment you have available to you. The rest is open to development and experimentation.
Here are some key things to remember:
- Research the habitat you want to photograph
- Have an idea of what you would like to photograph and how
- Get your equipment ready and tested in advance
- Approach your subject slowly and deliberately
- Use colour to your advantage
- Use the sun where possible
- Aim for capturing behaviours
- Whether diving or wading, evaluate your opportunities
Good luck!


