
A Guide to Using Flash with Wildlife

Learning to use flash effectively is a very important and, at times, undervalued aspect of nature photography. Flash has many different applications for photographing wildlife; from providing a touch of fill light, to using it as your main source of light, or getting creative using off-camera techniques. While undoubtedly there is something very charming about the look of nice natural lighting, certain situations can call for the use of flash. Whether to remedy a challenging lighting situation, or to create light all of your own, taking the time to learn the benefits of artificial light can help take your photography to the next level.


It’s very important to keep in mind the impacts that human presence can have on wildlife. Using flash has never been scientifically proven to harm wildlife, however it is up to you to use your discretion and keep the animal’s well being in mind, first and foremost. Using flash with particularly sensitive species or situations should be avoided altogether.
First, let’s take a look at a few examples of the various ways in which we can use flash.
Fill Flash
Using your flash as a fill light means that you allow ambient light to enter your camera whilst also supplementing the lighting in the scene with light from the flashgun.
Sometimes we’re faced with difficult lighting conditions that cause undesirable shadows on our subjects. Selectively brightening your subject using fill flash can vastly improve your image by balancing the lighting. Some photographers may argue that this same effect can be easily achieved in post production. In reality, even with today’s sophisticated cameras, there is no way to replicate the effect that proper use of fill flash can provide. Brightening shadows significantly using editing software can introduce unwanted noise and make things look unnatural.

In this situation, I was dealing with some backlighting which wasn’t providing a lot of illumination on my main subject. Using a much brighter exposure to lighten the bird would’ve resulted in an overexposed background. Instead, I set my camera to properly expose for the background and used a touch of fill flash to even out the lighting.

Here, a lot more light was falling on the background than on my subject. Fill flash provided a great solution to this challenging lighting situation.


In addition to balancing the light, using fill flash can bring life to wildlife photos shot in dull conditions, and also help even out harsh midday light, allowing you to extend your shooting time.
Things to Avoid
A common mistake made when using fill flash is not allowing enough ambient light to enter your camera and relying too heavily on flash to provide light for the whole scene. Fill flash is meant to supplement the ambient light and illuminate your subject, not the background. Notice how the background in this image appears unnaturally dark whereas the bird is properly exposed. Too much flash was used and not enough ambient light was let in to achieve a balanced exposure.

Top Tip: When using fill flash, be sure to enable “High Speed Sync” on Canon cameras or “Auto FP” on Nikon cameras. This will ensure your camera is able to surpass its normal sync speed, enabling you to use the faster shutter speeds sometimes necessary when shooting outdoors in daylight.
Main Light
There are some situations when we simply do not have any ambient light to work with. That means that flash will illuminate our subjects entirely. Depending on where you are in the world, there are usually an assortment of interesting, photogenic creatures that come out at night. An understanding of flash can open up a new world of possibilities after the sun has gone down.
Here are a few images of nocturnal creatures photographed using flash as the only source of light:

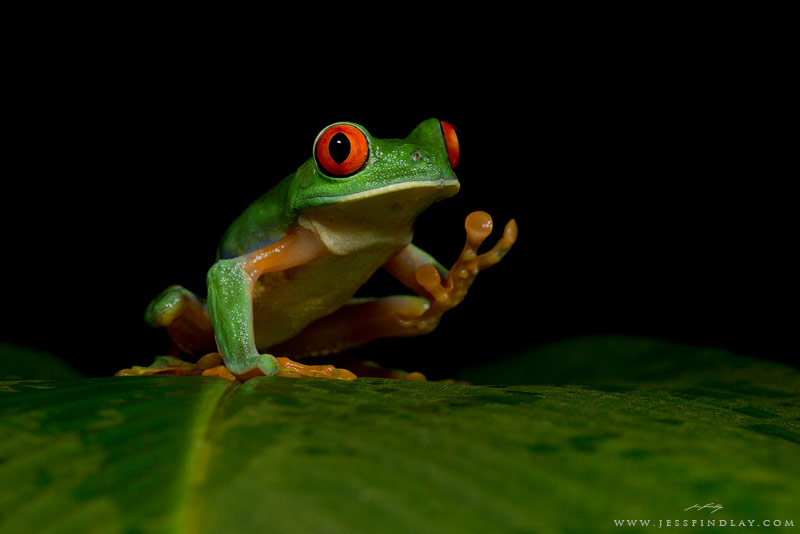

Remember, when there is no ambient light available, adjusting your shutter speed will not affect the exposure. To adjust the exposure, you’ll need to change either your ISO, aperture or flash power.
It’s VERY important to limit use of flash on nocturnal subjects. Their eyes are very sensitive to light and may be susceptible to disturbance in the event of excessive flash use. Taking just a couple frames and using a low flash power and high ISO to lessen your impact is highly encouraged.
Further Reading: “Does Flash Photography Harm Animals?“
Creative Lighting
Being able to adjust the power and angle of your light source allows for total creative control. Plenty of time studying how to operate your flash and some experimentation can lead to some really interesting and unique results that aren’t possible with natural light.

Here I set my exposure for the moon and lit this map tree frog with a diffused, off-camera flash.

Experimenting with backlighting can yield some interesting results, such as with these leaf-cutter ants.
Further Reading: “Backlighting in Macro Photography“

Though an advanced and much more gear intensive technique, the results of using multiple flashes on very low power for flying hummingbirds are pretty astounding! This is a buff-tailed Coronet.

Allowing in just a little ambient light while flash froze the action gave a cool blue cast to this wintry image of a Rocky Mountain bighorn sheep.
Which Mode is Best? Manual vs Metered Flash
Knowing when to use flash is the first important step to master. The next step is learning to properly operate your flash and use the correct mode for any given situation. Let’s explore the two.
Manual
Manual mode allows you full control by changing the output of light from the weakest (typically 1/128) to the strongest (1/1). Rarely will you find yourself using a flashgun at full power, and adjusting a flash’s power will change the look of the resulting photo.
Pros:
- Allows you to select the exact light output
- Output stays locked and does not change once set
Cons:
- If your subject comes closer or moves further away, you will need to adjust your settings
- Does not react and adjust based on changing lighting conditions
ETTL or iTTL
When using ETTL/iTTL mode, a split second before your photo is taken, an invisible pre flash is sent out and reflected back to your camera. Your camera quickly gathers the information from the pre flash, such as subject distance and tonality. Together, using that information combined with your camera settings, the flash determines an appropriate flash power. While you can’t choose the exact flash power, you can adjust the intensity by using the flashgun’s exposure compensation.
Pros:
- Automatically detects the distance and tonality of your subject to determine output
- Intensity can be tweaked easily using the flashgun’s exposure compensation
- Detects changes in lighting conditions and compensates
Cons:
- Does not allow you to select exact light output
- Inconsistent, especially if your subject is passing through variable surroundings
Sometimes when photographing wildlife, you simply do not have the time to fine tune manual settings. It is advisable to have your flash set to ETTL (Canon) or iTTL (Nikon) mode just in case something unexpected pops up. Flash exposure compensation set to -2 is a good place to start.
If you do have time to get your settings completely dialled in, manual mode will provide far more consistent results and allow for complete control over the look of the photograph.
Flashguns
There are a range of flashguns available for both Nikon and Canon, either made by the respective brands or third-party manufacturers. The Nikon SB-900 and Canon Speedlite 600EX-RT are the latest flashgun models and will do you proud.
Flash Accessories
Flash Bracket
Flash brackets are really important to have in your arsenal, especially if you’re using a telephoto lens. This elevates your flash off the camera, preventing unwanted eyeshine known as “steel eye” and the flat look caused by direct lighting when mounted on the hot-shoe. Flash brackets are available from brands such as Custom Brackets and Kirk.
 Many consider the Wimberley Gimbal Head to be the best wildlife photography tripod head on the market. If you’re using a gimbal head and plan to use flash for your photography, be sure to pick up a Wimberley flash bracket too. They are available with mounts that attach to either the gimbal itself or the Wimberley lens foot.
Make sure to also purchase a flash sync cord or a wireless transmitter to attach to the flash so that it will fire remotely.
Flash Diffuser / SoftBox

While a bit bulky, for those serious about using flash, especially for macro photography, this is a really valuable piece of gear! This will help to soften the light and produce professional quality lighting. Look for the packable variety that are approximately 20cm in length. I would recommend the Lastolite Ezybox Speedlite.
High Capacity Batteries

If you splurge on a nice flash, you might as well spend a little extra on some nice rechargeable batteries as well! Not only will these improve the performance of your flash, but they will end up saving you lots of money before too long. Look for batteries with a capacity of at least 2000 mAH. The larger the capacity, the longer they will last and the faster your flash will recycle. Buying a charger with an 8 battery capacity is a good idea for longer trips. My recommendation are the Powerex Imedions.
I hope this introduction to using flash for nature photography has been helpful. Please always remember that the welfare of your subject should always come before your photo. Flash doesn’t necessarily have an effect on an animal when you use it, but there are of course exceptions. Use your judgement for each situation and always remember to keep your wildlife photography ethical. Best of luck with your photography!


