
How to Make Panoramic Prints
As a hobbyist or professional nature photographer, there’s nothing more satisfying than seeing your hard work culminate into a final product like a gallery-worthy print, and one such style is a panoramic print.
Of the many aspect ratios that we can choose to crop and display our images, perhaps one of the most visually impressive is the wide panorama.


As a landscape photographer, I am grateful for the opportunity to travel and explore the outdoors, creating artful images of nature’s beauty that I can share with others.
I have always been a fan of printing my photographs in a large format, as small photos tend to be forgettable while oversized prints can make a real statement and transform a room.

This article will explore what it takes to create fantastic panoramic prints, from the field to the printer, including some lesser-known pro tips that will bring your prints to the next level.
Before we jump in, it is important to start with a review of some background basics.
What is a panorama?
Generally speaking, a panoramic photograph can be described as one that is at least two to three times as wide as it is tall.
For example, in terms of crop ratios, an image that is 50cm tall and 100cm wide would be a 2:1 ratio, while a 50cm tall by 150 cm wide would be a 3:1 ratio, and so on.
Although it is possible to print images extending as far as 4:1 or 5:1 and beyond, a 2:1 or 3:1 photograph is much more visually appealing.

It’s worth noting that research reveals the natural field of view of the human eyes to be approximately 210 degrees horizontally, but only about 150 degrees vertically. This means that if you hold your head still and look straight ahead, you will naturally see more width than height.
As such, it makes perfect sense that panoramic photographs are naturally pleasing to the eye because our vision is already ‘panoramic’ by nature.
Panoramic photography
There are many reasons that panoramic photographs are so popular, starting with the super-wide field of view that they offer which makes them more interesting to look at.
Installing a large panorama on your wall is out of the norm and can generate the ‘wow’ factor in a space.
Stitching multiple images together to create a panorama also offers the advantage of substantially higher resolution, which allows us to make much larger prints, with incredible detail.

In terms of composition, they also allow us to include more visual elements from a scene than would otherwise be possible. A standard 2:3 ratio image of a mountain and lake scene can be beautiful, but including more details of the landscape in a panorama can evoke a stronger sense of place in the viewer.
Finally, most of the walls in our homes tend to be much wider than they are tall, lending themselves perfectly to a panoramic format image. It fits the scale of the wall better and looks more pleasing to the eye.
Read more: How to Take & Stitch Panoramic Photos
Choosing a subject
The surrounding views can be exhilarating if you have ever climbed to the top of a tall hill or mountain.
In modern society, many of us live in urban areas where we are not accustomed to such a wide field of view of the surrounding landscapes.
Therefore, grand vista scenery lends itself well as a subject for panoramic images, whether it be a majestic mountain range or simply a farmer’s field with a point of interest strategically placed to anchor the photograph.

Using the basic ‘rule of thirds’, a wide horizon line can be placed on the upper or lower third of the frame, depending on the scene’s subject.
Generally, if the foreground has strong visual interest, placing the horizon line on the upper third will include more foreground and less sky.
A distant object of interest can be placed near the left or right vertical third to create a pleasing natural balance in the photograph, as seen with the trees in the example below.

Conversely, if a dramatic and colourful sky is the main subject, then placing the horizon line on the lower third to showcase the sky makes more sense.
Other subjects that work well for panoramas are abstract details found in nature, such as closeup or macro views of rocks, leaves, or water reflections where the subject is not immediately apparent to the viewer.

With no horizon lines or skies to limit our compositions, these subjects add a whole new level of creativity to your photography and are fascinating to look at as a large panoramic image.
Read more: Composition in Landscape Photography – The Essential Guide
To stitch or crop
Shooting multiple overlapping frames in the field from left to right that can be digitally stitched together will result in a much higher-resolution file. This can be enlarged into a huge print with fantastic detail.
This is by far the best way to create a base image file with more options for cropping later, and one that has less size limitation when printing.
Below is a mountain vista that was intentionally shot on location as a panorama, with the end goal of being able to print the final image with unlimited size restriction.
With my camera positioned vertically in portrait style on my tripod, I shot four frames left to right, overlapping each frame by approximately one-third.
This allows plenty of detail on the edges of the frames for your processing software to identify and stitch together later.

I also shot multiple left-to-right sequences with different focus points to be sure that I had plenty of sharp files to work with while processing later on.
With my aim of printing big, I always ‘focus stack’ to make sure that my final prints are tack sharp from the foreground to the background.
If you wish to create a panorama from a single shot, most cameras give you a standard 2:3 ratio frame which you can also crop to a 2:1 or 3:1 ratio. Be aware that this method will limit how much you can enlarge your photo due to limited resolution.

At the end of the day, you have to decide for yourself what the final output of your image will be. Is it sharing it on social media, printing it small, or going big with the possibility of a monster-sized showpiece for yourself or a customer?
Read more: Megapixels – How Big Can You Really Print a Photo?
Cropping your images
Although there are several ways to crop your images with different types of software, I prefer the classic crop tool in Photoshop.
This tool allows you to quickly input your custom crop ratio with ease. Below, I am using a standard 2:3 ratio lava image shot in Hawaii that I wish to crop into a 3:1 panorama.
Step 1. In Photoshop, select the crop tool from your toolbar.
Step 2. Select the drop-down menu of the left icon shown below, then choose ‘Rule Of Thirds’, and ‘Always Show Overlay’. Next, under the cog wheel icon drop-down menu, choose ‘Use Classic Mode’ and select ‘Always Show Overlay’. You are now set up in Classic Crop Mode.
Step 3. In the top left of your screen, click the drop-down menu shown and select ‘Ratio’. In the fields directly to the right, choose your desired crop ratio. For this image, I typed ‘3’ in the left box and ‘1’ in the right box. This will give me the 3:1 ratio that I want for this image.

Step 4. You are now ready to crop. As shown above, click and hold your cursor anywhere on the left side of the image, then drag your cursor across to the right and down as far as you can, and then release. You now have a perfect 3:1 ratio crop box.
Step 5. Click and hold anywhere inside the crop box and drag it up or down to fine-tune the crop on your subject matter.
Step 6. When you are satisfied with the results, simply click the check mark at the top of the screen and you are done. Photoshop will display your newly cropped image.

The final 3:1 ratio panoramic print with custom framing makes for a breathtaking showpiece that fits the scale of the wall perfectly.
Overcoming paper size limitations
Traditional photographic printing on paper with today’s products and technology can produce outstanding results, and usually satisfies the needs of most photographers. But what can we do if we want to print larger than the paper sizes available?
Most manufacturers can provide long rolls of paper to print as wide as you wish, but you will be limited on the height depending on the width of the printer.
The answer is to create a ‘polyptych’ print, or in other words, one that is divided into multiple sections.
Although the number of panels depends on your visual preference, the most popular is the ‘triptych’, where the photograph is divided into three panels that are installed side by side.

The triptych panorama above is printed as an acrylic face-mount, where anti-glare acrylic sheets are laminated over the face of the paper print.
As the largest commercially available single sheet of acrylic is five feet tall by ten feet wide (1.5 x 3 metres), this lava image was divided into three square sections of four feet (1.2 metres) each, to create a spectacular twelve feet wide (3.7 metres) print.

Dye sublimation metal prints are also very popular as an alternative to paper prints, although the largest metal sheet available is four by eight feet (1.2 x 2.4 metres).
Using the triptych method, your print sizes are no longer an issue, as long as you have the resolution in your image files to back it up.
Read more: How to Print Photos – A Photographer’s Guide
Basic gear and shooting tips
As I specialise in printing my images very large in the highest quality mediums for my customers, the quality of my print files is crucial to make prints that are clean and sharp.
This comes through a combination of many factors, which I will mention briefly here. Let us start with gear and shooting technique:
1. Use a camera body with a high megapixel count. I am currently shooting with the Nikon Z7II with a 45.7 MP sensor. The higher the resolution of your digital files, the bigger you can print.
2. Use superior-quality lenses. Also remember to shoot at the sharpest aperture, usually 2-3 stops down from your widest f-stop. I almost always shoot at f8, which is a sweet spot on many lenses.
Shooting at smaller apertures like f16 or f22 causes ‘lens diffraction’, which softens your images, and becomes very apparent when doing big enlargements.
3. ALWAYS shoot in RAW format. This will give you the largest, most detailed digital files.
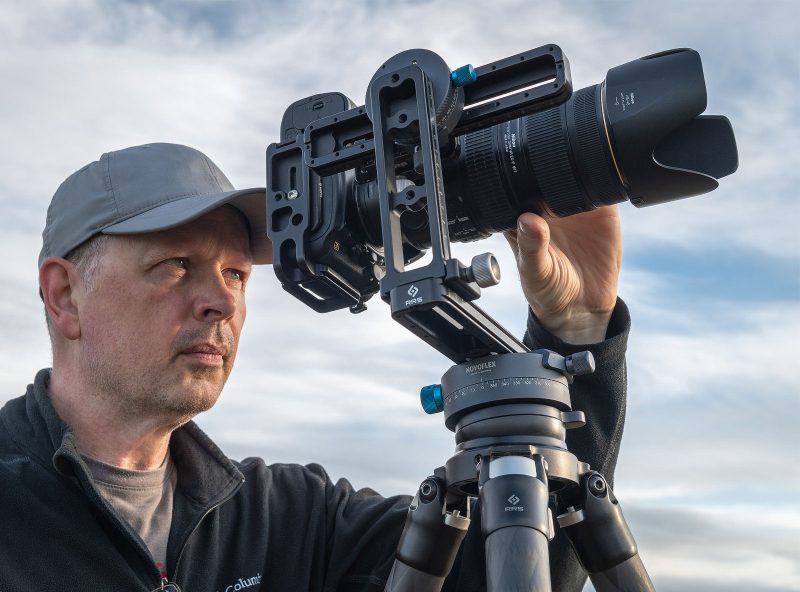
4. Use a dedicated panoramic rig. Although not necessary, it will make your shooting much easier. I have a custom multi-row rig utilising Really Right Stuff and Novoflex gear. An RRS levelling base on my tripod eliminates the need to set the tripod legs perfectly level.
On top of that is my Novoflex click-stop panning base, which will ‘click’ as I am panning left to right, for perfectly overlapped frames while shooting.
The horizontal rail, vertical rail, and nodal slide rails are from RRS, as well as a second smaller Novoflex click panning base for vertical panning adjustment, as seen in the image above.
Processing tips for superior results
The next step is image processing, which can be complex and therefore difficult to cover in a short article.
I recommend investing in some professional video tutorials to learn about hardware and software, non-destructive processing techniques, and sizing your images.
At the end of the day, the best education will come from trial, error, and experience. The following points can all be studied in detail from the wealth of free information online.
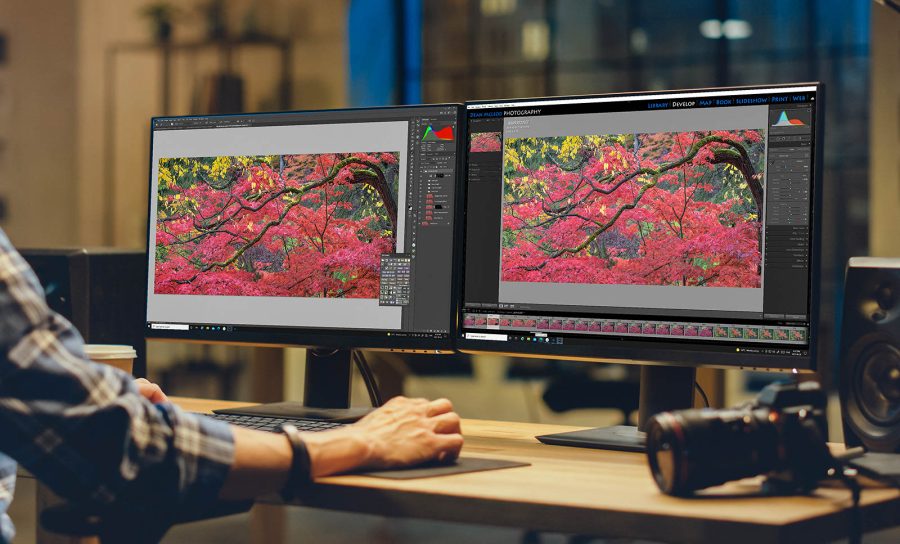
1. Always use a colour-calibrated monitor. This is crucial if you want your prints to look like what you see on screen, without major colour shifting. I use an X-Rite i1 Display Pro calibrator, as seen below.

2. Set your RAW processor and other software workspaces to 16-bit mode, Adobe RGB. This will keep your files as detailed as possible, in a colour space that is universal to most printers.
3. Processing for the web is different from processing for print. Remember that any image will look good on your phone or a computer screen, but if not processed carefully, it will fall flat on a big print. Artefacts or digital noise from poor camera or processing techniques, which are invisible at small sizes, are greatly exaggerated the more you enlarge.
4. Most print files need to be brightened. Your bright computer screen is projected light, while a print is reflected light. If you do not add some brightness to your print files, they will almost always print darker than what you see on your monitor.
Remember to use the histogram in your processing software to be sure you are not blowing out any highlight detail when you brighten. I use a luminosity mask on my brightening layer in Photoshop to shield the highlights from becoming overexposed.
(Secret) Pro tips!
When I started, like any new photographer, I had no idea what I was doing. Learning the best practices for shooting, processing, and printmaking takes time and experience, for which there is no substitute.
I encourage everyone to reach out online and chat with professionals who print their work, and search online for instructions on any techniques below that you are not familiar with.
The following are a few tips I learned over the years that I wish I had learned from the beginning and will elevate your game when it comes to making beautiful prints.
1. ‘Pull’ your ISO when possible. Many camera bodies support ISO settings below the factory default, so use them if you can. My Nikon allows me to drop my ISO as low as ‘Lo 1.0’, which is the equivalent of ISO 32.
This will not degrade your image files whatsoever and will provide the cleanest noise-free images which are critical for big enlargements. Noise and artefacts in your files will become greatly exaggerated when you print large.
2. Focus stacking your images for sharpness from foreground to background. Out-of-focus areas in your images become dramatically apparent the bigger you print. Photoshop can blend and align your image files automatically.

3. Use quality ‘interpolation’ algorithms for upsizing your images. I always upsize at 300ppi (pixels per inch) which is the industry standard, using the ‘Preserve Details 2.0’ algorithm in Photoshop.
If you do not see it listed in the image size menu, you will have to enable it by following these steps: Click Edit > Preferences > Technology Previews > Enable Preserve Details 2.0 Upscale > OK. The algorithm should now be visible in your menu.
4. Use a 2K monitor for critical sharpening. You may not want to hear this, but for those of you using high-definition 4K monitors (which are fine for overall processing), keep in mind that proper sharpening techniques are impossible due to the high pixel density of 4K.
You will not be able to ‘see’ what you are doing with any degree of accuracy. I use a Dell U3011 30-inch monitor, with a resolution of 2560 x 1600 (or 2K). Viewing your upsized image at 25% zoom (no bigger or smaller) on a 2K monitor while sharpening will never let you down.

5. Softproof and desaturate out-of-gamut colours using an ICC profile. Remember that computer monitors display more saturated colours than you can print on paper.
The biggest culprits are saturated colours in skies, which will print blotchy unless you desaturate them slightly first. Download the ICC profile for your paper stock and activate in Photoshop (View > Proof Setup > your ICC).
Search for how to use the ‘Gamut Warning’ tool in Photoshop and desaturate selected areas of your image if needed using a Hue/Saturation layer.
Finally, invert your white mask to black on the Hue/Sat layer which hides all the desaturation, then slowly paint away the coloured gamut warning areas on the black mask with a soft white brush set at a lower opacity.
In conclusion
There is nothing like printing a grand panoramic photograph to celebrate the hard work you put into your photography.
In a world where beautiful photographs rarely advance past viewing on the web, I encourage everyone to print their images. It is far more satisfying to see them on your wall, rather than hiding them on your hard drive.
These tips are sure to help you in all aspects of your workflow, from shooting in the field to finalizing the edits on your print files. I hope these new skills will inspire you to set out and create your next panoramic masterpiece.


