
Megapixels: How Big Can You Really Print a Photo?
How big can you print a photo? There’s something special about seeing your photos in print. Whilst they may look great on the screen, you can’t beat holding a physical copy of your work.
If you take a shot you’re particularly proud of, you might find yourself tempted to print it very large and show it off. But how many megapixels do you need to print at larger sizes?


I was always told “megapixels don’t matter” when I was first starting out. I’m not quite sure why I was told this, but that definitely isn’t true. Greater resolutions mean you can print larger, have more room to crop your photo, and record finer detail in an image.
Sure, owning a camera with a lot of megapixels doesn’t mean your levels of creativity and talent improve. But it does open the door to more options when it comes to editing and reproducing your work.
The perfect print quality
When you send a photo off to be printed, you should ensure the file’s resolution is set at 300 PPI (pixels per inch). This is seen as the optimum resolution for printing; it should appear just as good on paper as on the screen.
You can adjust the resolution in your photo editing software. Don’t forget to also adjust the dimensions to your ideal print size. For Lightroom users, this is in the export window. For Photoshop users, navigate to “Image > Image Size…”.
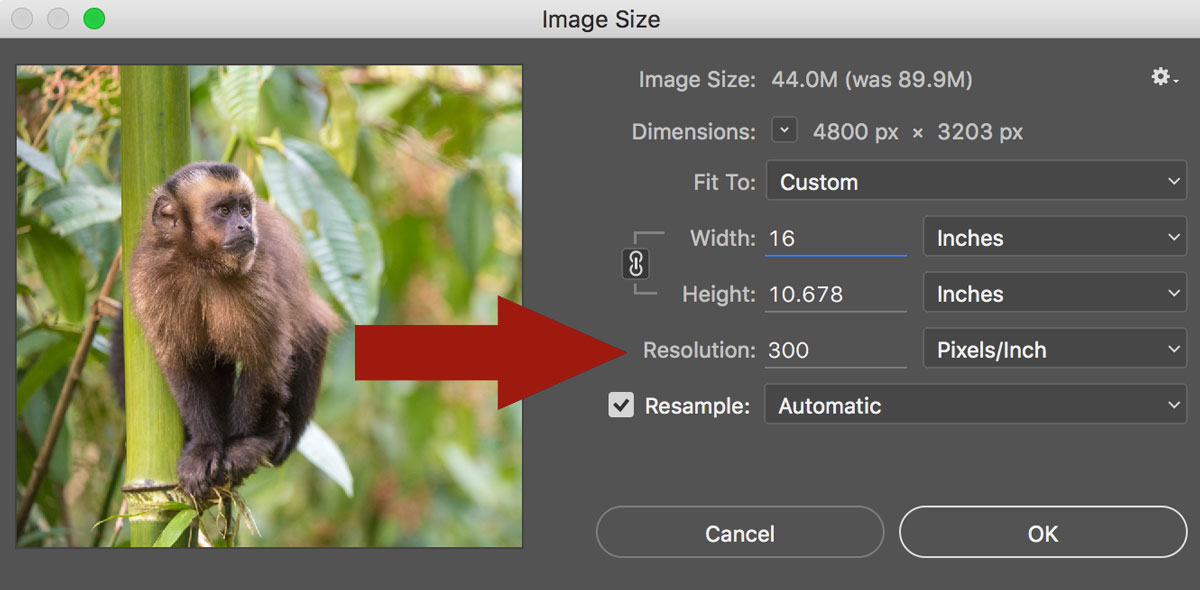
If your file is spat out of your camera at 4928px x 3264px then that means you have 16 megapixels: (4928 x 3264) / 1,000,000 = 16. This means you could print at 16″ x 12″ with no problem. You can see this by opening up the file and switching the dimensions to inches.
If you were to print larger, then you’re beginning to stretch the file and degrade the quality, although this doesn’t become immediately noticeable (see the next section).
Contrary to belief, PPI values do not affect your viewing experience on a screen. You could have a photo at 1000 PPI and 1 PPI, and they will display exactly the same on the screen.
If you’re trying to compress a photo online so people can’t print a copy of it, you need to reduce the file’s dimensions rather than the resolution.
You may have heard the term DPI (dots per inch) before, but this actually refers to the printer. The printer uses a number of these dots to create one pixel of your photograph on paper. Unless you’re printing your photos yourself at home, you don’t need to worry about DPI.
Read more: How to Print Photos – A Photographer’s Guide

How big can I print my photo?
With all that in mind, take a look at the following chart which will give you some idea of how large you can print your photos depending on the number of megapixels your camera has.
The green spot means you’re able to achieve the optimum printing quality, and the yellow spot means the quality has started to degrade (even if it isn’t that noticeable in reality).
For example, open a 36 megapixel file and the dimensions will be near 16″ x 24″, so it gets a green spot. Open a 24 megapixel file and the dimensions will be less, so it gets a yellow spot at the 16″ x 24″ size.
All points in the chart are as if you are printing 300 DPI. So, yellow spots mean the photo is ‘stretched’ over too many pixels and has lost sharpness.
However, in truth you are very unlikely to notice the difference between a ‘green spot’ and a ‘yellow spot’ unless you looked very closely or used a magnifying glass. Throughout the industry everyone prints at the ‘yellow spot level’ without issue.
Basically, anything with a green or yellow spot and you are good to go. If you are a total perfectionist producing the highest of high quality work, then you’ll want to stick to green spots only. But if this is you then you are probably still shooting with film to produce very large, high resolution images.
Resampling
This is a bit of a saviour for those of us trying to print a little bigger than our file’s resolution. Tick the ‘resample’ option in Photoshop (or set the PPI value too high in Lightroom) and the software will add in the extra pixels. Of course this isn’t foolproof, and blowing pictures up extra large will begin to look strange.
If you un-tick the resample option, you’ll see that as you reduce the PPI value, the dimensions of the image become bigger. A 100px x 100px file, at 100 PPI will produce a 1″ x 1″ print. But at 10 PPI, it’ll produce a 10″ x 10″ print.
So, resampling allows you to print larger whilst retaining the PPI value of your choice.
But how can photographers print huge billboards?
Surely you need a 1,000 megapixel camera, right? Wrong! Actually, billboards are not printed at 300 PPI. Instead, they’re more likely printed somewhere around 15 PPI.
This means that up close the photo looks pixellated and fuzzy, but when have you ever pressed your face up against a billboard?

The viewing distance of a photo makes a real difference in how we perceive it. Viewing a 300 PPI photo up close will allow us to see all of the detail, sure, but with a billboard, we won’t be doing this. 15 PPI is more than enough since people will be standing many metres away from it.
This means that to print for a billboard, you don’t actually need a very high resolution camera.
So, if you want to print larger than your resolution allows (the red spots on the chart above), then decreasing the PPI (e.g. to 240 or less) will let you do this.
But just make sure the print isn’t going to be viewed up close! If someone is viewing from a few feet away, then you’re probably safe.
Be aware of cropping
You may have a 36 megapixel camera, but as soon as you start cropping you are reducing the number of megapixels of the file. 1024px x 1024px equates to one megapixel, so be careful with how drastically you are cropping if you wish to start printing your work.
In conclusion
The number of megapixels you need is down to the viewing distance versus the size of the reproduction. Once you understand this, then you will be able to reproduce your work at its optimum and get the most from those megapixels.
For more tips, read our guide on How to Print Photos for Photographers or download our eBook Breaking Into Business which looks at how you can make money from your photography.


