
How to Take & Stitch Panoramic Photos
Out of the various picture formats – square, 3:2, 4:3 and so on – the one with the most impact is arguably the panoramic, especially when viewed as a large print. Because it replicates how our eyes scan across a scene, a well-executed panoramic photograph gives a greater sense of actually being at the scene than any other format.


A number of specialist panoramic film cameras have been popular over the years, including the Hasselblad X-Pan and the Fuji 617, both with true ‘letterbox’ formats. There are very few digital options, however, and those which exist are prohibitively expensive. It’s possible to crop from a single frame, but this requires an extremely high resolution master file if you want to produce a decent-sized print, so for most of us the best option is to shoot a series of pictures across the scene and then stitch them together in software.
Composition
Compositionally, panoramas are very different to the squarer aspect ratios. Our eyes will want to scan horizontally across the frame – usually from left to right in western cultures – so the scenes which work best are those with strong horizontal planes. A strong focal point, such as a building, clump of trees or prominent hill, will help to break up the horizon and slow the eye down on its journey across the frame.

Equipment
The key to successful stitching is producing a series of pictures which align successfully. If the point of perspective changes much from one picture to the next, this may result in misalignment – known as ‘parallax error’. To prevent this, the camera needs to rotate around the optical centre of the lens: its ‘nodal point’. There are specialist panoramic heads which allow this, but in practice, parallax error is really only a problem if there is foreground interest close to the camera. Unless you specialise in panoramic images, it’s probably not worth the expense.
You will, however, need a sturdy tripod, and a head with a good panning action. If the panning base is at the top of the head, as with the Arca–Swiss Monoball P0 for example, once you’ve levelled the camera, you’ll be able to rotate it without having to make any further adjustments. If the panning base is at the bottom of the head, you may have to level the camera again between shots. Geared heads, such as the Manfrotto 410 Junior Geared Head, make this process much simpler.

Technique
Stitched panormics aren’t hard to create as long as you employ some basic techniques. You don’t want any variations in exposure, white balance and so on across the frames, so take meter readings from the whole scene, average them out and set your exposure manually. White balance and focus should also be set manually, and polarisers should be avoided as the effect will vary across the series of pictures.
Many photographers prefer to shoot in portrait format, taking around 7 or 8 frames, as this reduces the amount of distortion and makes it easier to merge the pictures. That said, many scenes will stitch together perfectly well from a horizontal series of 3 or 4 shots, and the advantage of this is that there is less chance of conditions changing from one image to the next – cloud movement or different wave patterns in a seascape can cause alignment problems, for example.
Ensure to overlap each frame by around 25%, as this will make them easier to line up, and shoot slightly wider than you think will be necessary to allow margin for error when lining up the frames, and to give cropping options.
If you’re lucky enough to own a tilt-shift lens, this can provide one of the best ways of shooting a sequence for panoramic stitching. Simply use horizontal shift to take three images – one centred, one shifted left and one shifted right. The main advantage of using a tilt-shift lens is that the camera doesn’t move, with the result that there is no shift in perspective and the images will line up easily.
Stitching a Panorama
If you shoot a lot of panoramas, you may want to invest in a dedicated stitching program, such as pTGui, but for the occasional panoramic, Adobe Photoshop works very well. Just follow these simple steps:
- Download your photos and make basic adjustments to the images, ensuring that these adjustments are the same on each image. You could bulk process them in Adobe Lightroom to ensure you apply the same adjustments.
- Open the images in Photoshop and navigate to “File > Automate > Photomerge“.
- In the dialogue box, choose your option for merging the images. In most instances, “Auto” will work well, but Cylindrical and Perspective can also be effective, so be prepared to experiment.
- Select your images, and click “OK”. Depending on how powerful your computer is, you may want to go and have a cup of tea at this point as it could take a while.
- When the images are merged, each one is automatically placed on its own layer. There will be some blank space around the edges of the image, which is a result of how the individual images have been lined up. Crop the image to remove the blank space.
- Flatten the layers and carry out final adjustments to colour balance, contrast and so on.
An Example
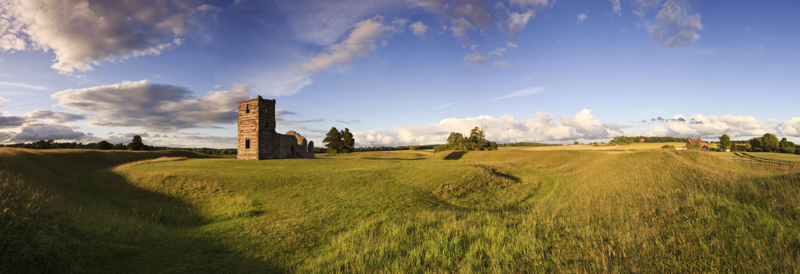
For this example, I used just three images. Without any close foreground, there was little chance of distortion shooting in landscape orientation, and I was able to work more quickly, which was important in rapidly-changing conditions at sunrise.

The raw files were processed with the same white balance, exposure, contrast and saturation. This is how they look opened up in Photoshop and lined up next to each other.

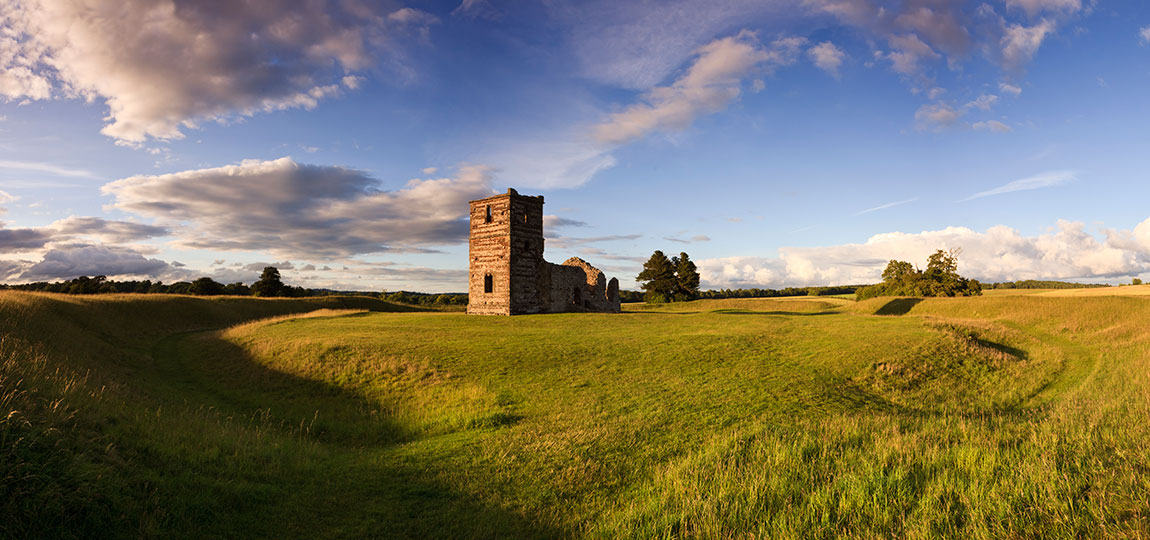
This is the final result, once the merged image has been tweaked for exposure, contrast and colour balance.
That’s about it! It’s a fairly simple process, so have fun with it and keep experimenting. Share some of your panoramic photos in the comments below!


