
How to Post Panoramas to Instagram
Panoramic photos never did well on Instagram; the mobile format does not lend itself kindly to very wide images. But with the ability to post a chain of photos, it is now possible to post “swipeable” panoramas to Instagram. Suddenly, panoramas look great on the platform! Cutting up a panoramic photo into a few “pieces,” you can post them altogether so that your followers can seamlessly explore the scene.
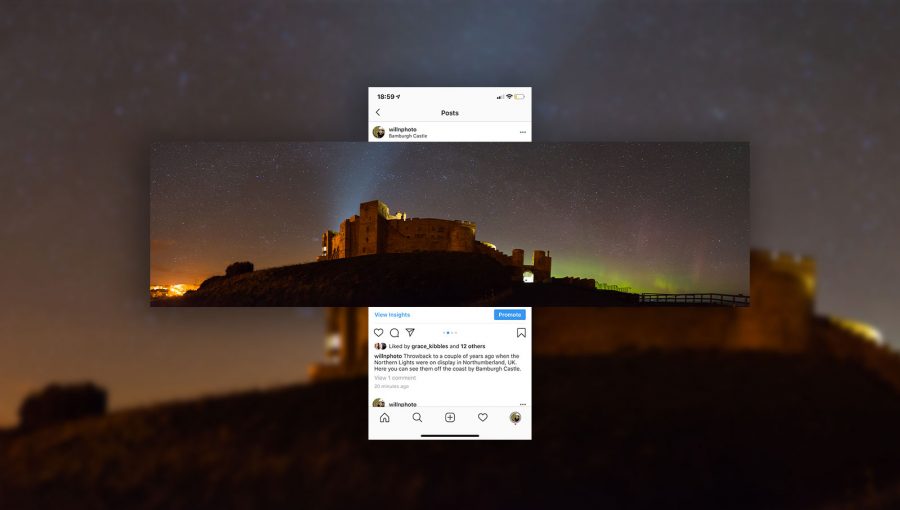
To do it, you need to make use of an app on your smartphone. It ensures that the cropped sections of your photo are perfectly sized and lined-up to allow for the seamless transition. Here’s an example of how it works once the panorama is posted to Instagram:


It’s really simple to post a panorama to Instagram – all you need to do is:
- Download the appropriate smartphone app
- Automatically chop up the image into multiple sections
- Save them to your phone’s photo album
- Post them to Instagram!
Now, let’s take a look in more depth at how exactly to do it.
Which app to use
There are a number of different apps to use, some of which are almost useless. So it’s important to choose the right one to make the process as smooth as possible, and to avoid any unwanted watermarks being added to your photos.
For Android users, an app called InSwipe seems to be the clear choice. There are no watermarks added to your image, and you can cut up a photo into as many as 10 pieces (should you so wish).
For iOS users, the choices are not so great. I’ve had most success with Panorang. It has no annoying adverts, and it doesn’t add watermarks to the cropped versions. It also supplies a zoomed out version of your panorama, showing the full image in one square – however this slide does have a watermark, but you’re under no obligation to actually post it.
Posting the panorama to Instagram
Once you’ve got the sections cropped successfully and saved into your phone’s photo album, head on over to Instagram. Click the new post icon, and then tap on the button that allows you to select multiple images. Starting from the left of the image, tap on the sections in order.
Once you’ve done that, press next and enter your caption as your would normally. Once posted, you’ll be able to seamlessly swipe between all the different sections! Here is how it looks when you’re posting it:
It’s as simple as that! It’s a really fun and interactive way to post panoramas to Instagram, and hopefully your followers will appreciate the effort too.
If you’re looking for top tips on how to take great panoramic photos, make sure to check out our full tutorial here. Also, don’t forget to check out the best hashtags for nature photography on Instagram.


