
How to Use the Orton Effect
You may already be familiar with the Orton Effect, or the Orton slide sandwich. It is a creative technique developed by a Canadian photographer in the eighties called Michael Orton who wanted to imitate watercolour paintings.

His idea was to capture two images of the same scene – one sharply focused and the other defocused – and then overlay them to create a soft, bright, ethereal glow.


The effect is particularly well-suited to back and side-lit subjects, misty scenes, woodlands, and any scene containing lots of foliage, so look for these elements when planning your Orton Effect images.
While Orton had to sandwich and blend pieces of film, photographers can now replicate the effect simply and precisely using software, or they can use their camera’s multiple exposure mode.

It is up to you how you wish to create the effect, but results are attractive, and this is a technique worth adding to your repertoire.
In an age when photographers obsess over image quality and critical sharpness, it might seem odd, and somewhat counterintuitive, to discuss and promote a technique that will soften your images!

Like other creative techniques – for example, Intentional Camera Movement – the Orton Effect style can be a hit-and-miss affair, suiting some scenes better than others, and it certainly shouldn’t be overused.
But, when applied well and appropriately, this technique will enhance your images and help them stand out from the crowd.
What are the advantages of creating the Orton Effect in-camera?
Today, most photographers replicate the Orton Effect in post-processing, where you have optimum control, and the effect is reversible.
However, don’t overlook the option of doing things in-camera. Using Multiple Exposure mode, most digital cameras will automatically blend the in and out-of-focus images in-camera to produce a single Raw file (check your camera’s user manual for details).

For example, on a Nikon, switch on Multiple Exposure mode via the Photo Shooting Menu. Via this menu, you can then select the number of shots you wish to overlay – select 2 at first, although you can opt to blend more frames for different effects.

Your camera will most likely provide a choice of Overlay modes. Average is a good starting point, as this will achieve an average and correct exposure for your sequence.
However, cameras typically offer other options like Add, Lighten, and Darken to create different results. Have a play with each option to discover which mode you prefer.
When you switch on Multiple Exposure mode, your camera may allow you to capture a single multiple exposure or a series. Remember that if you select a series, you must switch it off again once you’ve finished shooting, otherwise, you will continue to capture multiple exposures.
I guess the most obvious advantage of creating the Orton Effect in-camera is that it provides greater satisfaction – let’s be honest, it is always nice to get things right in-camera.

Doing so also reduces the time spent on a computer, which is particularly appealing for those who either don’t enjoy editing or just generally struggle with post-processing.
For me personally, one of the greatest appeals of applying the Orton Effect in-camera is that results are then eligible to be entered into photo contests that demand you submit a Raw file at the latter stages of judging.
Many big competitions won’t allow you to enter composite images, ruling out Orton Effect photographs that have been created in post-production as opposed to in-camera.
Read more: Create Impressionistic Images Using Multiple Exposures
Top tips for creating the Orton Effect in-camera
Creating the Orton style in-camera can be very hit and miss, but it is undoubtedly good fun.
Here are some top tips to keep in mind as you use this technique:
- With Multiple Exposure mode switched on, first take your in-focus frame, and then defocus the lens before taking the second image.
- It is normally best to have the camera fixed on a tripod when doing this, to ensure the frames align perfectly.

- Experiment with the amount you defocus the lens for different results. Subject selection is key.
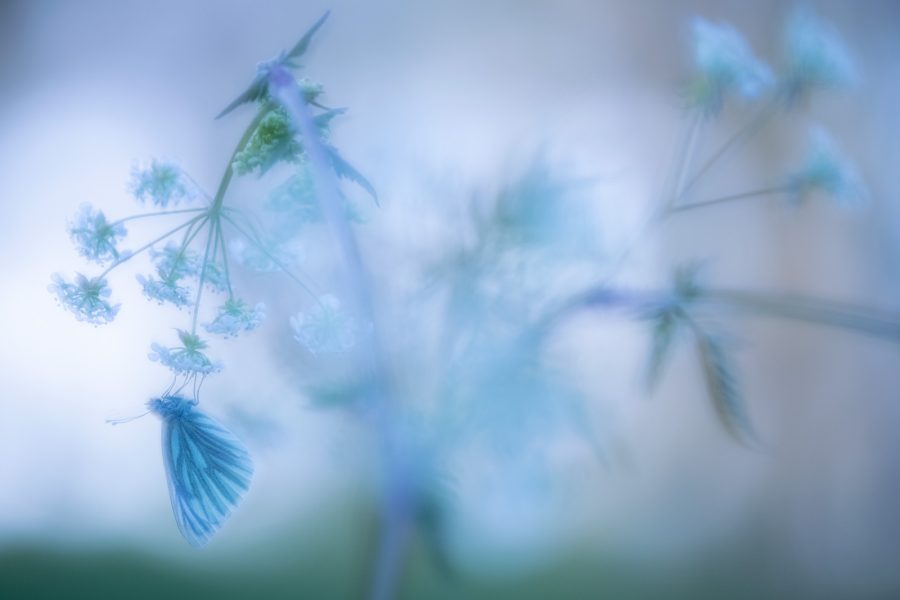
- Remember that this technique not only suits landscapes but other subjects too – I’ve used it successfully when shooting close-ups of flowers and backlit butterflies. It is a popular technique among portrait photographers too.
- Ultimately, like any creative technique, apply it thoughtfully and appropriately – this technique won’t miraculously transform an average photo into a good one.
How to create the Orton Effect in post-processing
Understandably, many digital photographers favour producing Orton Style results in post-processing, where you have more options and control.
You also don’t need to take two separate in and out-of-focus frames to create the look.
Instead, simply use one sharply captured image, duplicate it, apply a Gaussian blur, and then merge the layers.
You can apply the Orton glow to your shots using almost any photo editing software, including Adobe Lightroom, Luminar, and Nik Color Efex – you can also download or create a Photoshop Action.

However, for this step-by-step tutorial, I will use Photoshop, as it is the most widely used program. There are various ways to generate a luminous effect, but this is one of the simplest methods to get you started.

Step 1: Select a suitable image and open it in Photoshop. Now create a duplicate layer by clicking Layer > Duplicate Layer.

Step 2: With your new layer selected, click Image > Apply Image. From the Blending dropdown menu, select Multiply and click Ok. Your image should darken.

Step 3: With your new layer still selected, alter the layer blend mode within the Layers window to Screen – or try one of the other modes, like Soft Light. Your image will return to its original brightness.

Step 4: Now click Filter > Blur and from the dropdown menu select Gaussian Blur. Use the slider to apply a medium amount of blur, in the region of 40-75 pixels. However, you will want to experiment with the level of blur, depending on the scene and effect you wish to apply. Now click OK to apply.

You will now see a dreamy softness and slight overexposure of the image’s highlights. You can moderate the Orton Effect by adjusting the layer’s Opacity in the Layers window. You may also need to readjust exposure by clicking Image > Adjustments > Levels.
In conclusion
The Orton style has grown massively in popularity over the past few years, and you will find no shortage of examples online. The technique can be employed to enhance existing images to give them an attractive, dreamlike glow.

But better still, go out and capture fresh work that you know will suit the effect.
Don’t overdo the technique, though – only use it sparingly and appropriately. And don’t be tempted to apply it too heavily – over-processed Orton-style photographs can resemble HDR shots.
That said, as with any creative technique, results are very subjective and ultimately you are aiming to produce results you enjoy – Orton himself was aiming for an abstract look, so it is up to you how far you wish to push things. Just go and have fun with the effect!


