
How to Choose Your Best Images After a Shoot
As a photographer, there’s nothing I enjoy more than being outside, immersed in nature, capturing images of my subject. However, in reality, the time spent out in the field is only one small step to producing final images from the shoot. Many more hours are spent sitting in front of my computer, choosing the strongest images before going through the editing process.
In this article I’ll walk you through my own workflow and why I choose the photographs I do. Hopefully this will help you choose your own best images after a shoot. I can’t talk about this without a little background on how I approach my photography.


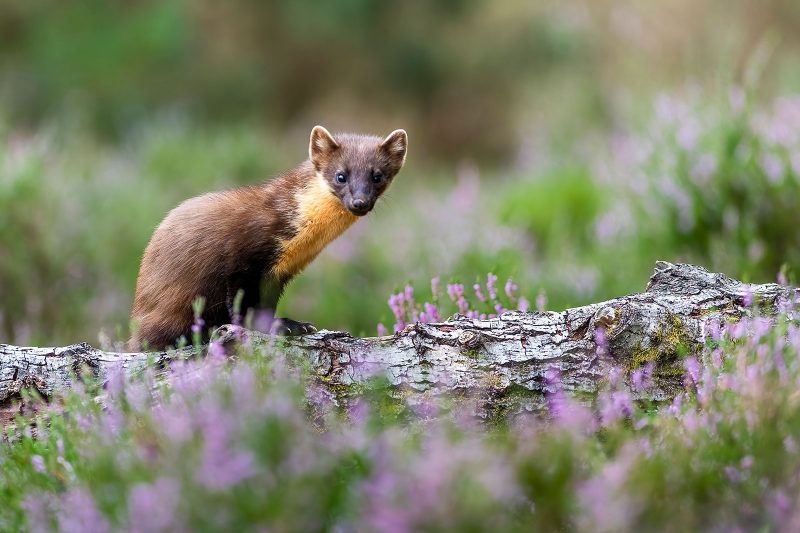
I primarily specialise in a few species found in the Scottish Highlands: red squirrels, mountain hares, pine martens, crested tits, and red kites. I like to get to know a species (and in some cases, individual animals) by learning their habits and behaviours. I believe this leads to better images and makes for a richer experience.
I use Nikon cameras: primarily the full-frame Nikon D850, but also a crop-sensor D500. I tend not to use a tripod and I strive for eye-level images of the subject where possible. Most of my images only ever appear on social media or my blogs, but I also sell prints and greeting cards and upload to image libraries.
I photograph in raw, and so post-process all my images in order to enhance them. However, I still strive for a natural and unedited look. This is where workflow, and the ability to choose the best shots, comes into play.
Overshooting, or not?
I should start by telling you how it’s best not to take too many images, because the more you have, the more lengthly the editing process becomes. However, I often find myself returning from a shoot with hundreds, if not thousands, of images!
My argument for this is that if you photograph wildlife in bursts, one image in the series might have something special that you’d never have captured if you were taking single shots.

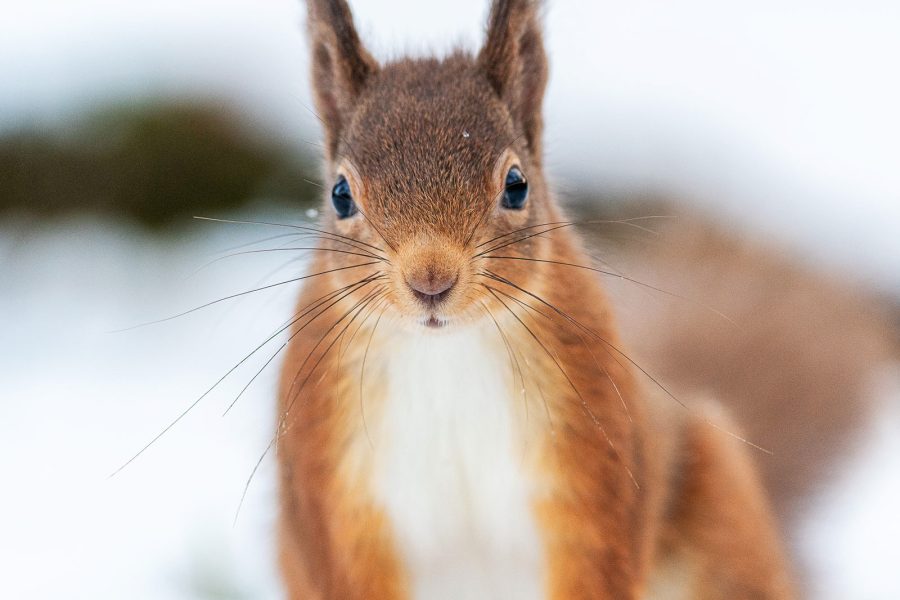
For example, when photographing a red squirrel eating a nut, one image in the series might catch the squirrel looking at me, with what appears to be a smile on its face: a fleeting, photogenic moment that I might not have caught if I hadn’t been shooting in burst mode.
If you have the time to edit, the space on your memory cards/hard drive, and the patience to go through the photos, then I’d say to take as many images as you wish!
Importing your photographs
I photograph in RAW L, so on a D850 with its large sensor my file sizes can be up to 65mb. I use the Adobe photography package and do the majority of my post-production in Lightroom Classic.
I import directly into a Lightroom catalogue and can add titles, metadata, and initial development settings during this process. The Library module makes it very simple to see my photographs in both thumbnail and full size, and so it’s easy to tag those I wish to keep or delete.
As my files are so large, I delete the obviously poor images in-camera if I have time to do so during the shoot. By this, I mean the red squirrel that was moving when my shutter speed was too low, capturing nothing more than an orange blur!
Read more: Don’t Delete Your Raw Files for DNG Format
But, if I don’t have any quiet moments, or if I’m not one hundred per cent sure it’s a duff image, I’ll wait until I import into Lightroom, where I can see each photograph better. Sometimes an image that looks poor on the back of the camera has something going for it, so it’s often worth taking a closer look.
There are two options when importing. You can either import all your images, or you can discard those that you know you’ll never use, prior to the import.
In Lightroom Classic you can select photographs not to import by either unchecking from the thumbnail screen, or scrolling through the images unticking (or clicking “x”), for those you definitely don’t want. This can depend on the speed of your computer during import, and the space on your hard drive.
The first pass through the images
Once imported, I go through the images one by one, flagging with “x” to discard. You could also do this with thumbnails, but I prefer to see each image at full size. I enjoy this part of the process the most, as it’s the first opportunity to see what I captured. There are some surprises in there more often than not, and images that will make me smile or laugh out loud.
However, this is an initial cull so I do it quite quickly. At this point I’m not comparing similar images to find the best one. I’m only removing those that are soft, poorly composed, et cetera. Lightroom Classic also has an option called “Auto Advance”. This isn’t turned on by default, but is in the photo tab (Library module). It means that, if you flag an image, you will automatically move on to the next one, which can be a real time saver.
During this first pass, I’ll sometimes come across an image that makes me smile or chuckle- these I’ll give a positive “p” flag. It doesn’t mean it’s a keeper, but I know to give it a better look. Once this first pass is completed, I’ll delete those that I marked with an “x” (photo/delete rejected photos)

What do you want to achieve from the shoot?
Now, the real work begins. I start to go through the images in the Develop module. I often do a quick edit on the photographs, just to check their potential. To do this, I tend to use the “Auto” function and then tweak. If there are a series of images taken with the same conditions/settings, I’ll copy those edits across the batch.
This time I’m looking at the photographs with a more critical eye, and I use “p” to flag the ones that have potential. It’s worth having a think about what you want to achieve from the shoot:
- Where will the images be published?
- Are you planning to print?
- Do you want to show specific behaviours or tell a story? Habitat, interaction, emotion?
However, it’s also important to think about the future. Keep all images which might prove useful for a future project, if you have the space to do so. It doesn’t matter if you don’t have time to process these now, but do remember to save the raw files, and tag appropriately so you can locate them at a later date.
Deciding which photographs to keep
So many factors go into my decisions about which images to pick at this stage. Now is the time to check image quality, looking more closely to ensure the subject is in focus, and there are no distracting features that can’t easily be removed.
Note: for wildlife competition submissions you cannot change the physical scene, so bear this in mind as well.
My most important criteria when choosing which photos to keep is this: does the photograph evoke an emotional response? I love emotive images, and I also find them to be the most successful on social media. Success leads to more shares and more followers, which lead to a larger potential client base.
For me personally, eye contact is also an important factor in deciding which images to keep, especially for social media use. Eye contact captures the viewer’s attention and creates an instant connection.
Sometimes this is obvious, as above, but often I have to look a bit closer. Here are three images, taken in one burst, of a red deer stag walking past me. In the top two photos the stag is staring straight ahead, but in the bottom image he’s looking at me out of the corner of his eye. It’s a little bit cheeky and it’s the one I’m immediately drawn to. So, it’s the keeper!

To help users narrow down their selection, Lightroom Classic has “Survey View” in the Library module. Select the images you wish to compare, and either click the icon with 3 little rectangles in it, or type “N” to access.
You can now compare images and whittle them down to the best. This can be really helpful when you have a few similar photographs, as it saves you scrolling back and forth between them. Seeing them all together, it becomes immediately obvious which are the stronger shots.
If I find I have two or three left to choose from, I’ll check the exposure settings. Because I use auto-ISO, this often changes during the burst. So, if one of the finalists has a lower ISO than the others, that’s the one I’ll pick. It’s worth being a bit tough on yourself here and choosing just one if they are all almost identical, as there’s really no point keeping two.
In this screenshot I’m looking at 6 images in survey view. I can flag those I decide to reject. These have the little black flag at the bottom left. I can then click the cross at the bottom right to remove from survey view, until I’m down to one.

Considering your composition
Composition is very important too. If the subject is in profile, I’ll tend to choose those where the animal is on the third and looking into the frame– I like space in my photographs. Red squirrels move very quickly, often pausing for a mere second, so I have to react very quickly to get the shot, and often don’t have the time to get that perfect composition in-camera.
Having a full frame camera with a large sensor means I can crop if it’s a strong image. But, if the animal gives me time, I’ll recompose and take a second shot. Of these two, I would choose the right-hand image.

Read more: Composition in Wildlife Photography – Getting Creative
Checking your background
This leads on to thinking about backgrounds. Where possible, a clean image is better. There are a number of ways to achieve this: a shallow depth of field can blur the background, or just try not to photograph your subject when it is in a cluttered spot, or too close to the background.
Where possible, I try for eye-level images to achieve this. If I’m not using a hide and the animal is on the ground, I’ll lie down. With a relatively shallow depth of field (anywhere between f/2.8 and f/5.6, depending on which lens I’m using), it means everything surrounding the subject is soft.
If you photograph looking down on your subject, the surrounding area will be in focus and detract from the subject. The first of these two images of rabbits was taken through my kitchen window, and I’m looking down at the grass.

For the second, I was lying flat on the ground. You can see the different it makes.

Other factors to consider
I also look for images that can be described as anthropomorphic, because these also evoke an emotional reaction. Red squirrels, for example, often clutch their paws to their chests when nervous: this has an air of vulnerability about it which pulls at the heart strings. Mountain hares raise their back paws in what looks like a wave or a high-five when cleaning between their toes.

Images that clearly show behaviours are worth keeping, as these can be great for stock sites and articles. In this example, the squirrel is cleaning her paws.

To crop or not to crop?
One of the great things about editing in Lightroom Classic is that it’s non-destructive. It’s always possible to return to the original state, or some previous point in the edit process.
To do this, go to the Develop module. At the left hand side of the screen there’s a section called “History”, which details everything you’ve done to the image. You can return to any of those steps just by clicking on them. This means you can experiment with different crops to see how they improve the image.

However, I would recommend that you don’t export cropped images if you plan to use Adobe Photoshop for any final post-production. It will give you more flexibility and a higher quality file, that can then be cropped and saved as a new file for whatever purpose is required.
I would also suggest at this point that, when out photographing wildlife, it’s better not to get too close to your subject, especially when using a prime (fixed focal length) lens. Not only is this less stressful for the animal, but it also means you won’t be in danger of losing part of the subject from your shot if it stretches or changes position, and you’ll have more creative flexibility in the edit.
Read more: Ethics in Wildlife Photography – Code of Conduct
This squirrel came so close to me that I was unable to get the tips of its ears in the frame. However, I kept it because I loved the intensity of the eye contact and the sweet expression.

Environment images
In my experience, close-up images with eye contact work best for social media. However, don’t be afraid of wide-angle or environment images too. You don’t always need to crop. In fact, when the subject is small in the frame it can also be emotive, telling a story about the animal’s habitat and the conditions in which it survives.
You may have taken these by accident when the subject was further away, but don’t immediately reject or crop them. I’ve always liked this photograph of a red squirrel in the remnants of the old Caledonian Forest: it really shows how small the squirrel is, and the scale of the environment in which it lives. I avoided the temptation to crop this.

Another reason to not crop images too tightly, either in the field or during editing, and to leave space on at least one side of the shot, is that often magazines and press like to use images where they can place text on top of part of the image. This only works with uncluttered space.
Read more: How to Photograph Animals in Their Habitat
The ‘fixer uppers’
For whatever reason, you may find you have some images which, on first glance, are poorly exposed or composed. However, if the content is strong, don’t immediately reject them. It may be possible to edit in such a way to save the shot.
I took this photograph of a mountain hare during a blizzard. My camera was sick (very sick), and I couldn’t see what settings I was using – all the wrong ones, as it turned out!
However, I was drawn to the content and, although I’d unknowingly switched my camera from rawo JPG, I was able to save this in the edit. It’s one of my favourites and was shortlisted in a national nature photography competition.
Read more: How to Photograph Winter Wildlife


In conclusion
Choosing images from a shoot can seem like a daunting process, especially if, like me, you tend to take a large number of photographs. However, once you have a system in place and an idea of what you’d like to achieve with your shots, I promise it will become easier.
The best advice I can give is to trust your instinct: if you have a positive gut reaction to an image, others probably will too. Ask for the opinions of other people if you get stuck, or see what kind of response the images receive on social media. Sometimes you just need a fresh pair of eyes to see the images.
If you can delete all of those for which you know you’ll never have a use, you will save time and drive space in the future. If, like me, you feel emotionally attached to the shoot and find it hard to be tough when deleting images at the time, just return to them a couple of weeks later and do a final, more ruthless cull.
It’s not necessary to edit all the photos you keep, but do give them appropriate tags so you can easily locate them when required. Good luck and happy image selecting!


