
How to Photograph Pine Martens
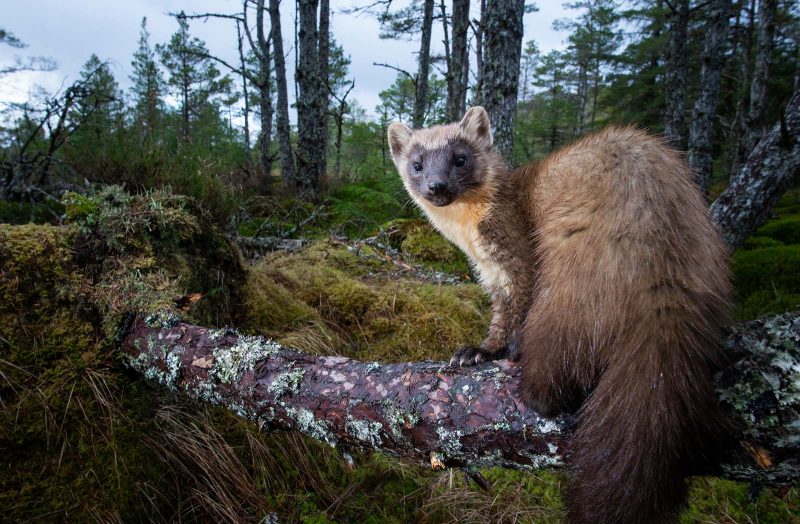
The pine marten is one of the most elusive mammals in the UK. It is a brown, “cat-like” animal of the weasel family. An extremely shy, largely nocturnal species, the pine marten presents numerous challenges when it comes to wildlife photography.
Over the last five years, I have fallen head-over-heels in love with these most charismatic of creatures. As a professional photographer, no other species has caused me so much excitement and joy, nor as much frustration and stress.


As you will read in this article, photographing pine martens is rarely easy – but it is almost always worth the effort.
Where to find pine martens in the UK
Formally a common and widespread species, pine martens declined to near extinction in the UK by the 20th century due to the combined effects of persecution and habitat loss. Thanks to conservation efforts and changes to public attitude, their numbers are now recovering well in Scotland, but they remain very rare in the rest of the UK.
Pine martens can be found in coniferous and deciduous woodland, as well as more open scrubland, heathland, and even upland areas.

The Scottish Highlands contain the vast majority of the UK’s pine marten population. Particularly good areas include the Cairngorms, the Black Isle, the central glens, Lochaber, and Ardnamurchan, amongst others. In some of these places, pine martens can be found in most woodlands, to varying degrees of population density.
There are also small populations in Shropshire, mid-Wales, the Forest of Dean, and in isolated pockets in the North of England.
Spotting the signs of pine martens
Pine martens have large territories and are famously elusive, so simply finding them in the first place can be a challenge.
Pine martens leave scat (droppings) at various locations in their territories. These scats are dark brown/black, usually up to about 10cm long, and often curled into a ‘U’ or ‘C’ shape. They usually contain remains of mammal fur, beetle shells, feathers, and berries.

The scats can be mistaken for fox droppings, but a good starting point in finding pine martens is to deploy a trail camera in a location where you have found probable scat. Leave the trail camera out for several days, and see what results you get.
At this stage it is crucial to make one thing clear: if you happen to find a pine marten den, leave it alone immediately and do not return. It is illegal to disturb a pine marten den, under the Wildlife and Countryside Act (1981).
Read more: Ethics in Wildlife Photography – Code of Conduct
Using a commercial hide
Pine martens are not animals which you can approach or stalk out in the open. For the majority of the time, pine martens are hidden away, following well-concealed tracks through the woods, or sleeping in their dens. They are extremely shy when out in the open, and any chance encounters you may have will probably be very brief.
Probably the easiest way to photograph pine martens is to use one of the few commercial pine marten hides in the UK. The animals at these hides tend to be accustomed to humans, and you will not have to put in the large amount of work required to photograph them from scratch.

The best hides have had a huge amount of thought go into them, so you are fairly likely to come away with lovely images. The disadvantage, however, is that your images will probably be fairly similar to lots of other shots taken in that location.
Alternatively, there are a number of holiday cottages in the Scottish Highlands which have pine martens reliably visiting feeders in the gardens. However, these cottages are not always run by owners with photography in mind, so they may not be the best option for people wanting the best images possible.
Setting up your own pine marten hide
If you have found a location where pine martens are present, then the easiest way to start the process of photographing them is to mount a peanut feeder in a quiet location and keep it topped up.
Put out a single hen’s egg in the feeder along with the peanuts and, if there are pine martens nearby, then they will very likely find it at some point. This can be a long process; it can sometimes take several weeks before a pine marten will start visiting a feeder.
Read more: Opinion – Should We Use Bait to Attract Wildlife?
However, once a pine marten has found a reliable food source such as this, they will often start to visit fairly regularly. Depending on the individual animal, this may be only once every few days or weeks, or as frequently as several times per 24 hour period. Do not use processed foods such as biscuits, chocolate, or sandwiches.
If you are going to use a pop-up hide, then make sure you get any necessary permissions from landowners. It is best to leave your hide in your chosen location for several days or weeks before you attempt to photograph the pine martens, to give them a chance to get used to it.
It is a good idea to spend some time just sat in the hide without a camera too, to get the animals accustomed to humans. It is worth noting that some individual martens may never tolerate a human being so close, and others may take a long time to be accepting of your presence.
Read more: What’s the Best Portable Wildlife Photography Hide?
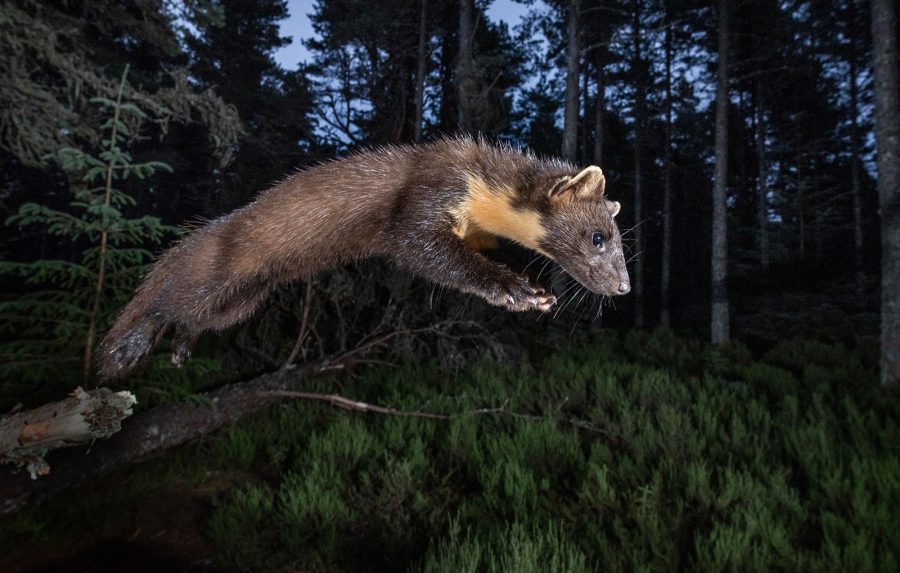
Using a hide for night-time photography
Pine martens are generally most active between dusk and dawn. If you can establish a good lighting setup, then photographing them during darkness is arguably far easier than photographing them in daylight.
My basic setup involves a hide located 8 to 10 metres away from where I want the pine marten to be. I hide some peanuts on a tree stump or branch, and then shine a low-powered lamp on the scene. The lamp is only there so I can see when the animal appears, and to use for autofocus acquisition. I then use a number of off-camera flashguns to light the animal.

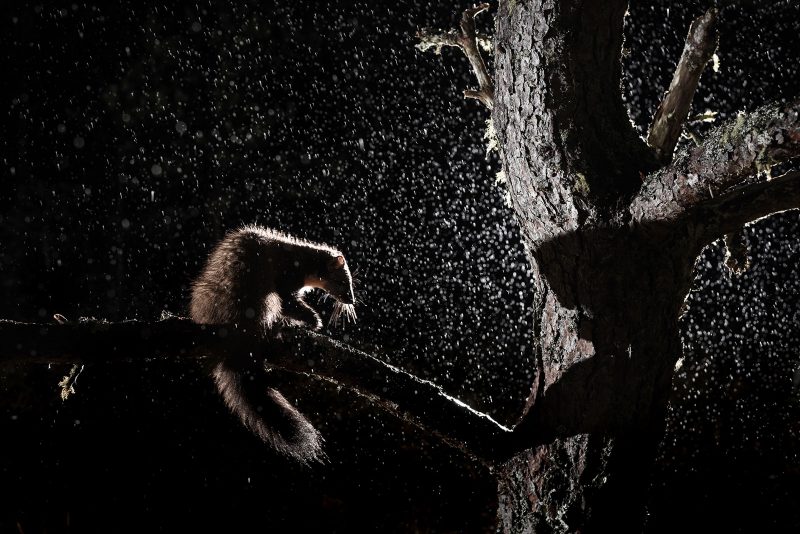
There are endless ways in which you can position and modify the flashes in order to create the exact lighting you wish, and this is a complex subject in its own right.
A basic setup is quite simple, however. Mine involves two flashes angled at around 45 degrees to where I expect the animal to be: one as the main light, and one as a fill light. I then use a third flash directly behind where I expect the animal to be, in order to create some backlighting.
Read more: A Guide to Using Flash with Wildlife
Thankfully, pine martens seem largely unbothered by flash. However, to avoid the risk of startling them, it is best to use the flashes at a relatively low power setting, and increase your ISO and/or use a wide aperture to compensate. I generally don’t use the flashes at a higher output than 1/8th power.

At first, it is perhaps best to aim for as basic an image as possible. Hide some peanuts on a branch which is well above the ground with plenty of space behind it, and this should make it as easy as possible to predict where the animal will be. As such, you can position your flashguns appropriately.
When a pine marten arrives, give it at least a few seconds to settle before you start taking photos. It is best to fire single shots or bursts of two or three images, to avoid the shutter noise disturbing the animal, and to allow the flashes to recharge between shots.
Using a hide for daylight photography
This is where it gets difficult. The majority of daylight pine marten images from the UK are taken at a handful of hides or feeding stations which have had years of work gone into them. It can take a very long time indeed before a pine marten will be happy to spend much time out in daylight in front of humans.
Ideally, the hide needs to sit in the territory of an adult female pine marten. During the spring and summer, mature female martens will often forage and hunt during daylight, as they are busy collecting food for their kits. If you keep a feeding station topped up daily on a long-term basis, within the territory of an adult female, there is a good chance she will make at least some daylight visits.

In most situations, it is likely that the evening will be the best time. However, pine martens can be active in almost any weather conditions and at any time of day, so the key is to spend as much time in the hide as you can.
The best months for daylight images tend to be May, June, and July. In Scotland, the summer days are long and I have photographed martens in daylight conditions as late as 9.30pm before.
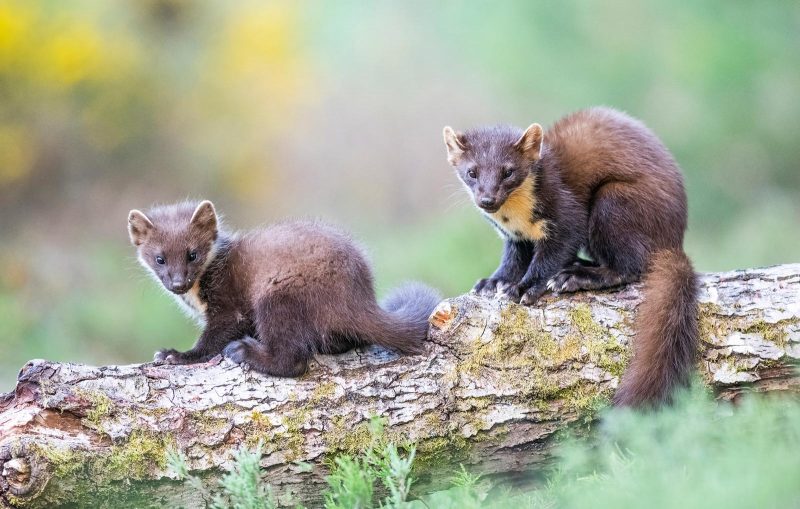
The kits tend to emerge in late May or June. A pine marten mother will only take her kits somewhere she is comfortable, so this is only likely if she has been visiting a hide for several months or perhaps even years.
If you are lucky enough to have a entire pine marten family appear in front of your hide, achieving good images can be tricky. The kits tend to be boisterous and fast-moving, so it can be hard to get a fast enough shutter speed without resorting to very high ISO values.

However, pine martens tend to stop and look up from whatever they are doing every few moments. When this happens, there are usually 1 or 2 seconds when the animal is completely static. So if you can react quickly, it is possible to use relatively slow shutter speeds to photograph pine martens. For example, I have had to resort to 1/15th second on a 500mm lens before, but still came away with sharp images.
Lens choice
Choice of lens can be difficult. If I could only choose one lens to use, it would be my 300mm f/2.8. The wide maximum aperture allows me to shoot in poor light, and the relatively long focal length means I don’t have to be too close to the pine marten.
However, a zoom can often come in handy. Pine martens will occasionally stand vertically upright, meaning that you risk ‘chopping off’ a head or tail if you are using a prime lens. Similarly, you will be glad of a zoom if you are lucky enough to get multiple animals visiting at once.
My favoured equipment setup involves two full-frame camera bodies: one with a 300mm f/2.8, and one with a zoom (such as a 70-200mm or 100-400mm lens). Full-frame camera bodies are ideal, as the image quality tends to be superior at high ISOs.
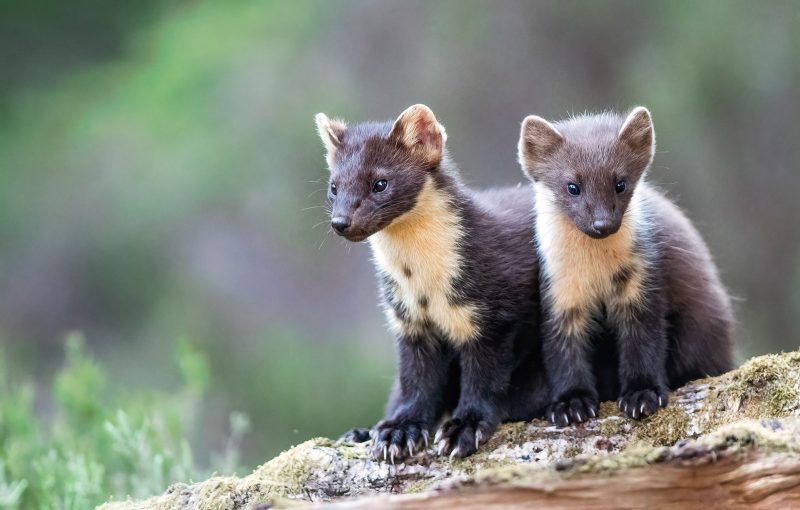
As pine martens as dark brown but have a bright, creamy ‘bib’ on their neck and front, exposure settings can be crucial. In general, it is perhaps safest to under-expose by at least 1/3rd of a stop in order to avoid blown highlights on the bib.
Using a DSLR camera trap
If you have the skills and equipment to set up a DSLR camera trap, then this is a superb way of getting some really unusual images. DSLR camera traps involve deploying a camera and infrared sensor (and normally some flashes) at your chosen site. When an animal passes in front of the sensor, it will trigger the camera.
In general, pine martens are quite tolerant of camera traps. Individuals vary in their wariness, but most are fairly comfortable with flashes and a static camera firing close to them. This allows you to use a wide-angle lens to photograph pine martens, enabling you to include some of the environment in your images. It also means you don’t have to put in the long hours required to use a hide.
A basic DSLR camera trap setup does not need to be particularly expensive. If you have an old DSLR body lying around which you rarely use anymore, use this and a kit lens. You can buy a PIR sensor to trigger the camera for around £175 – £200, and you can get 2nd hand flashes quite cheaply. You will need flash triggers and receivers, and some lighting stands, but the collective cost of these is not high.
Read more: 8 Tips for Wildlife Camera Trap Photography
DSLR camera trapping is an entire discipline in itself, and can take a long time to master. However, it is worth the effort to learn, as it opens up a whole new world of possibilities for your wildlife photography. Camera trapping is becoming increasingly popular, and there is perhaps a general trend towards wide-angle wildlife photography at present. It is worth attending a DSLR camera trapping workshop to get you started, as it can feel a little overwhelming when first getting started.
In conclusion
Whatever method you decide to use, photographing pine martens is a marathon, not a sprint. It can take a great deal of patience and effort, but it is worth every moment. I have never met anybody who hasn’t been ecstatic upon photographing a pine marten for the first time.
Twenty years ago, it was rare to see high quality pine marten images taken in the UK. Now it is increasingly common. With pine marten populations starting to recover in some parts of the country, hopefully it won’t be too long before it many more of us can enjoy seeing these remarkable animals.


