
How to Photograph Moths

In the field of natural history photography, I feel that moths are a little unfairly overlooked – particularly when you consider the great enthusiasm shown for butterflies. I suppose this is partly because a lot of moths are nocturnal and so remain unseen, but I also think there is a deep-seated belief that moths are “uninteresting” – maybe even drab – and, to some, completely unappealing. But, by contrast, we revere butterflies as beautiful and beguiling.
Focusing on moths
Well, let’s start to dispel some myths. Moths are fascinating, important, and beautiful creatures. Through our study of them, we are beginning to understand that they are essential in our ecosystem – for example, they are pollinating a lot of flowers.


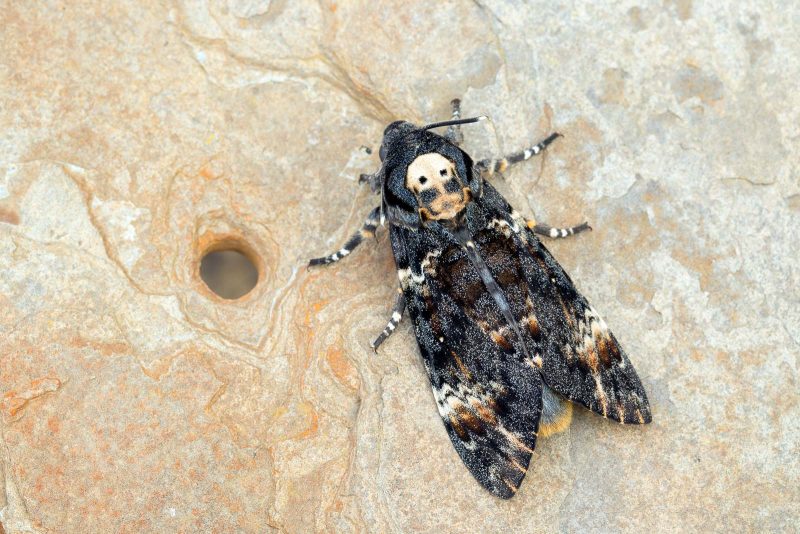
They are anything but drab. Many are extremely colourful; they take on a zany range of shapes, have fascinating behavioural traits, and have the most wonderful names of any British creatures (examples of which include death’s head hawkmoth, uncertain moth, confused moth, nonconformist moth, figure of eighty moth… and the list goes on!)

When you consider that more than 2,500 species of moth have been recorded in the British Isles (compared to only about sixty-odd species of butterfly), you begin to see that there is a wealth of photographic opportunity in the moth world. You can also appreciate that identifying so many different species can be a nightmare, so it is probably wise to first concentrate on the larger or ‘macro’ moths, of which there are about 800 types in Britain.
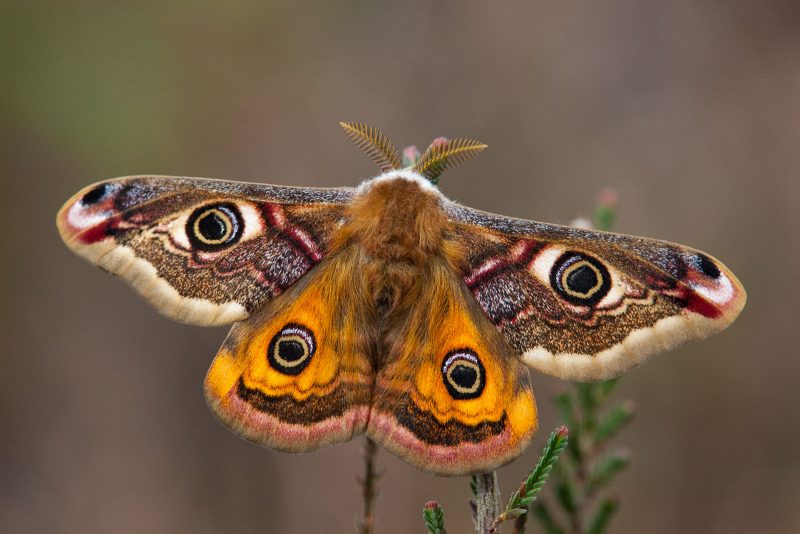
My own experience of moths began with a series of random encounters in the field, most of which were of day-flying (diurnal) moths such as the emperor moth and the six-spot burnet moth – which sports six red spots on each wing. Since I live on the south coast of the UK, I also came across some migrant moths such as the silver-Y moth and the hummingbird hawkmoth. Yes – there is a moth which looks like a hummingbird, hovering at flowers to drink nectar.
I occasionally saw moths on the white wall of our house, particularly close to the external lights. I knew that some moths could be attracted to light, but I wasn’t really interested in photographing them. This was probably because I didn’t know much about them.
Then I began to take part in “BioBlitz” events. These are led by natural history experts, with the aim of recording as many species as possible at one location in 24 hours. No BioBlitz would be complete without a moth trap because they are a sure way of adding substantially to the total number of species. Lepidopterists (those who study moths) are always on hand to help identify and describe the features of the moths, and my eyes were opened to an incredible new world – as well as boundless opportunities for photographing moths.
Back at home, I tried attracting moths using standard lightbulbs and white sheets. I had some success, but as I became more interested I bought myself a moth trap with a mercury vapour lamp – a very bright bulb which will attract more moths. Over the last fifteen years or so, I have set the trap regularly during the summer months and always enjoy examining my catch.
Through the recent lockdown period, the moth trap has been a source of great solace to me and has provided photographic subjects on a regular basis. It’s interesting that, even after many years of trapping, I still tend to find one or two new species each time I set the trap.
In this article, I aim to share some of my experiences and tips for photographing moths which can be caught in a trap in the garden.
The moth trap
I use a “Skinner-type” moth trap which has a mercury vapour bulb and two sheets of Perspex sloping down to a narrow gap below the bulb. The moths are attracted to the lamp and some slip down the Perspex into the box beneath. Once inside, they have difficulty getting out and will settle in dark corners within. To give the moths somewhere to hide in safety and comfort, moth trappers put empty egg boxes inside.

I then get up quite early in the morning and make sure the moth trap is placed somewhere cool and shady to protect the moths from overheating and from predators, such as robins and tits, which like an insect snack. Looking after the moths is important, so I keep them cool and in darkness through the day and let them go the following evening, unless they have already decided to leave of their own accord.
Many of the larger moths can be moved from the egg boxes and placed in position for photography – and this is essentially what I do. Some species, particularly the smaller ones, will fly as soon as they are touched. So, to get photographs of those species I also put bits of bark and wood in the trap and hope that some of the small moths will settle on those. I also put a variety of objects around the moth trap because many moths will be attracted to the light and settle outside the trap.

Preparation
Moth trapping is best done on nights which are mild, calm, and overcast. Summer is more productive than winter. If it is a clear night, then it is best when there isn’t a full moon. The better the conditions, the bigger the catch is likely to be.
The moth trap must be set up in the evening and will be lit all night long. I use a timer on the light so it will come on at dusk and turn off just after dawn. As well as preparing the moth trap, it makes sense to prepare some equipment the night before. I use bits of wood, plant pots, bark, logs, stones, moss, and garden ornaments – all of which can be gathered together in advance.
I have a shelf at the end of my shed which I use for taking photographs on. It is at a comfortable working height and is shaded from the early morning sun – ideal for photography purposes. Despite this, I often find myself kneeling on the concrete and so I always wear knee pads – something which will amuse the young wildlife photographers out there, but which will be fully understood by anyone beyond the age where joints begin to creak!
In terms of photography equipment, this is what I use: full-frame DSLR (5D Mark IV); a 100mm macro lens (the most important single lens, but I also occasionally use a 300mm f2.8 for bigger species); a very sturdy tripod which gets down to ground level; a remote release; a reflector.
Delve deep
In the morning, you might find that you have caught tens – or maybe hundreds – of moths. If you try to photograph every individual you will be there until Christmas! Therefore, select only the best-looking examples of each species.
Before photographing it, try to identify the moth (at least by picking out the key identification features). This will help you decide which angle to take the photograph from. For many moths, the best angle of view is from behind so you can see both wings – but there are some that are better from the side.
When approaching a shot from the side, try to get an angle which shows the eye of the subject. This might mean looking slightly from the front of the moth, but not square-on which will lead to an issue with depth of field. I’ll come to that in a bit.

Move the moth from the egg box by coaxing it onto a small twig and place it carefully onto the prop you think will be appropriate. Put the prop somewhere where you can work comfortably around it, and then start to think about taking photographs.
Setting up your shot
I find that shaded locations are better than sunny spots. Ideally, you will have a cloudy morning with diffused light. Look at how the light is falling on the subject and consider whether you might benefit from a reflector – I use gold and white reflectors, usually preferring gold for moths because it adds a touch of warmth to the shadow areas.
As well as this, I sometimes use shading too. Some moths have white scales on top and these can burn out easily, even on dull days. Use a hand to cast a bit of shade, or use a diffuser held above the moth to reduce the intensity of light. This will also allow you to bring out more details in the shadows.
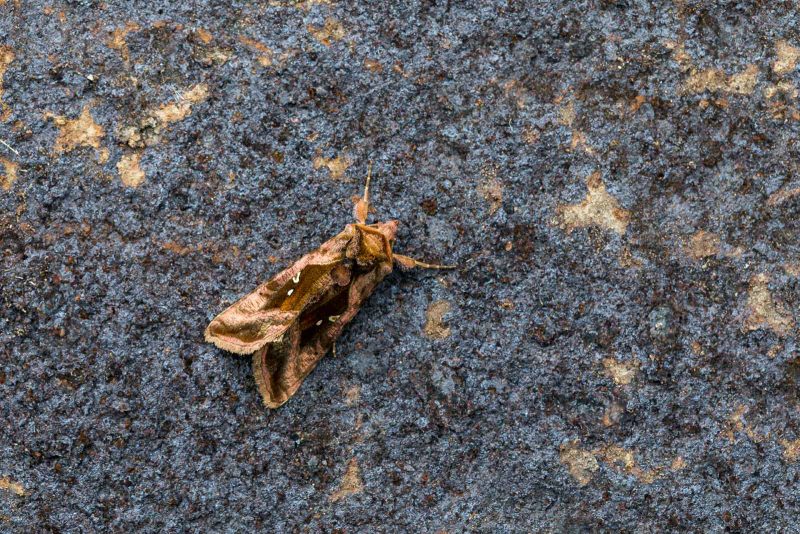
These two photos show a plain golden-Y moth – notice the effect of a gold reflector placed underneath the subject.

Set up your tripod and select your lens – most often I use the 100mm macro lens. Get the camera close enough to compose a pleasing image of the moth. The aim should not be to have the moth filling the frame, but instead to make a composition out of the moth and an element of the prop you have chosen. So, for example, you might have the moth facing diagonally into the frame and a knot in the wood on the other side of the frame to give balance.
Read more: How to Compose a Macro Photo

With small moths, the lens will be quite close to the subject. This is the only time I ever advise anyone to take the lens hood off their lens. Lens hoods are there for good reason: to cut down on extraneous light and to protect the lens. But if they are casting shade on the subject because they are too close, then take the lens hood off.
Stacking macro photos
Depth of field is the big problem with macro photography. If a moth lies very flat and is very close to the background prop, then there is a chance that you might get away with a small aperture and a single shot – but this is the exception rather than the rule. For most moth photographs using a full frame camera and a 100mm macro lens, I have found that focus-stacking is desirable to get the whole moth and surroundings sharp. If you want to avoid focus-stacking, then you could try some of these strategies: use a crop sensor camera; use a 50mm macro lens; keep the subject small in the frame and crop in post-capture; use the smallest aperture (high f-number) that you can.
Read more: How to Focus Stack Macro Photos in the Field
I wouldn’t describe myself as a big fan of focus-stacking, but it can give amazing results. Some DSLRs now have focus-stacking software built-in, as do many mirrorless cameras, so it is getting a lot easier to do but – unfortunately – the 5D Mark IV doesn’t, and so I do it manually.
With the camera set up and subject framed nicely, I use Live View and a remote release. The magnify function on Live View allows me to focus very accurately. I take a series of photos focused through the subject, and then use Photoshop to stack them.

One problem that occurs with focus-stacking is around the wings of the moths: there is sometimes an out of focus fringe beyond the edge of the wing. The best strategy I have found for dealing with this is to clone from the surrounding background. This problem can also be alleviated in the capture of the image by using a relatively small aperture, and so I tend to use f/8 or f/11.
Another area where I often have problems is around the moth’s antennae which are very thin and often move between exposures. Once stacked, I zoom in to full magnification and if there is an issue I layer the finished photo onto the single photo with the best antennae and manually merge the two images.
Getting creative with moth photography
If you have a selection of props available, you will be able to choose something appropriate for each moth.
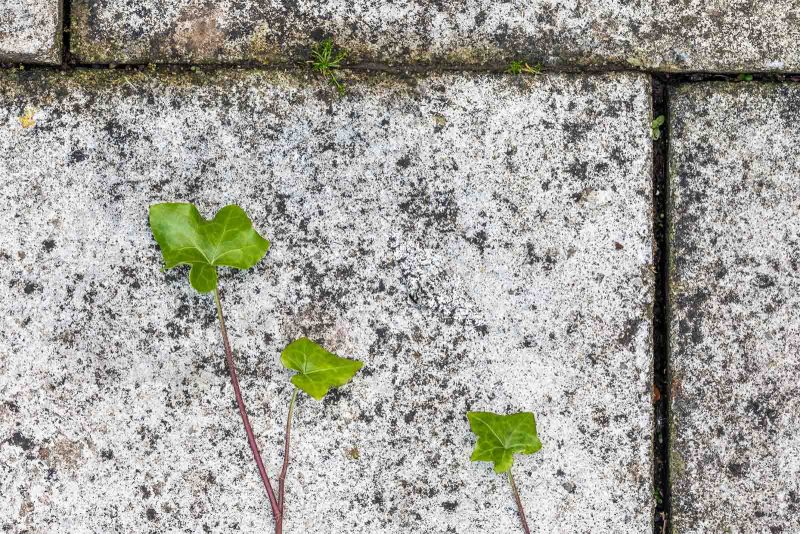
Some moths have wonderful camouflage which they use to protect themselves, so it makes sense to try to demonstrate this by taking a photo in which you can’t immediately see what you are looking at. This might seem like an odd decision when you look at the photo and really can’t see the moth!

Some moths are very colourful and it might be possible to position them on props which either contrast or harmonise. Think of the colour wheel – opposite colours, such as orange and blue, create a striking colour combination; colours which are closer together on the wheel create a more relaxing, toned effect.

I like to use a 300mm f/2.8 lens for showing larger moths, such as hawk moths, in the environment – often resting them on flowers This sort of image requires a very calm da, and focus-stacking is unlikely to be successful so generally I content myself with getting what I deem to be the most important parts of the moth sharp.

If you choose to place your moths on plants, try to choose an appropriate species. Don’t place a wetland moth species on a woodland plant, for example.

In conclusion
Much of the success of this sort of portraiture is down to the surroundings you choose for the moth. This might seem a little contrived and won’t suit everyone, but it does allow for a significant amount of creativity. I enjoy photographing moths and find them fascinating and so I want to share their beauty with others. If we can convince enough people that moths are worthy of our interest, we have a better chance of protecting them and the wider natural world as a whole.
To identify moths, you need a good guide. Field Guide to the Moths of Great Britain and Ireland is a great choice for macro moths. Good luck!


