
Underwater Camera Housing: A Guide to Choosing, Using and Care

Delving into underwater photography can be very expensive. The last thing you want to do is make a mistake when purchasing an underwater camera housing and have to buy it twice.
As a relatively new photographer or new to underwater photography, you probably don’t need a dedicated underwater camera alongside a land camera.

Housing your existing camera would reduce the need to spend money on a new camera body, lenses, and accessories – you can just purchase the most suitable housing for your budget and not an entirely new system.
It makes sense for most photographers to use their existing camera system underwater; it is familiar, you know the button placement, and have already customized the settings.
But here are some important questions to ask yourself:
What do you intend to do with this camera underwater? Are you sticking to photography, delving into video, or a mixture of both? Can your current camera system handle what you want it to do, or is it looking like a good time to upgrade?
Another important factor to consider when housing your existing camera is the cost to replace it if the worst happens and you have a housing flood (this isn’t likely, but it is a possibility, as no system can be 100% foolproof!).
If your camera would cost a substantial amount to replace, or you rely on it for work, etc., then maybe consider a cheaper camera that can be a dedicated ‘learner’ underwater camera, or consider getting premium camera insurance.
Many budding underwater photographers choose compact or action cameras as their first underwater cameras. The housings are usually cheaper (£200-500), and the small size is great, while still offering great quality.
They can, however, be limiting; many compacts don’t offer full manual modes, and the lack of interchangeable lenses can be frustrating.
Wet lenses, (external lenses that are mounted on the outside of the underwater housing and can be changed underwater), for macro and wide-angle capability are available for underwater housings but at an additional cost.
Read more: What Equipment Do You Need for Underwater Photography?
Choosing a camera housing
When it comes to choosing a camera housing, it can be very overwhelming! The many different housing brands and vastly different price points between the cheaper and premium options often leave many hopeful underwater photographers lost and confused.
There are a few things to consider which will help narrow down your choices.
Budget is a big one; you need to factor in the cost of the camera body, a choice of lenses, accessories, and the housing too – the last thing you want to do is invest in a top-of-the-line camera and housing, then limit yourself by using cheap lenses and low-quality accessories.

Premium underwater housings are often made of milled aluminium or aluminium alloy. Some examples of brands include Nauticam, Aquatica, Marelux, Isotta, and Sea&Sea.
There are other cheaper options which are usually constructed with plastic, such as Ikelite, Seafrogs, Aquatech, and AOI.
The cheaper options have fewer bells and whistles, and the most expensive ones come with all the extras, such as vacuum seals, leak detection systems, and extra ball mounts, to name a few.

Let’s use the Sony A1 as an example to compare the cost of different underwater housing manufacturers:
- S&S £3595
- Marelux £3498
- Nauticam: £3497
- Isotta £3035
- Aquatica £2735
- Ikelite £1466
- Seafrogs £470
- Aquatech £1735
- AOI (not available for Sony)
There is some consistency within the premium models; slight price differences will be related to features such as leak detectors and multiple ports for fibre optic strobe cables or monitor attachments.
These are more premium features and wouldn’t feature on cheaper housings, but it’s worth knowing that many underwater photographers have loyalty to certain brands. Once you invest in ports with one manufacturer, they don’t work on any others.

Another important thing to consider is ergonomics. Your housing should feel easy to use, and button placement should be comfortable and simple. Searching for the right button or lever to change a relatively simple setting such as ISO shouldn’t be difficult!
The housing should be user-friendly, and at their high price, I must say that the premium models often get this right.
I would always recommend choosing the housing that feels most comfortable in your hands, and if you have the opportunity, visit an underwater camera shop and see how user-friendly the different housings feel in your hands.
Setting up your underwater camera housing
If you have just purchased a shiny new housing and feel overwhelmed with the first setup, it’s worth asking an underwater photography friend or the seller if they would be able to help you assemble the housing.
This will give you confidence that you are setting up the housing correctly, show you the steps, and become much more knowledgeable the next time you set it up.
You should also take time to read the manufacturer’s instructions, as they should contain a detailed description of the camera housing setup process along with recommended tools and greases to use. Ignoring these instructions may risk flooding or void warranties.
I have a few key tips I always follow when I set up my housing, which may help you in devising your setup.
1. Before every dive, I make sure my batteries are fully charged, and I always take spares on the trip with me, including spare batteries for my flash trigger, leak detector, and strobes. By using fully charged batteries, it minimizes the chances of needing to open the housing outdoors.
2. Always set up your camera indoors. I often use a clean towel or neoprene mat on top of my table to ensure a clean, dust-free area. Try to set up somewhere with lots of light available, or if the lighting is poor, use a torch; this will help spot any pieces of dust or dirt inside the housing, particularly around or on the O-rings.
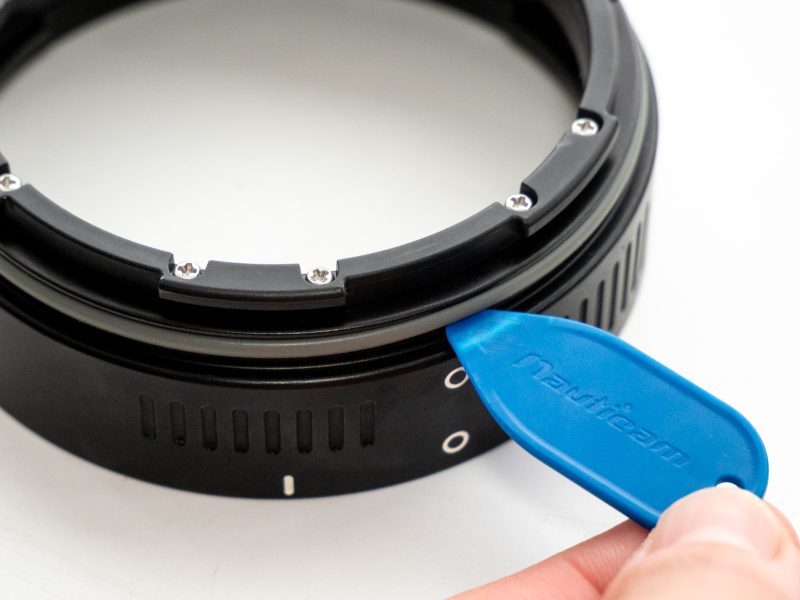
3. Always remove, regrease, and clean your O-rings. Find and remove any specks of grit, wipe both the O-ring clean and the housing where the O-ring sits before regreasing and placing them back into the housing. To remove an O-ring, make sure to use a plastic O-ring pick, as metal picks are more likely to damage the O-ring itself or even the housing.
4. Make sure you have a good amount of space to spread out your camera accessories and O-rings, and remember, don’t rush! Rushing your camera setup risks missing pieces of dirt or dust on the O-rings, maybe a forgotten lens cap, or even a missed battery.
5. Once you have set up your camera, be sure to check that your camera is all in working order. Turn everything on and take a test shot. I’d rather find a problem and fix it before the dive than notice it at the last minute and not have a chance to correct it.

6. If you have a leak detector or vacuum system fitted, be sure it is turned on and leave it for 10 minutes or so to see if the system loses pressure; this will indicate a leak. Another quick way to check for leaks is a dunk test. Have the system ready to use and all turned on, and submerge it into a tub or bucket of freshwater to check for bubbles. This is also a great time to take another test shot just to be sure everything is in working order.
Read more: Landlocked – How to Practice Your Underwater Photography Without Going Diving
Caring for your underwater camera housing
It seems like an obvious piece of advice, but if you look after your underwater camera housing, it should last for years! Simple things can help to keep your system in great working condition.
O-rings are the parts of your housing (strobes) that keep the system sealed. O-ring care is an incredibly important part of looking after your housing, as any sand, dust, dirt, or hair can cause a leak!

They are also fragile, and they do break; every time you set up your camera or open it up to switch batteries, check them carefully for any damage, tears, or stretching, as this means it is time to replace them.
Don’t ever be tempted to risk using them if they are looking a little worse for wear; this may lead to a flood, and in comparison to the alternative, a new O-ring is a relatively inexpensive fix.
Keep your housing clean
After using your underwater camera (and that means every dive or snorkel), you should take time to wash the housing in freshwater. Submerge the entire housing and let it soak for around an hour.
While soaking, be sure to twist any dials and press the buttons; this helps to prevent salt build-up and keep all your buttons functioning properly. After it has soaked, be careful not to open the housing when wet.
Dry it thoroughly with a towel or airgun before opening.

Opening a wet housing risks water droplets falling inside the housing or onto your camera body. If you notice this happening, quickly soak up the water using a cotton bud or lint-free paper towel.
Water droplets inside the housing can cause rust, damage the camera body, and may lead to misting inside the housing.
Many people choose to use silica gel pouches to remove moisture from their housings; these are useful when storing the system and when travelling.
In conclusion
Purchasing underwater camera housings can be a minefield, but the ability to capture images underwater is certainly worth it! For your first housing, pick something accessible, and don’t invest too much, as you may not like it!
This is unlikely, but we often learn from our mistakes, and having an incredibly valuable underwater camera will only increase the pressure to set it up correctly.
Housings take time to master, as initially, the settings and button placement can be confusing, but persist, and you’ll soon be changing those settings with ease!
Looking after your housing and taking time to set it up correctly will increase the longevity of your system, particularly regarding those pesky O-rings.
An underwater housing is an expensive piece of kit, and you have to care for it properly. Don’t be afraid to ask for help from fellow underwater photographers, or to look online on forums, and for articles with other helpful information.


