
How to Photograph Seals in the UK

Chubby, inquisitive and full of personality, it is no surprise that grey seals are an icon of our coastal and marine ecosystems. The UK is home to a whopping 40% of the world’s grey seal population, making them particularly widespread along many stretches of our unique coastline. Grey seals come ashore to give birth between October and December, with large colonies breeding on the east coast of England.
Thousands of nature enthusiasts make their way to our shores each winter to enjoy views of these plump and amusing mammals. Photographing seals on the other hand, can present some very different challenges. In this article, I’ll share some useful tips to consider when planning a trip to the coast, with a particular focus on photographing grey seals.


1. Research
Prior to setting out to successfully find and photograph seals, good research should be your first port of call. There are two species of seal which frequent the UK coastline, and both come ashore at different times of the year: grey seals and common (also known as harbour) seals.
Grey seals are the more common of the two species and spend the majority of their life fishing at sea, resting periodically, but will come ashore to breed in autumn. Grey seal cows give birth to their pups in late autumn and early winter, when they congregate in high densities at a number of locations around the UK. This species has grey and brown fur with a characteristically flat profile to its head, with a long muzzle.

Common or Harbour Seals are slightly smaller than Grey Seals, and come ashore to give birth to pups in June and July. Despite the name, this species of seal is confusingly far less common than their larger cousin. Other than their smaller size, their distinctive facial features include a concave head profile likened to that of a dog, with v-shaped nostrils that make them fairly easy to distinguish.

Finding the right location is of key importance when photographing grey seals. Online searches may report recent sightings of hauled out seals resting at lesser-known locations closer to you. These are some better known larger colonies which offer photographic opportunities in the UK:
- Horsey Gap, Norfolk
- Blakeney Point, Norfolk
- Donna Nook, Lincolnshire
- Orkney Islands, Scotland
- Farne Islands, Northumberland
- West Cornwall’s Coastline (various colonies)
- Skomer Island, Pembrokeshire
2. Be respectful and practise good fieldcraft
When you arrive on location with the aim of photographing seals, the welfare of these animals amongst their colonies is absolutely vital. Welfare should be at the forefront of your mind when planning to photograph these animals, and the image should never be put first. Allowing the seals to feel comfortable in your presence will result in individuals exhibiting more natural behaviours, such as interaction with each other.
When approaching seals, avoid making sudden movements and move as slowly and as quietly as possible. When you are in position, be still and stay low to the ground if you can. Young weaned grey seals are extremely curious creatures and will often approach you when they are relaxed. This will allow you to be more creative with which lenses you use, allowing you to incorporate more of the coastal environment into your images.
It is important to respect the animal and its circle of fear, making certain you don’t position yourself between a mother and her new-born pup, or between a seal and the sea. This is extremely important during the pupping season, and no image should ever constitute endangering the life of a seal pup. Stay at least 10 meters away from unweaned seal pups. At this age, the pups are fully reliant on their mother and aren’t fully waterproof, meaning they may perish if they are unable to reach her, or vice versa.
Adult seals and fully independent seal pups are able to support themselves and can be viewed and approached with care and caution. These individuals are not at the same risk of starvation or death in the same way that unweaned pups are. Be sure to allow a good distance between yourself and new born seal pups by using a telephoto lens.
Read more: Ethics in Wildlife Photography – Code of Conduct
3. Get down low
Perhaps the single most important technique to consider when shooting on location is to get down and be low to the ground. If you are able to, lay on your front and use a beanbag for key lens support when composing your image.
The height of a filled beanbag is a similar height to the head of a stationary seal resting on the beach. Although this sounds like a strange approach, by doing this you will immediately create more intimate images by being on eye-level.
Seals have a typically rotund profile. Photographing them from ‘standing’ level or higher is unlikely to do them the justice they deserve. When positioning yourself on their level, distinguishing features such as whiskers or a raised flipper will stand out.


Read more: 12 Ways to Evoke Emotion in Your Wildlife Photos
When situating yourself close to the ground, you will also be able to create a smaller focal plane and narrower depth of field – consequently creating a more attractive bokeh. When using larger or medium apertures (f/3.2 – f/8), coupled with the ‘compressed’ effect achieved with a telephoto lens, depth will be added to your image.
This will allow you to isolate the subject and create a cleaner image, with fewer potential distractions as any will be rendered out of focus.

If you don’t have a beanbag, excess items of clothing (such as a jumper or coat), camera bag, or low level tripod will all do a perfectly good job. Although you are certain to gather impressive quantities of sand in every pocket, I can assure you that it will be worthwhile.
Getting low is particularly important when photographing seal pups. You can capture particularly impactful images of these adorably chubby little animals when you get down onto their level. During the pupping season, watching and (respectfully) photographing these new-born mammals exploring and interacting with their coastal home for the first time is always special.

4. Properly prepare for the shoot
It’s hard to beat the feeling of a brisk winter morning’s walk on a sunny UK beach. Constantly moving is enough to keep you warm, combined with wrapping up in multiple layers. As soon as you stop moving however, the bracing coastal weather becomes immediately noticeable.
Seals are incredibly well adapted to lay still for hours at a time in these conditions, with a thick insulating layer of blubber surrounding them. Since we don’t have that adaptation, it is vital to prepare well when it comes to clothing. Never underestimate the unpredictable nature of UK weather!
Here are a few tips when it comes to protecting yourself and your camera:
Thermal layers
Between late autumn and into early winter, the UK coastline can be an unforgiving place. Check the weather forecast a couple of days before you’re planning to visit a seal colony, and layer up accordingly.
A thermal base layer is always a good idea, combined with a fleecy layer and warm coat. A bottom base layer and thick trousers are recommended as well to keep your lower half warm. I strongly recommend a thick pair of thermal socks, or double up on thinner socks – no one likes cold feet.
As well as socks, be sure to take a pair of gloves with which you can still operate your camera whilst wearing. Your extremities will be the first places that you feel the cold, so prepare in advance and ensure that you stay comfortable. This allows you to spend more time focused on pursuing your dream images.
Waterproofing
To avoid getting damp unnecessarily, a waterproof coat is a good idea.
If the forecast doesn’t look promising and rain is in the offing, don’t let this put you off. Unique images can be created in conditions like these, but a good waterproof layer is an absolute must.
Read more: How to Get Rain & Snow Streaks
Protect your camera
Keeping your camera and lenses protected when on location is absolutely essential. Make a small investment in a lens cover, as this will keep water off and out of your camera body and lens.
More importantly, however, it will protect it from abrasive sand. You will be spending a lot of time photographing these mammals in an environment where you are surrounded by sand. A sudden gust of wind may blow sand in your direction, or a torrential downpour may occur – both potentially damaging your camera equipment.
Prepare beforehand to prevent against any unwanted damage. An extremely useful and underrated accessory to consider purchasing when working on the coast is a rocket blower. These small, manual air blowers are relatively cheap and help to remove excess sand from the harder to reach places on/in your camera. Don’t learn the hard way like me, as no one wants their lens mimicking the sound of a pepper grinder!
5. Working with light
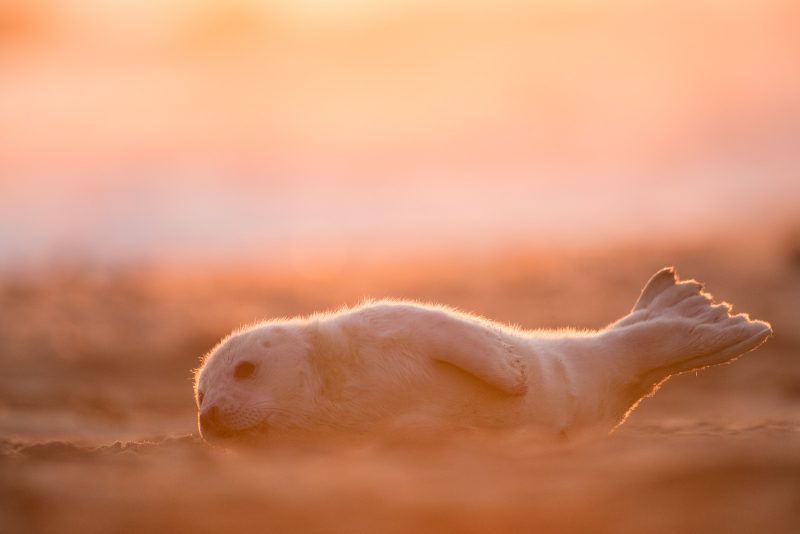
When deciding what time to head to the coast, check the weather forecast in advance. If clear weather is forecast, an early start can be particularly rewarding. Utilise the most unique colours of the day by arriving to the location before sunrise. You may be able to photograph seals in the cool hues of the blue hour, before the sun rises.
In clear weather, this is soon followed by the rich golden colours and hues of a crisp winter sunrise. Experiment by positioning the sun behind the subject and purposefully underexposing.
Read more: Backlighting in Wildlife Photography – Creative Use of Light
Backlighting is an extremely effective way to highlight the a seal’s features, achieving a slightly more artistic appearance to the image. If there isn’t much wind, you may be able to capture the condensation of a seal’s breath. This is more common in the testosterone pumped bull seals (males) which regularly disagree with their competitors.

Keep an eye out for bull seals approaching cows (females), as females with young will be fiercely protective over their offspring. They are often seen lashing out at inquisitive males.
As with many species, some of the more interesting behaviours occur during the first hours of the day, making painfully early starts even better. Keep an eye out for the body language of adult seals as explosive fights may break out. When the beaches are particularly quiet at first and last light, you may be lucky enough to witness more tender moments such as pups suckling from their mothers.

If cloud is in the forecast, overcast conditions will allow you to experiment with nice, consistent lighting. Try not to underexpose images in overcast conditions, as they may risk looking slightly flat. Experiment with techniques such as purposefully over-exposing an image to give it a high key effect.

6. Lens choice
When deciding which lens to use, make the best of whichever lenses you have (as cliché as it may sound). In such vast coastal environments, it is important to experiment and make the best of what you have. The perfect focal length range would be between 100-400mm, which would give plenty of variety.
When shooting with a zoom lens which offers versatility, you might want to incorporate more of the environment by shooting at 50-100mm (or even wider in some cases). Try to minimise disruption by using longer lenses if you are spending a long time working with individuals.

Quite often, when working on the beach during the winter, young and inquisitive fully-weaned and independent seals may choose to approach you. In these situations, use your judgement and be sensible. Seals may come close to inspect you, allowing you to create images and compositions with much shorter lenses.
You may want to experiment with wider lenses between 24mm-70mm for example, but you must do so with extreme care of the animal.

In absolutely no circumstances should you attempt this with unweaned newborn seal pups. For this technique, you must be extremely sensitive by using a remote trigger to capture images. You will need to place your camera in position and compose the image, leaving the camera in place and moving away to a safer distance. Allow the seal to approach your camera whilst you operate it remotely with the trigger.
If you attempt this type of environmental composition, I would recommend putting the camera on silent mode to reduce any potential stress to the subject.
In conclusion
When photographing Seals, do so with extreme care, attention, and respect. Despite what might appear as a relaxed and unfazed demeanour, you should still practise good fieldcraft when approaching and photographing seals.
Be patient and determined to work in a multitude of weather conditions, as well as during different times of day. Be sure to prepare thoroughly before visiting a colony, including checking the weather and protecting yourself and your camera gear from the elements.
There are a number of wonderful seal colonies dotted around the UK coastline, all of which are excellently monitored. The time and effort that goes into conserving the areas in which these beautiful mammals thrive is so valuable. Make sure that you put the animals first, being sure no image is ever put before the welfare of the subject. This will allow other to enjoy our country’s incredible seal colonies for years to come.


