
High-key Wildlife: How to Create a White Background
It’s a technique that we don’t see very often, because few situations allow for it, but the high-key style can set a photo apart from others. High-key photos use light to blow out shadows and create a white background to a photo. This is often reserved for shoots with models or products, but when introduced into a wildlife photo it can be very effective. Creating high-key photos of wildlife is something I now tend to do whenever the situation arises. I love the ability to isolate the subject from the scene completely, giving the photo an artistic touch.


What Situations Allow for High-key Photos?
Unless you’re shooting in some kind of studio setup, you’re only going to be able to do this when the surroundings are white. The obvious situations where this will be the case are either photographing in snow or against clouds. This is why we see so few high-key wildlife photographs; for most of us snow is a rarity, and photos of birds against a white sky are often boring because of the angle they are taken at.
Settings
Firstly, you’re going to want to be shooting in raw for this. The ability to retain information in the highlights of the image is important, especially as there is the possibility of overexposing the subject by accident. It also allows you to adjust the white balance without any consequences during post production. Snow often appears blue in photos and is something that can be fixed adjusting the white balance later on.
Next, adjust your camera’s metering mode. You want to be using spot metering for this, although it is also possible to achieve using centre-weighted spot metering. This means the camera takes a preference to what is under the focal point when calculating the exposure. Note that metering modes won’t have an effect when you are shooting in full manual as the camera has nothing to adjust.

It is strongly recommended you use aperture priority mode for this. Chances are your subject is not sitting still in front of you waiting for you to get all the settings right. As long as you have a similar scene exposed for beforehand (you could test on a plant or something static with a white backdrop), you can be sure that the camera will correctly expose the animal against the background when the time comes. Use exposure compensation to adjust the exposure and fine-tune it. You’re trying to get the background as white as possible, whilst retaining detail in the subject and not overexposing it. If your camera has a ‘highlights’ feature during playback then you should turn this on – the camera will indicate areas of complete white to you.
Having said all that, chances are that your subject is a lot darker than your snowy backdrop. Consequently, as long as you expose the scene ‘as normal’ then you will be able to perfect the high-key style during post production – this is essential even if you are paying particular attention to the highlights on your LCD. There’s also the possibility that you don’t intend to take a high-key photo at the time, and once the opportunity arises it’s too late to perfect anything in camera.
Post Production
In reality, capturing a high-key image straight from the camera is not really possible. Plus, once you open the raw file it will suddenly look flat and grey again – but that’s just how raw files work, they require further adjustment to reflect the scene as you saw it.
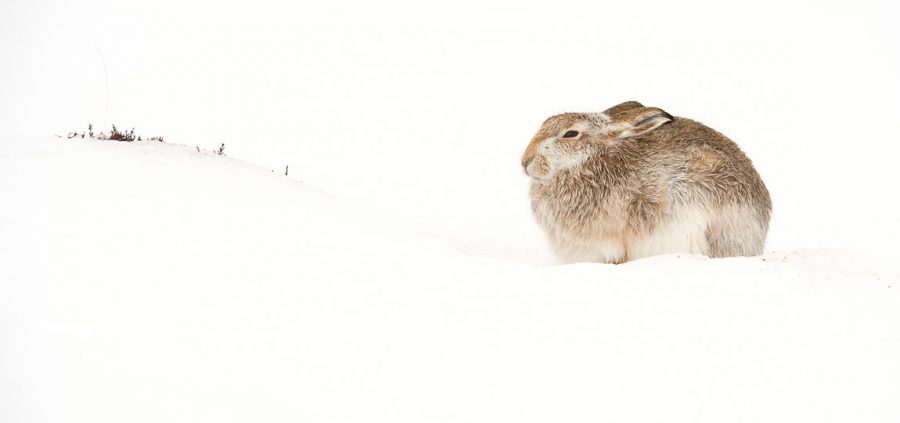
Here is a photo that I took of a mountain hare. You can see the raw file is very flat and the picture has blue/grey tones to it. This is partly due to the nature of raws, and also the fact that my white balance is incorrect for this scene! But that’s the beauty of raw – you can adjust this later with no issues.

The best way to achieve the pure white background is to tell the editing software what in the photo should be white. You can do this in both Lightroom and Photoshop, using the tools indicated below. In Photoshop you will find this tool in the Adjustments > Levels panel, and in Lightroom it is in the Develop window.

Use the dropper tool to select the part of the image that should show as pure white. The edges of your photo are likely to be slightly darker due to vignetting, so you should select from here to ensure all of the background is white. If the subject ends up looking strange from doing this, then select a lighter area of white in the image (so perhaps not directly in the corners).
Once you’ve done that, you’ll probably need to play with the exposure slider in Lightroom. In Photoshop you should have already achieved a correct exposure when opening the raw file, so selecting the white area should be sufficient to achieve the high-key style.

There’s a really useful trick in Lightroom to highlight all pure white areas. Just click the little arrow above the histogram as shown below.

The final product is a high-key wildlife photo.

Final Thoughts
It’s definitely true that the final product is tied together during post processing, but this is the nature of raw files in any situation. Capturing the photo as close to ‘high-key’ as you can when working from the LCD of the camera will help to make the process easier during editing. The important thing to remember is to expose the subject properly, as you don’t want to overexpose it and lose detail there.


