
6 Tips for Better Fieldcraft in Wildlife Photography
Wandering around a nature reserve with just a camera and long lens doesn’t guarantee good results. Any wildlife photographer will soon reason that there’s more to it than that.
It can be surprising, after you’ve invested in something like a 600mm lens, to realise how close you still need to be to get a frame-filling portrait.


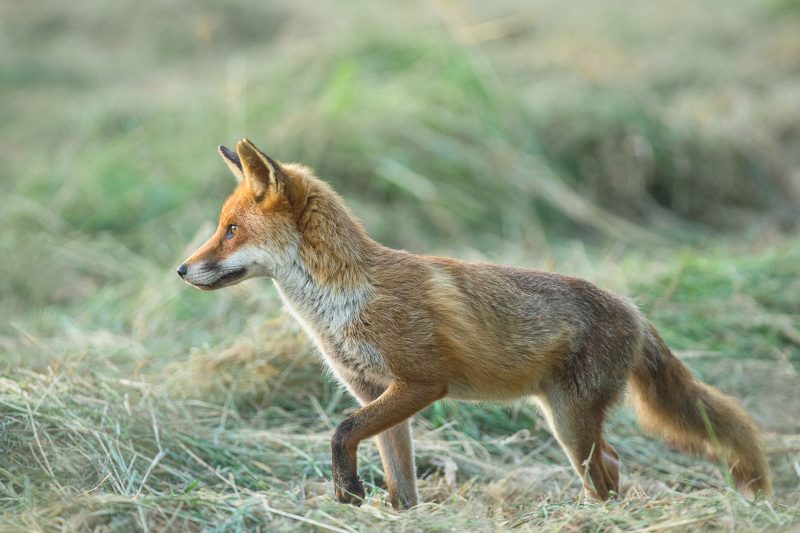
All animals, except the ones that can eat you, have what we call a fear circle. This is effectively how close an animal will let you get before it takes flight or runs away. Humans have been merciless predators of most animals for millennia and wildlife is therefore, not surprisingly, very nervous of us. Just look at the difference between the behaviour of a rural fox, where they are still persecuted, relative to that of urban foxes.
Unfortunately, I frequently see photographers pushing animals to the point that it is negatively affecting them and their behaviour. At best, the resulting shot is the rear end of a deer or bird as it exits the scene.
Read more: Ethics in Wildlife Photography – A Code of Conduct
I believe that a little effort devoted to developing skills in fieldcraft will yield far better images, as well as little or no disturbance to wildlife. In my opinion, this is clearly a win-win situation.
In this article, I hope to set budding wildlife photographers on the right track to improving their fieldcraft and getting within that fear circle.

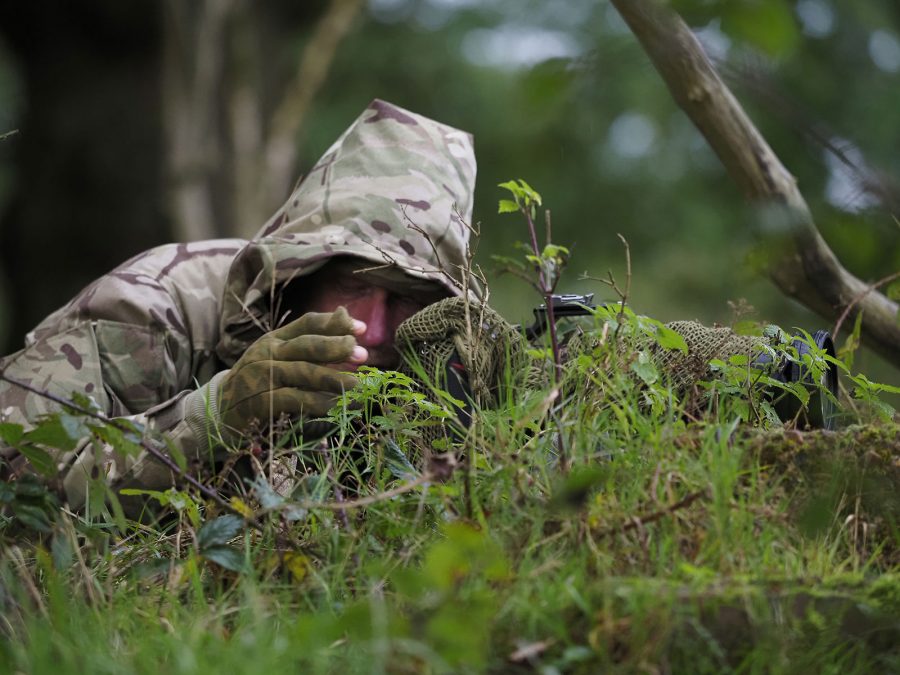
1. Use camouflage
Camouflage is disruptive pattern material: it hides you, but only if used properly. Often our first step might be a camouflage jacket – it is helpful and could possibly get you closer.
But going the extra mile with camouflage can improve your chances further. For example, try using camouflage gloves, a bush hat, or a camouflage balaclava to hide your face.

In the picture above I am in full camouflage, and in this situation I have had barn owls land within a metre of me. This is far too close for photography, but as an experience it is incredible and proves that camouflage really works.
Interestingly, I have also had people walk by just a couple of metres away and be totally unaware of my presence!
2. Use a hide
If your subject is coming into a predetermined place, such as in a situation of bait and perch, then a hide is a much better system. They ensure that you have plenty of room, will be more comfortable, and can therefore endure longer periods of waiting.

There are plenty of hides available online now, some of better quality than others. The camouflage of the hide is important. If you use a woodland print, for example, in the middle of a snowy field then you’ll stick out like a sore thumb.
Read more: What’s the Best Portable Wildlife Photography Hide?

3. Learn to stalk your subject
Learning to stalk an animal, although requiring much practice, can yield amazing results.
The first step is to walk softly, placing your foot from heel to toe very slowly. This way you will be able to feel any twig or branch likely to snap and give away your presence. You can then withdraw your foot before it snaps.
Watching a domestic cat stalk is possibly the best way to learn how to do this. Look how slowly, tentatively, and lightly they place their feet, feeling the ground before they put their full weight on the foot.
If your subject is feeding, such as a roe deer grazing, then freeze when it raises its head. Only move forward when the head goes down to feed.
Use tree lines, or any cover such as ditches or hedges, to get closer – especially when your subject’s head is down, and only break the line of cover if absolutely necessary.

Stay low – the less upright and human you look the more successful your fieldcraft will be. A good way to get close to brown hares is to belly crawl slowly towards them. Additionally, your composition will probably be better from this low viewpoint.

Don’t look directly at your chosen animal. As humans, even we can tell from 100 metres away or more if someone is looking directly at us. It’s a threatening thing to what is most likely a prey animal.
Once you have decided a line of approach, glance sideways (or even only through the viewfinder) at your subject.

4. Know when not to stalk
On occasion I have observed mammals, such as a fox, approaching from a distance. This has allowed me to carefully choose a spot to wait. This may be seated with a tree trunk behind me, camouflaged and motionless.
In fact, this is preferable to stalking as you just let the animal come to you. It may mean time spent observing both animal behaviour and the recognition of tracks and signs. For example, a badger’s path in the grass is fairly easy to recognise and often becomes a mammal super-highway for other species. Waiting for animals to use this path at dusk can be extremely rewarding.

With this in mind, an essential consideration for all fieldcraft when dealing with mammals is wind-direction. Quite simply, you do not want to be upwind of a mammalian target.
Always feel the wind and be aware that it can change direction. If it does change, move to a different location; one that is ideally pre-determined. Don’t stick it out if your human scent is being carried the wrong way – if a badger can smell you, it’s game over!
5. Be quiet
This seems fairly obvious, but sit in a quietening woodland at dusk waiting for badgers to emerge and you’ll soon learn that the smallest of movements can make noise. So, with that in mind, just slow down.
You will also learn how noisy waterproof material is. I prefer soft layers and use an army surplus soft jacket rather than expensive, breathable Gortex.

6. Know your subject
The more you observe and research an animal, the better you will be at knowing its acuity and solve the problem of getting under its radar. Combine this with the implementation of the other points here, and you’ll begin to build on skills from species to species. You will also develop generic wildlife skills, making each new subject easier to tackle. It is an addictive process.
Read more: Photographing a Species In-depth
Examples of effective fieldcraft
In the below image of a red deer at dawn, it took a combination of fieldcraft (including camouflage, stalking, not stalking and other factors) to get the shot.

It meant arriving before dawn, at the right time of year. For example, wild red deer are rutting in early October. The weather forecast was checked beforehand and looked very promising, although I could never have hoped that the sky would be so rich.
There is always an element of luck, but I would argue that the variable of luck would have been irrelevant if I’d stayed at home with a cup of coffee! Instead, the alarm was set early.
I knew where the deer were rutting, so I arrived in darkness just as a red glow was rising on the east horizon. The herd were easy to find by following their sound as a stag’s roar carries a long way.
In full camouflage, I crawled into position to the west of the herd (which luckily placed me in a hedge with a ditch and bank) and rested the camera and lens on a beanbag. I simply waited for the deer to perform as the dawn developed.
It was a case of being in the right place at the right time, in the right conditions, and stalking into position using terrain, camouflage, and knowledge of behaviour. The subsequent result I am very pleased with.

Similarly, I did once (rather foolishly) foot-stalk a female jaguar in Brazil by crawling below the line of a bar of sand. When I slowly raised my head above the parapet, I was a little shocked to see her glaring at me from a mere 20 metres away!
I had nowhere to go and, even if I did, she would have beaten me to it. I used simple disarming tactics, such as not directly staring at her. I even raised my open hand in a gesture to announce that I meant no harm. This was because leopards will raise their tail high, showing the bright white underside, if they are not hunting.
Fortunately, this breathtaking cat accepted my presence and lay down to groom herself. I stayed with her for an hour until the light had gone, then left as sensitively as I had originally approached. I couldn’t sleep for several nights as I was just reliving the experience.
In conclusion
By going the extra mile, and practising your technique, you will be amazed how close you can be to wildlife. You will develop generic fieldcraft skills and learn to assess situations much more quickly wherever you are, and it is incredibly satisfying to get shots of your subject with zero negative disturbance.
You will get better images, and feel much better about the process. I would suggest starting with more benign species before moving onto jaguars, though!


