
How to Photograph Albatrosses

Albatrosses are one of the world’s most enigmatic families of birds. Masters of the wind and ocean-wanderers, they were, and still are, revered by sailors, who believed they were the souls of those lost at sea. It was even considered bad luck to harm one.
Twenty-two species exist, the majority of which are sadly classed as globally threatened according to the IUCN Red List. However, there are many places where you can see albatrosses. They are an absolute pleasure to photograph, should you be lucky enough to spend time with them.


Where to go to find albatrosses
I am writing this article from my own personal experience of growing up in the Falkland Islands, where we just happen to have the world’s largest population of one particular species of albatross: the black-browed. Over half a million pairs breed on these remote islands!
‘Remote islands’ is the key here: these birds are seabirds and so, naturally, they need the ocean for access to food.
Read more: How to Plan a Photography Trip to the Falkland Islands

As they are large, heavy birds, they also generally need the wind to facilitate take-off and easy gliding across the waves. The Prince Edward Islands, Crozet, Kerguelen, Auckland Islands, Chatham, Gough Island: these are just some of the remote places where albatross populations are found.
However, they are not locations one can necessarily visit as a regular tourist. At least, not easily!
The Falkland Islands are accessible, however, and once you are here you will not be disappointed with the opportunities for taking beautiful photographs of these birds. Head to New Island, West Point Island (via day trip from Carcass Island), Saunders Island or, with special permission, to Steeple Jason Island.
Albatross may also be seen near Death’s Head on West Falkland mainland (ask for permission at Dunbar farm).
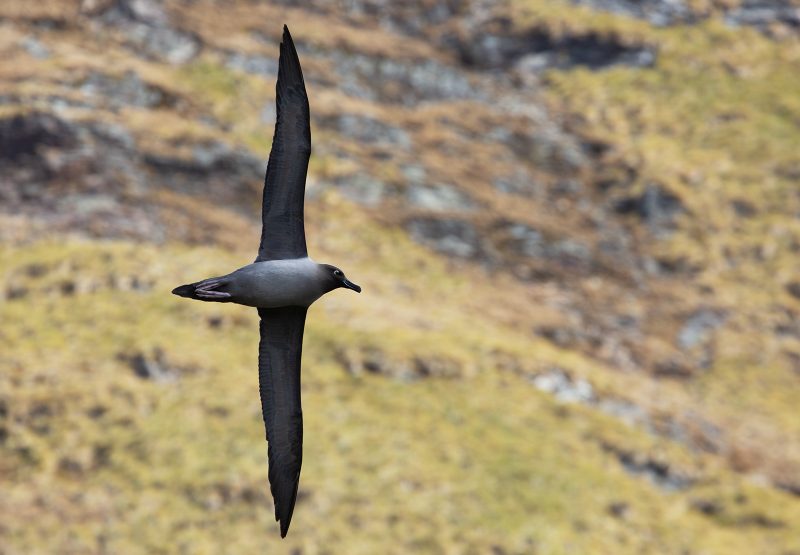
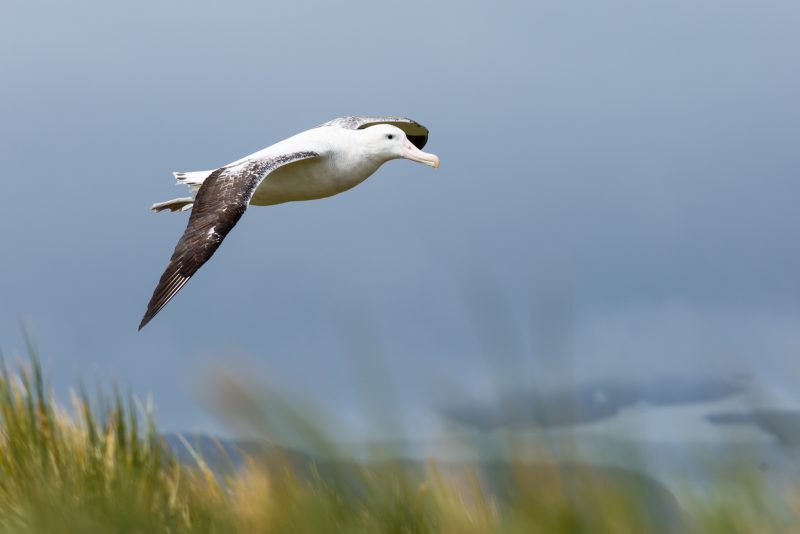
From the Falkland Islands, it is sometimes possible to join a small expedition cruise ship to South Georgia – a wild, sub-Antarctic island which holds the possibility of seeing one of the world’s largest albatross species, the wandering albatross, as well as the light-mantled sooty and the grey-headed albatross.
Alternatively, you can join a cruise in Ushuaia, Argentina, and make a combined trip to the Falklands and South Georgia by sea, without flying to the Falklands directly.
Be aware that, in South Georgia, it is not likely that you will be able to easily photograph these albatross on the nest. You will have chances to see them at sea and in the air, but double-check with individual cruise companies for exactly what to expect from their itineraries.

When to go
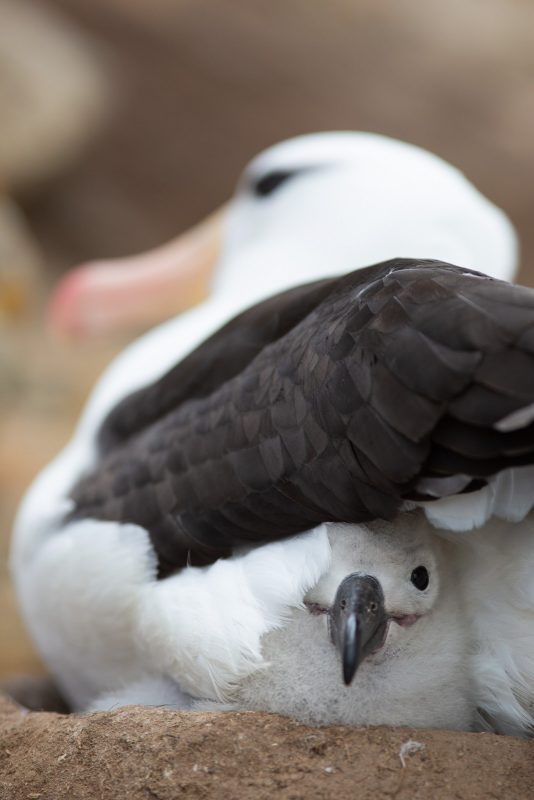
In the Falklands, the black-browed albatross return in late September, with a breeding cycle that takes them through to April. October (coinciding with the start of the tourist season) is great for courtship, mating, and egg-laying behaviour. Early to mid-December is good for hatching, and by mid-January the chicks will be sitting alone on their nests, while both adults go to sea to forage.
By the end of the season here, the chicks will have gained their waterproof feathers and will be strengthening their wing muscles, ready for their maiden flight at the end of April. South Georgia has a similar season for tourism, with November being one of the best months to visit.
Camera equipment and settings
These birds are large and very tame, making them a very easy subject! In the Falkland Islands, for black-browed albatross, you will be glad of a medium telephoto lens such as 200mm or 300mm. You will find that you can sit very close by and shoot away to your heart’s content.
If you can bring a prime lens with a wide maximum aperture, such as f/2.8, then all the better. Beautiful evening light is common in the Falklands, and very often the albatross nest in open, west-facing colonies, giving you excellent golden and blue hour photo opportunities.
Read more: What’s the Best Lens for Wildlife Photography?
A larger telephoto, such as 400mm, or a 1.4x extender for a medium telephoto, will be ideal for perching on the cliff-edge and capturing the birds’ in-flight antics. A longer lens may hinder rather than help you, as the Falklands are extremely windy in summertime, and hand-holding a heavy lens in these conditions on a cliff edge brings forth a whole new set of challenges!
The same goes for any trip to South Georgia – shooting with a very large lens from a moving ship or inflatable boat is not going to help you get sharp images.
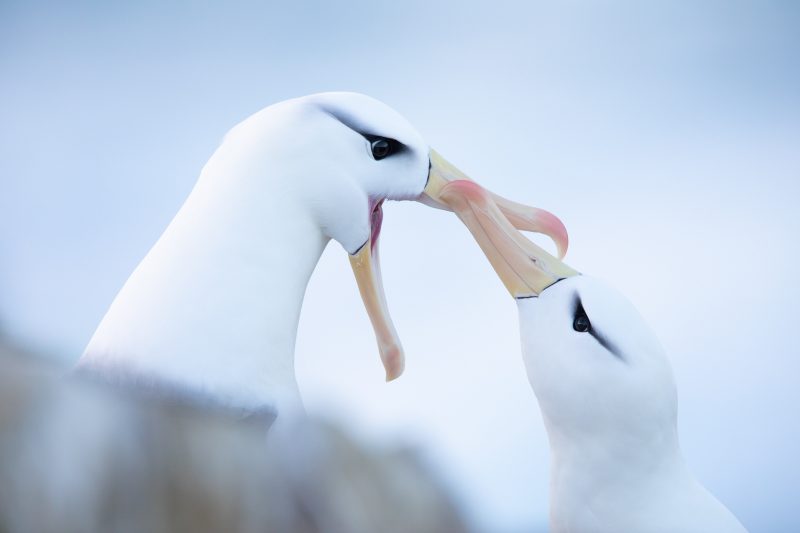
As a fairly docile species, the speed and accuracy of your camera’s autofocus system is not as crucial as it usually might be for photographing birds. The most action you will find is when they are engaged in courtship.
This is a beautiful display of touching bills and ‘fencing’: stomping around each other with their big, clumsy, webbed feet and pointing their bills to the sky. This is interspersed with the male tucking his bill into his back feathers while he tries to impress the female!
Choose single-point focus or a small cluster of focus points to achieve focus on the eye, and set an aperture such as f/4 or f/5.6.
Read more: Back Button Focus – When and Why to Use It
This will allow for the facing eye of both birds to be sharp (bear in mind that, if you’re quite close to the action, you will need to choose a smaller aperture, maybe f/8, to obtain enough depth of field). Allow yourself plenty of space for the birds to move within the frame – when they stretch towards each other, you want to make sure you don’t crop too closely and miss off important bits!
Consider changing lenses and increasing your aperture number to f/11 or f/16, and including the birds’ environment in a wide-angle, landscape shot, instead of only shooting portrait-style images. The places where these birds nest are often spectacular, and the scenery is sometimes well worth including for context, and creating a sense of awe in your images.

Black-browed albatross nest in large colonies, often with thousands of birds together. So, an alternative effective aesthetic is to shoot with a mid-range, ‘normal’ focal length, such as 50mm or 85mm, and maintain a wide-open aperture, such as f/4. Include the mass of other nesting albatross in the colony as a background to the courting pair in the foreground.
This can work particularly well if your pair of albatross in focus have a little elevation above the rest of the colony. So, search for a pair displaying on a large rock or cliff-edge, overlooking the others.
This technique works beautifully with the birds’ native tussac grass, or the ocean, in the background.
Capturing in-flight images
As far as birds in flight go, albatross are your perfect subjects! They are large, and therefore relatively easy to lock focus on accurately. Use the wind to your advantage here, and find a spot where they are flying into it – usually when they are coming in to land – because they will be going much slower.
Give yourself a second advantage with a little extra depth of field, by selecting an aperture of f/5.6 or f/8 (if you have enough available light). Ensure your shutter speed is fast enough, not necessarily for the bird itself, but to compensate for that almost-certain gale of wind that will be buffeting you around!
1/2000th second is a good place to start. Use a continuous auto-focus mode to track the bird, and aim to focus on the eyes.
Select your ‘zone’ for a nice composition before you begin shooting. Look at where the birds are flying, and establish an area where the background is pleasing and the light is good. Try to avoid tracking the birds all over the place, as you will find it much harder to get a good shot that is also well-composed.
If you are on the cliffs you might be able to shoot down on the birds, which can look beautiful, especially if the ocean below is swirling with lovely blues and greens. Or, if the sunlight is sparkling on the water, it can produce a gorgeous bokeh background.
Most colonies in the Falklands allow you to move around a great deal and find brilliant spots for all sorts of compositions. Don’t just stand in one spot, go and explore angles, and be a little adventurous about it!

Look for repetitive behaviour in the individual bird’s flight – if they don’t make a successful landing at their nest site the first time (very common), then they will make a wide circle and try again and again until they successfully land.
This gives you multiple opportunities to grab the perfect shot. Such obliging creatures!
Read more: How to Photograph Birds in Flight
How to use the light to your advantage
Dramatic and stormy light is fairly common in this region, as is rich, golden light, early and late in the day. You will achieve gorgeous colours in your compositions if you shoot during the golden hour, and use the tussac grass and colourful lichens to enhance the aesthetic. You should still head out in bad weather, because it is often the best for this kind of photography!

Albatross also lend themselves perfectly to high-key photography on overcast days, or during the first ten minutes or so after the sun has set, when the eastern sky is dusky pink and blue. Their white plumage against the sky, with a stop or so of overexposure on your exposure compensation scale, can produce dreamy results.
Look for clean and interesting compositions and think about leaving plenty of ‘negative space’ in your images.
Read more: Backlighting in Wildlife Photography
In some locations, you may not have the luxury of choosing the time of day that you visit. For example, if you take a day-trip to West Point Island in the Falklands, or if you go on a cruise, which can mean you may face harsh sunlight and high-contrast light.
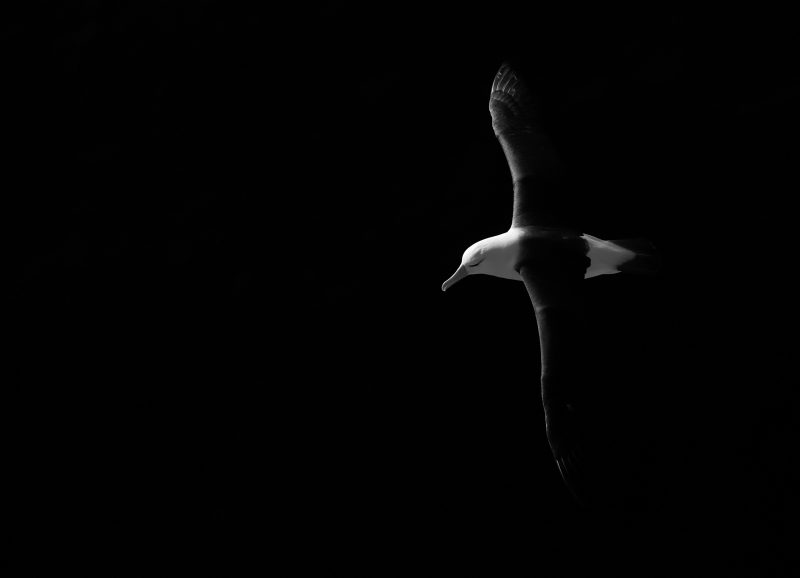
Use it to your advantage, and shoot at very high shutter speeds to freeze the action of birds in the air. Alternatively, perhaps try some low-key images where the birds are against a black or shadowed background, such as a cliff face in shade.
The sunlight should catch the bird, but not fall on the dark background. Use your exposure compensation and set it to around minus 2 stops, or until you accurately expose for the bird’s white plumage. Therefore, you are underexposing the shadows, rendering them rich black for a dramatic effect.

Finally, don’t forget to try backlighting! It is one of the most beautiful ways to capture unusual and memorable images. Experiment with different backgrounds, or shoot against the last moments of the setting sun for a silhouette.
Underexposure usually works best in this case but, if you’re not shooting in the golden hour, you can experiment with a range of exposures to see what different results you get.
In conclusion
Don’t be afraid to break the photographic rules – in fact, I beg you to break the rules! Photography is art, after all, and what better subject could you find to create a masterpiece?


