
How to Photograph Nesting Birds

Photographing birds at the nest is perhaps the oldest form of bird photography; looking back at the work of Eric Hosking for example, his work was often at the nest, probably due to the fact that with primitive equipment and slow film, photographing a bird at a known spot and barely moving often yielded results which could not be achieved with more active subjects.
Tackling the subject of nesting bird photography, I approach this article with some trepidation as it is an area fraught with controversy and, in the days of social media, potential criticism that is often totally unqualified and unconsidered. Please be aware that I take a great pride in my fieldcraft and only wish to encourage photographers to do the same.


It’s worth noting that this article is titled “nesting birds,” which does not necessarily mean photographing birds at the nest – they are two entirely different situations.
Photographing nesting birds means that you can photograph the associated behaviour, such as collection of nest material, the carrying of food, courtship displays, emergence and feeding of young, and simply achieve great portraits. Conversely, photographing birds at the nest can be somewhat limited and pushes us further down the moral scale of whether we should actually be doing it unless it is for some specific scientific or documentary reason.
Nesting birds and the law
Often articles of this type cite the legal ramifications at the end of the article, as if it is an afterthought. The law governing nesting birds in the UK is not an afterthought and it must be fully adhered to. Additionally, from a moral standpoint, the overriding rule that governs my working life is simply that the wildlife comes first; I will never compromise an animal’s safety, or breeding success, just to get an image, no matter what the deadline or who wants the image.
Read more: Ethics in Wildlife Photography – Code of Conduct
To protect rare breeding birds, the law prohibits any intentional disturbance of any species included in Schedule 1 of the Wildlife and Countryside Act 1981. This is applicable when the bird is building a nest or is in, on, or near a nest containing eggs or young.
It is also illegal to intentionally disturb dependent young of schedule 1 birds or for a photographer to visit the nest of a Schedule 1 bird without the granting of an appropriate licence issued by Natural England.

Schedule 1 birds are a classification of birds most at risk in the UK or even internationally, as some of these are migrant birds. To see the whole act and what it means, take a look at the UK government website.
Code of Conduct
In addition, you must adopt a code of conduct if entering this area of bird photography. The aim is to remove disturbance and ensure the welfare of your subject is protected.
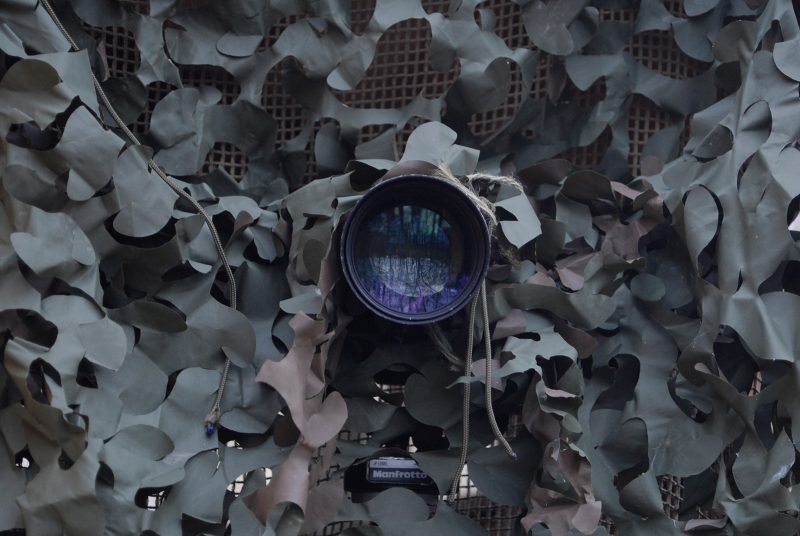
1. Use a hide
Shoddy fieldcraft and simply sitting outside of the nest is unacceptable – this will potentially disturb birds, whatever their legal status, and prevent adult birds from bringing food to their young. Buy one, make, one, adapt one… but use a hide!
Read more: What’s the Best Portable Wildlife Photography Hide?

Move the hide into position slowly, especially with the more shy species. If you plonk a hide 4 metres from the nest site of a sensitive species, they will potentially abandon the site. So, set the hide up some distance away and, over a period of days, gradually move the hide in closer.
2. Know your bird species
Some birds are bomb-proof and you can do pretty much anything around them and they just don’t care. In the case of the toco toucan, however, these birds are so shy of human disturbance around the nest that they just will not come if there is any suspicion that you are close.
So, a fully camouflaged hide was required and it meant getting up 4am to allow sufficient time to get to the hide, check for unwanted visitors such as snakes, and get fully settled in the hide. This ensured that by dawn I was relaxed, in place, and causing no disturbance.

Getting in and out of the hide without disruption depends on your species, and I strongly advise observing from a distance first to gain as much information as possible before moving a hide into place.
If possible, observe their reaction to human traffic. I have watched little owls remain stock still as a dog walker passes by, oblivious to the owl. However, if the intruder stops, the perceived threat is increased, so the bird takes flight.
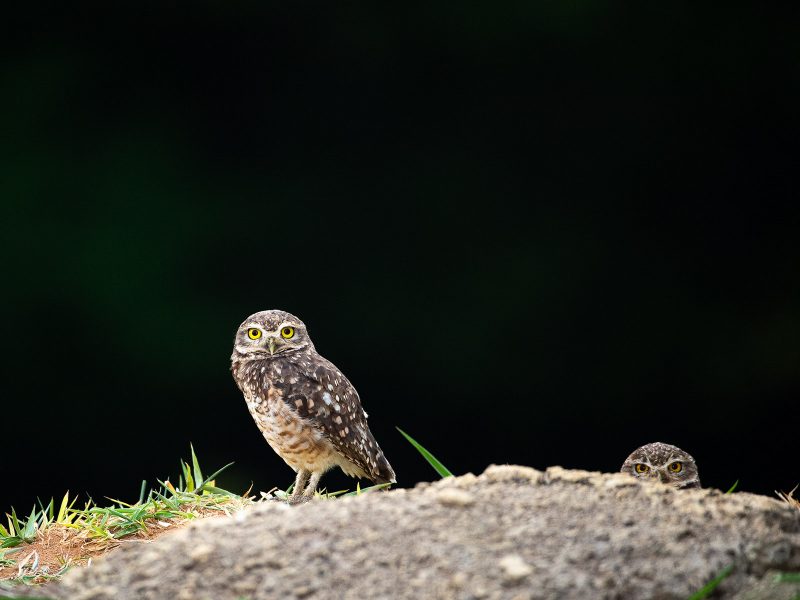
For burrowing owls in Brazil, I set up a pop-up hide swiftly one hot afternoon while the owls were dormant, and then from inside the hide I simply lifted it and slowly walked it to the exact position I needed. My colleague, Ricardo, then drove up to the back of the hide and I quietly escaped. The following day, about an hour before dawn, Ricardo drove me to the blind side and I slipped into the hide unnoticed. He drove away, leaving me in place waiting for the light.

Incidentally, many birds do not perceive a vehicle as a threat – or certainly less of one – than the tell-tale outline of a lone human, so they can make for effective mobile hides. I have adapted my 4×4 so that it is completely usable for this purpose.
3. Hide behaviour
This means your behaviour whilst in the hide, which his also called hide discipline. In the toucan example, if I am getting out of bed at 4am then I want to maximise chances of getting the shot. So, use scrim netting around the lens and withdraw the lens into the hide so that it is not obviously poking out of the front. Close any unnecessary ports to reduce your silhouette, and initially minimise your movements and sounds.

Regarding sound, it is again a case of knowing the species you are photographing. This will come with experience, but making some gentle sounds at the beginning of your project could get the birds used to your presence rather than maintaining silence and scaring the wits out of them when you press the shutter. That being said, if you have quiet or silent mode on your shutter then you should use it.
4. Don’t prune an area
This next point I have only gained by experience – I tend to do no “gardening,” which is the removal of foliage around the nest to allow for a clear shot, especially for low nest sites. In doing so we are wiping our scent all over the location and this will potentially attract the attention of predators such as stoats and weasels or badgers and foxes.
There is a reason why I have so many clips from my trail cameras of foxes or badgers sniffing and licking the camera. Although they are petrified of humans, they can age scent and know whether the smell is the acute presence of a human or it is something that passed several hours ago. By tidying up the nest site you are potentially inviting predators to have a meal.
Hopefully that covers both the moral, legal, and behavioural aspects of photographing nesting birds. Quite simply, if it’s a schedule 1 bird then don’t do it. Or, for any bird, if you are going to disturb it then don’t do it.
Photography tips for nesting birds
So, regarding the photography itself, nesting season is potentially the most productive time of the year for photographing a lot of bird species. It is when they are most active in carrying out the greatest variety of behaviour.
Additionally, knowing the location of the nest site means that we know the very epicentre of their activity and we can problem solve around that location to get a whole variety of shots.
1. Bird boxes
Starting simply is always the best way to go, and species such as blue tit or robin make for a great starting point. You may find you get intimately involved with your species, following the trials and tribulations and – hopefully – witnessing success with young being reared.
Read more: Photographing a Species In-depth

Blue tits are easy. They readily take to new nest boxes, and indeed prefer brand new ones as there are no dormant parasites inside.
Initially, keep the site under observation – you don’t want to scare them off from occupying the box. Then you can just set up a hide to capture them bringing nest material in. It will probably go quiet for about 3 weeks after this as the female incubates.
Once the young have hatched, there is no stopping them. The parent birds will relentlessly bring food, quite often colourful green tortrix or winter moth larvae. Then, you’ll have the period when the young are developing and poking their heads out of the box. Once the birds fledge, or leave the nest, you will have the opportunity of photographing adults feeding young.

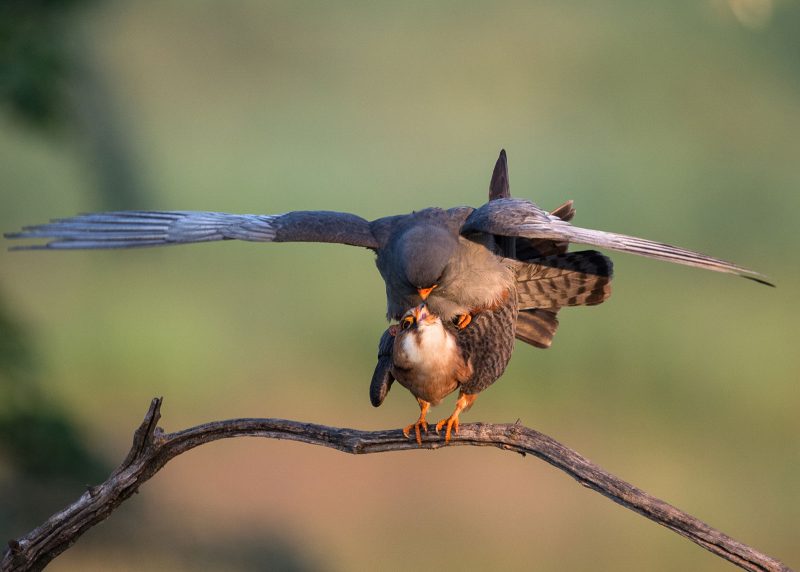
Other potential scenarios, which make for great images, are courtship shots. This is especially interesting in species that pass food to each other, such as bee-eaters or kingfishers, as a part of the pair-bonding process.

Please note that the kingfisher, although a very beautiful and desirable bird to photograph, is a Schedule 1 bird as specified above and therefore needs a licence to photograph at the nest. The image of the kingfisher food-pass was taken over 100 metres from the nest site and caused no disturbance.

To get most of your shots, such as bringing in nest material and food, you can simply observe the birds’ behaviour. They tend to stop in exactly the same place on their approach, allowing you to set up on this spot and leave the nest undisturbed. You can obviously introduce your own perch for this if necessary, which could be more attractive.

On one occasion, in Hungary, I was asked to try and photograph a Scop’s owl which had occupied a Eurasian roller nest box. The box itself looks just like a large blue tit box on a pole.
On my first night setting up, the owls just repeatedly flew straight into the box without stopping, producing poor results or at best an owl clinging to the sides of wooden box. I think most wildlife photography is about solving problems, and my goal was to adapt this situation (causing no disturbance) to get natural looking shots.
My solution was to find strips of bark and, during daylight, glue these strips to the front and half of one side of the box. Obviously, the strips did not change the shape of the hole of the nest box nor hinder access.
That night I was in the hide and ready before the adult owls began to emerge. Within half an hour, I got pretty much all the portrait shots I wanted. Although you may not have ready access to this beautiful owl, I use it as a nice example as this same technique can simply be transferred to any nest box in your garden.

2. Nests at height
As far as composition goes, I always try to get level with my subject for greater intimacy, as well as distancing my background. With the jabiru stork nest taken in Brazil, this meant using a 20 metre high tower hide.
Last year, for BBC’s Springwatch, I filmed the first white stork nest in the United Kingdom since the English Civil War, and this also meant using a tower hide.

3. Ground-level nests
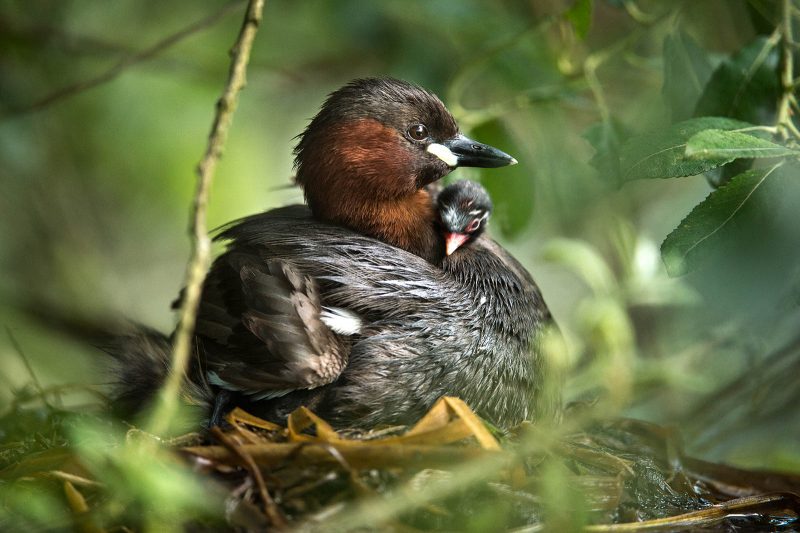
Conversely, to get level with little grebes, I had to get the lens about one or two inches above the waterline and a static hide on the bank was too restricting. If you have ever tried approaching a little grebe without using a hide, you’ll know that their fear circle is very wide and they just dive under the water before you’re anywhere near them.
Read more: 6 Tips for Better Fieldcraft in Wildlife Photography
I had to develop a mobile system, so I built a floating hide which was easily manoeuvrable, small, and highly effective. The hide itself comprised of a simple platform with a camouflaged cage over the top.

The camera and lens simply rest on the platform and, wearing chest-waders, I am in the water and under the camouflage cage, pushing the platform to where I need it. The floating hide was so effective that I could get the camera within metres of the nest without causing disturbance, as well as follow any subsequent behaviour such as feeding the young. Instead of chest-waders, I now tend to wear a dry-suit for this after a very unpleasant time with leeches in Hungary!

4. Nests in cavities
With cavity nesting birds that use a hole to access the nest, you pretty much know exactly where the bird is going to land and, with some time spent on reconnaissance, you can work out fairly accurately the repeated flight-line of the bird. Knowing this is a very good way of getting dramatic in-flight shots in a very low-tech way.
To do this, place the camera on a tripod and frame your shot with the cavity hole just out of frame. Lock the tripod in position so it will not move. Pre-focus the lens on your estimation of the flight-line, which may take a little trial and error, and then turn autofocus off.
Stop down your aperture to give you a little insurance should the point of focus be off slightly. Ramp up your ISO sufficiently to give you a fast shutter speed to capture the moving bird.

Since you are stopping down the aperture, your choice of nest site can be used to your advantage. Since you want the aperture out of focus, it’ll need to be a good distance away. Additionally, you will want the site to be in good light as you are ramping up your ISO as well.
For these shots, I put a cable release on the camera as it means I can sit back in the hide and drink my coffee with one hand, and as the bird flies in I simply depress the shutter to fire a burst of shots.
At the height of the breeding season, birds are sometimes visiting the nest so often that you can get a couple of hundred chances at this in a few hours, so by tweaking your settings each time you should be able to get something pretty dramatic.

In conclusion
Nesting season means very busy and often preoccupied birds, so it can certainly make the subject easier as your target is so focused on its activities that you’ll probably be ignored.
Although I have used some exotic examples for interest, they are done with the same generic skills I adopt for more common species. These are the very same skills I learnt at a young age in my parents’ garden.
I hope that I have shown what can be achieved at this fantastic time of year, but please remember the ethics as well as the law. No shot is worth a pair of birds abandoning their nest site.
Good luck!


