
The Best Settings for Landscape Photography

You’ll occasionally hear it said that the technical side of photography isn’t important and you should instead focus on creativity. The implication is that the technical and the creative are two separate entities and that focusing on improving your technical ability will somehow stunt your creativity.
In fact, nothing could be further from the truth. In photography, technical ability and creativity go hand-in-hand and in order to be truly creative, you’ll need at least a reasonable understanding of the technical side of things.


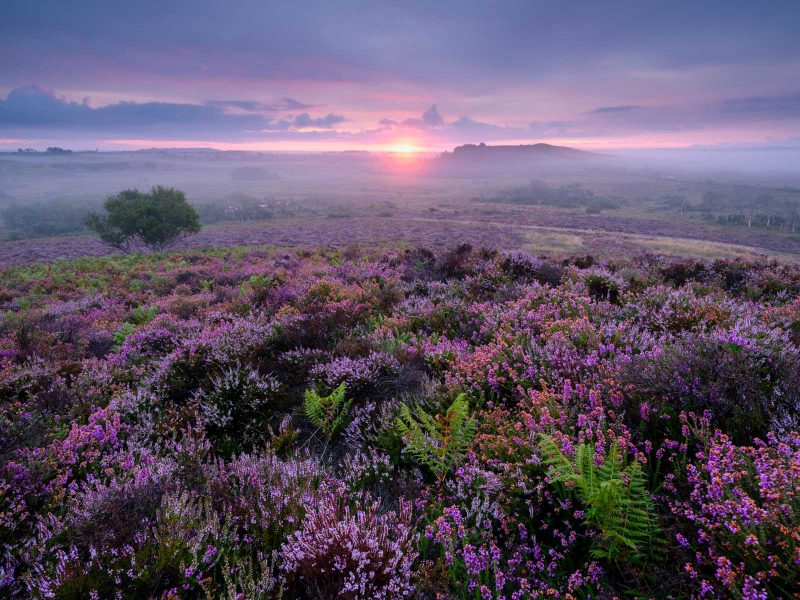
Imagine, for example, that you want to capture the drama of a sweeping vista. In order to do so, you’ve decided that you need a strong foreground element and a focal point in the distance. You’ve framed the shot to achieve a harmonious, well-balanced composition.
In order for the image to be truly successful, however, you need to ensure that there is enough depth of field to keep both the foreground and background sharp. So you’ll need to know which aperture to select and where to focus. The scene is also quite contrasty, so you can’t just rely on your camera’s automatic exposure, and you may need to use filtration to control the lighting.
In short, you’ll need to have an understanding of the technical aspects of photography in order to realise your creative vision. So what are the key settings you should get to grips with?
Camera modes for landscape photography
Modern cameras offer an extensive range of exposure modes, but the ones you need to pay attention to are: Program (Auto), Shutter Priority (Tv or S), Aperture Priority (Av or A), and Manual (M).
- Program mode is a fully automated mode in which the camera sets both the aperture and shutter speed to obtain what it determines is the correct exposure.
- Shutter Priority is a semi-automated mode in which you select the shutter speed you want and the camera chooses the aperture.
- In Aperture Priority, you select the aperture and the camera assigns the shutter speed.
- In Manual mode, you have full control and select both the aperture and shutter speed yourself.

In landscape photography, the two most useful settings are are Aperture Priority and Manual, because both of these allow you to select the aperture – which is crucial for controlling depth of field.
Purists may try to tell you that you should always use Manual mode, but if like most people you’re relying on your in-camera meter, the result will be the same as shooting in Aperture Priority. Aperture Priority is also arguably better in rapidly-changing light, reacting to changes faster than you can, and allowing you to concentrate on composition and other aspects of the photographic process.
If you need to change the shutter speed from the one the camera has selected, you can do so using the camera’s exposure compensation facility.
Read more: Understanding Different Metering Modes
Exposing a landscape photo
There is a certain amount of subjectivity in the term ‘correct exposure’. For example, a silhouette is technically a grossly underexposed subject, but if it is the effect you intended, then your exposure is correct.
However, in general, correct exposure is when there are no blown highlights or lost shadow detail in an image. To get the correct amount of light falling on the sensor to achieve this, we combine aperture, shutter speed and ISO speed settings. This is sometimes referred to as the exposure triangle.
Modern cameras have highly accurate meters, and you can usually rely on these, especially if you are also guided by the camera’s histogram, which you should activate in Live View (or in the EVF if you have a mirrorless camera).

The histogram is a graph which shows how the tones are distributed throughout the image, allowing you to avoid the extremes of underexposure (with the tones bunched up on the left) and overexposure (with the tones bunched up on the right). Once you’ve selected the the aperture you want (more on this below), then adjust the shutter speed so that there are no spikes spilling over the edges of the histogram.
You may have heard of a technique called ‘Exposing To The Right’ (ETTR) in which you push the tones as close to overexposure as you can without actually clipping any highlights. The theory behind this is that you reduce noise and capture more tonal information, although with modern sensors, which have a greater bit depth, more dynamic range and much cleaner shadows than earlier devices, it’s not really necessary. Just avoid the extremes and you’ll have all the information you need in your file.
Read more: Understanding Histograms and How to Use Them
Metering modes
These days, most cameras have three (or sometimes more) metering modes: centre-weighted, multi-pattern / evaluative and spot.
Centre-weighted metering reads the light from the whole frame but is biased towards the centre. It can be fooled by tricky lighting situations such as backlighting, but will make errors in a predictable way. It’s popular with traditionalists who know when to override its settings.

Evaluative metering reads from multiple zones across the frame, and these are analysed in order to determine correct exposure. Modern cameras meter exceptionally accurately with their various versions of evaluative metering and so this is the recommended setting for most situations.
Spot-metering reads from a very small zone in the centre of the frame – typically a 1-2% area. It’s useful in tricky lighting situations when you need to meter from a specific part of the scene – for example, a very contrasty scene when you want to meter just from your subject.
If you don’t like the idea of the camera doing all the thinking and would prefer more control, then use centre-weighted or spot metering.

ISO
Put simply, ISO refers to the sensitivity of the camera’s sensor. The higher the setting, the more sensitive it is and the more light it will capture. As increasing the ISO also generates more noise, in order to maximise image quality, you should shoot at base ISO whenever possible.
There are of course, occasions when you’ll need to use higher ISOs, for example if you want to stop leaves blurring on a windy day. Manufacturers – and some reviewers – will often make quite extravagant claims as to how high you can push the ISO while maintaining image quality, but as a general rule you will see some deterioration in quality from around ISO 800 – though up to a point, this can be offset by the excellent noise reduction available in most image processing software.

Aperture
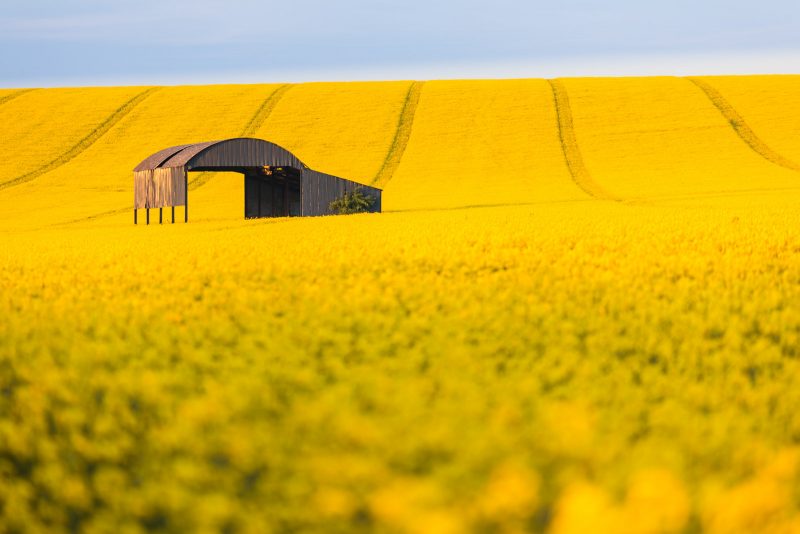
Depth of field is an important consideration when shooting landscape images and one of the factors which controls depth of field is the aperture selected. The vast majority of landscapes feature extensive depth of field, with the shot being sharp from foreground to background – though there are times when a narrow depth of field works very well. So, while front-to-back sharpness isn’t a ‘rule’ in landscape photography, it’s certainly a very strong tendency.
Depth of field increases as aperture size decreases (and the f-number increases). The temptation therefore can be to shoot everything at a really small aperture such as f/22.
Unfortunately, it’s not that simple. Although depth of field increases as you stop the lens down, so does an optical aberration known as diffraction. Diffraction is the spreading of light waves as they pass through a hole, such as a lens aperture, which causes the image to soften. As you make the aperture smaller, a greater percentage of light waves get spread, thus causing more softness.
Read more: 10 Top Tips for Sharper Landscape Photos
So when it comes to aperture selection, there is clearly a balance to be struck between getting sufficient depth of field and keeping diffraction to a minimum; clearly you should aim to stop down far enough to get the depth of field you need, but no more.
Depending on your composition, this will often be around f/11 with wide angle lenses. Sometimes it may be wider at around f/8 and sometimes you’ll need to stop down further to say f/16, but f/11 is usually a good starting point.
Focusing
Where you focus is the other main factor which determines depth of field. One rule of thumb which has proved popular over the years is to focus a third of the way into the scene. This is based on the fact that depth of field extends twice as far beyond the point of focus as it does in front of it. However, this is not very precise and people understandably get confused as to where ‘a third of the way in’ actually is.
A more reliable technique which has become very popular in recent years is ‘double distance focusing’, where you calculate the distance from the nearest object which you want to be sharp and then focus at twice this distance. For example, if the nearest object to the camera is 1.5 metres away, focus 3 metres into the scene.
Read more: Where to Focus in a Landscape Photo
Once you’ve selected the aperture and focused, you can check depth of field by using the depth of field preview in conjunction with your camera’s Live View, or with mirrorless cameras you can enable ‘focus peaking’ – which highlights in-focus areas of the image in a user-selected colour. Alternatively, you can take the shot and zoom in on the review image to check sharpness in the foreground and background.
The other choice you need to make is whether to focus manually or use autofocus. Purists will insist on manual focus, but it really doesn’t matter: autofocus is quick and highly accurate these days. Knowing where to focus, and making sure that focus stays locked on that point, is more important than whether or not you turn the focusing ring yourself.
To make sure focus stays locked where you want it, set up ‘back button focusing’ on your camera. This is where focusing is removed from the shutter button and assigned to one of the buttons on the rear of the camera. You then set focus using the customised back button and when you press the shutter, the camera doesn’t try to refocus. Check your camera’s manual for details on how to set up this feature.

File format
This is an easy one: set your camera to shoot raw files. This will give you a lot more flexibility when it comes to processing the image, allowing you to adjust white balance, exposure, shadow detail, contrast and so on both globally and to specific areas of the image.
If you’re not very experienced with processing raw images or you need a finished shot quickly to post on social media, you can always shoot Raw + jpeg.
Read more: Why You Should Be Shooting in Raw
White balance
If you shoot raw, then white balance can be adjusted quite considerably during post production, so in some ways it doesn’t really matter what white balance you set. However, it’s encouraging to see good results when reviewing images during a shoot, so some consideration is necessary.
In most instances when shooting outdoors, Auto White Balance (AWB) will deliver excellent results, but it can make mistakes if there is a predominance of one particular colour. For example, the warm tones of a vivid sunset can be misinterpreted as a colour cast and Auto White Balance will then do its job, removing the impact of the sunset colours to deliver a neutral result. In these situations, you can choose one of the presets, such as Daylight or Cloudy.
In conclusion
Finally, this isn’t actually a camera setting, but I’d recommend using a tripod whenever possible, as this has a considerable impact on the other settings you select.
Without the need for setting a high enough shutter speed to avoid camera shake, you’ll be able to stop down your lens to maximise depth of field and you’ll also be able to keep ISO at base level to maximise image quality. You’ll also be able to get creative and use neutral density filters to generate long exposures and experiment with subject movement.
The other benefit is that it slows you down, resulting in more considered compositions and allows you to make fine adjustments to your framing.
Good luck!


