
How to Photograph Gannets

Northern gannets can be found in 14 locations across the UK, where they go to breed every year. I have only photographed them at two, but I am looking at going to a few other areas in the next year or two.
When wildlife guiding in Shetland, I regularly receive comments from photographers to the effect of “I have already photographed gannets elsewhere, I don’t need to photograph them again.” This always surprises me, because every location has endless photo opportunities and each different location has a whole new range of imagery to be harnessed.


The more you photograph one species, the better your images will be and the bigger your portfolio of that species.

Gannets are a great species to photograph for all levels of photographic experience. They are approachable and guaranteed to be there during the breeding season, meaning you can spend a long time photographing them and trying out new techniques and compositions.
They display a wide range of behaviour too, all in a fairly small time frame. This allows you to capture lots of different types of images. If you are aiming to document behaviour, I would normally search for a pair which can be isolated from others, offering a good background in an area that is well lit.
After finding the ideal location, I would spend the day there photographing and waiting for the specific behaviours and interactions that I am looking for.

Read the wind direction
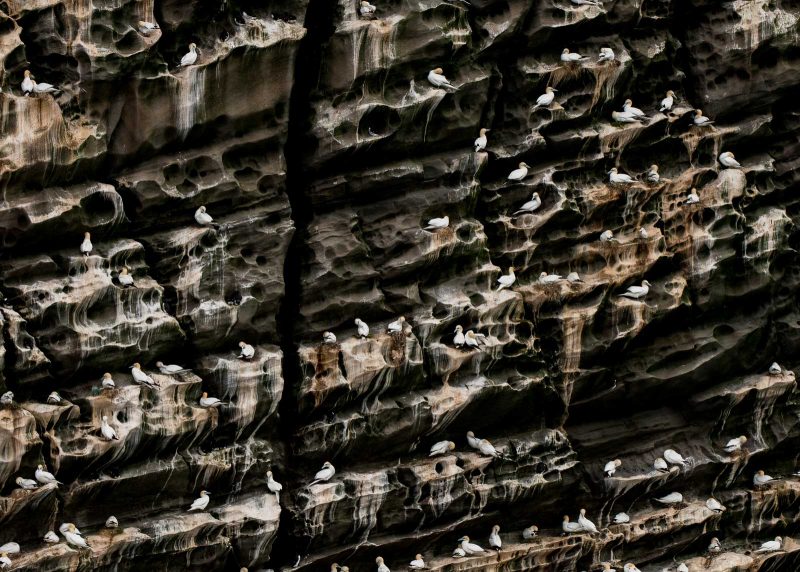
As most nesting areas are located on cliff faces, you are usually looking down on them. In these cases, wind can play an important part. Having a strong onshore wind will create an updraft, which will bring the gannets a lot higher up the cliff and more to your eye level.
The wind also creates a swell in the sea, making the water below much more dramatic, also adding an interesting backdrop to your images.

Wind can also slow down a gannet in flight, making shots easier than you might expect. They will tend to fly into the wind, especially when coming in to land by their nests, and sometimes come to a near hover. This is ideal for flight shots. So, when you next go, make sure you check the weather and choose the day accordingly.
Choose your lighting carefully
Due to gannets being mainly white, lighting conditions can have a huge impact on the photos you can take. If it’s a sunny day, you will have to underexpose your shots to expose the gannet correctly.
This can allow you to take some more creative shots, using a low key method. It is one of my favourite techniques with gannets; it’s simple, but effective.
To do it, find an area with a darker background, such as the water or a cliff, and underexpose the shot by roughly 2 or 3 stops. This will make anything dark appear black, and the white gannet will remain properly exposed, making the subject really stand out. This should all be done in camera with only fine adjustments in post production.

Another method in sunny conditions is to shoot “gannet trails.” This is where you take a 2-4 second exposure of the colony and it will create long trails of where the gannets have been flying. A fairly arty, and sometimes marmite, effect. However, it can add another dynamic to your portfolio of gannets.
These shots can be created in any lighting conditions, but I have discovered that sunny days make the gannet trails stand out best. To do this on a sunny day, you will need a strong ND filter in front of the lens to allow for such a long exposure.
If you don’t have one, then you will have to try at sunset but the trails may not show up as much.

If it is an overcast day, the light will be a lot better for your more general shots, giving no harsh shadows and ensuring the whole picture is exposed correctly. You can also use a high key technique, which is the opposite of low key.
With high key images, you overexpose by a few stops instead of underexposing. Shooting gannets against a white/grey sky, or guano (gannet droppings) covered rocks, and overexposing the shot by 2 stops will make the sky go white along with the gannets to create a very clean, simplistic and bright image.
Be careful about overexposing too much, though, as you still want detail on the gannet’s feathers, so you will have to experiment. As always, practice makes perfect.

If you’re on location when there is ample golden light around, then you are definitely onto a winner. Silhouettes, side-lit, backlit, head-on. They are all worth doing.
Read more: Choosing the Best Light for Wildlife Photos

Select your background
Shooting with different backgrounds can create completely different images. Photographing gannets with the colony in the background can make for a great habitat image. Use a high aperture to get a big enough depth of field to show the gannets in the background. This gives the shot a lot more context and shows the viewer where and how they live.

Shooting against the sky or calm water also creates a strong, clean image, isolating the bird and making it stand out. When shooting against the water, you can create some lovely images with a rough sea, producing some stunning light blue colour and white wash to add texture and dramatise the image.
Another trick with water is to shoot in or around the light beam on the water coming from the sun. This way you can create some nice bokeh effects and give a sparkling look to the background. With this technique, it is best to have the lowest aperture of around f2.8 (if you can), and get close to the subject. The greater the distance between your subject and the background, the better.

Shoot from boats
So how do we photograph a gannet colony from a boat? It gives a completely different perspective of the colony and you can produce some completely different styles of image. When shooting from a boat, try and pick a calm day with little swell.
The longer your lens, the harder it can be to focus and compose your images due to the movement, so you may have to compromise, especially in rough conditions. Also, don’t use the boat as a tripod – the movement and vibration will be too much. Instead, use your body. Tuck your elbows into your sides and try to stabilise yourself as much as you can whilst shooting handheld. Don’t forget to turn on vibration reduction (in the correct mode for your lens).
Another thing a lot of boat trips are now offering is a ‘gannet feeding frenzy’. This is where the boat’s captain moves the boat away from the colony and throws fish into the sea to get the gannets diving.
It is an incredible spectacle to see, not as good as a natural frenzy, but still amazing. It can be overwhelming to photograph to start with, though. Normally you need a few attempts.
Take both wide-angles and medium range lenses: 70-200mm is ideal, plus a wide. Anything over 400mm and you will struggle in the frenzy. Take a minute to watch, too. Put down the camera and appreciate the spectacle. Not everyone agrees with feeding the gannets, but if it’s something you are ok with and thinking about doing, definitely give it a go!
Photograph gannets in the UK: Diving Gannets at Bempton Cliffs

The story of plastic
Finally, as photographers our images should tell a story, or at the very least show behaviours. One of the current issues in the news is the huge amount of plastic in our oceans.
If you go to a gannet colony, I can guarantee you will see some plastic in their nests, whether it be fishing rope, cable ties, or any other manmade product. Although these won’t necessarily make for traditionally beautiful images, they will create a lot more attention and impact.
These are important images and photography is a powerful tool to help create change.


In conclusion
Hopefully this article has provided you with a few more ideas and techniques to use or think about when you next go to a gannet colony.
They are amazing places to visit and are some of the UK’s most spectacular sights to see. Hermaness gannet colony, in Shetland, is one of my favourite locations out of anywhere I have ever visited, and where most of these images were taken.
Good luck!


