
How to Take Long Exposure Landscape Photos
There was a time when long exposures in landscape photography were restricted to the times of day when the ambient light was very low, so they were a feature of dark valleys, dusk and night time photography. Nowadays most of us landscape photographers carry at least a couple of neutral density (ND) filters in our kit bags to give us the option of extending shutter speeds by an amount of our choice in any light.
Playing with long exposures in landscape photography can be quite exciting because we are producing something creative. By blurring moving subjects, we have the power to make an image which is different to that which we can see with our eye. It allows us to change the textures and sometimes shapes within the picture.


Most commonly we see the effect of slower shutter speeds in water such as the sea or rivers creating that ‘milky-effect’ which seems to divide popular opinion. But we also see movement in skies particularly when a stiff breeze is moving the clouds quickly.

Here, I hope to give some useful advice on how to take long exposure images for beginners, and a few useful tips for the more experienced photographers about the process of using long exposures in landscape photography.
What’s in my kit bag
I started out with a couple of circular ND filters which at first I found very good, but in time found them limiting because they can only fit on lenses with the same filter thread size, or with smaller lenses using step-up rings.
Once I was convinced I wanted to continue using ND filters, I purchased good quality square, drop-in filters with a filter holder and various adapters to fit all of my lenses.
Read more: The Essential Filters for Landscape Photographers
For extending shutter speeds, I now use a polarising filter and both 6-stop and 10-stop ND filters. The one I use most often is the 6-stop because I find at sunset or sunrise this gives me a good range of shutter speeds to work with. I like to use the 10-stop during the middle of the day to make standard day-time shots look a little different, and in dull conditions to make very long exposures when I want to achieve something a little more abstract. But, to be honest, I find at sunset a 10-stop ND filter makes my photography less flexible, often giving me the chance to take only one or two photos at the critical time of greatest colour.
Purchasing equipment
Don’t buy cheap ND filters. They introduce colour casts and, though these can be corrected to an extent, over-processing any image will lead to a deterioration in quality. If you have a limited budget, consider buying a circular ND filter to fit your favourite landscape lens rather than a cheap set of rectangular filters for the same price.
We have a number of articles on Nature TTL to help you decide on the perfect filters for you:
- What are the Best Filters for Landscape Photography?
- The Essential Filters for Landscape Photography
- LEE100 Filter System Review
In the field
You need a good, heavy tripod for long exposures, as well as a lockable remote release. Set the tripod legs on firm ground, not on spongy grass or sinking sand (you can always bring wooden boards if you’re shooting in marshland). Spread the tripod legs a little, if possible, and keep the tripod head approximately above the middle of the three tripod feet to keep it stable. If there is a breeze, take the strap off the camera to stop it blowing around and hold the remote release to prevent the same issue. If there is a strong, buffeting wind, like we often get in Cornwall… then don’t bother trying!
If using a ND filter, you might find it easier to compose the photo and focus before putting the filter in place, then turn the auto-focusing off before putting the filter on (the same can be achieved using back-button focus). The cameras I use work well with ND filters in live-view, so I put the filter on first then compose and focus manually (with the magnify function).
When I use a ND filter I tend to take off the UV filter, which usually stays on the lens all the time. I do this because I am conscious of the fact that any piece of glass in front of the lens will diminish the image quality to a degree, so having more than is necessary stacked together is not desirable.

Read more: The Best Settings for Night Photography
Achieving the correct exposure
If you are shooting exposures of up to 30 seconds, then just use aperture priority mode to properly expose the shot. Once you go over 30 seconds, then you must use a lockable remote release combined with Bulb-mode and begin working out exposure times.


Read more: 6 Tips for Photographing Waterfalls
2 good ways for calculating exposure
If you are using a ND filter, then possibly the simplest method to explain is to take an exposure reading without the filter in place then put the filter on and calculate the exposure using a conversion table for the filter in question (available online or through apps – such as the one by LEE Filters).

If you are achieving long exposures because the ambient light is very low, e.g. at night or if you prefer to leave the ND filter on the lens (as I do), the previous method is not an option. In this case, this is what I do: as soon as my exposure times go beyond 30 seconds I change the ISO and/or aperture values to get an accurate reading in aperture priority mode then switch to Bulb-mode and readjust the settings accordingly.
Let’s say at ISO 100 and an aperture of f5.6, in aperture priority mode, that the camera’s meter tells me the exposure time is 30 seconds. I know that if I want to use an aperture of f8 (that’s one stop smaller than f5.6) then I will need to double the exposure time; in this case to one minute (a stop is a doubling or halving of time).
If I want to use f11 then it will double again to two minutes (2-stops). So I switch to Bulb-mode and set an aperture value of f11 and then time an exposure of two minutes.
As it gets darker, and in order to get a meter reading in aperture priority, I might need to increase my ISO and widen my aperture. So let’s say when set to f5.6 and ISO 800 my camera suggests a shutter speed of fifteen seconds. If I want to take my photo at f11 and ISO 100 I will need to double the exposure five times: two stops for the change in aperture and three stops for the change in ISO. So my correct exposure will be fifteen seconds doubled twice for the aperture gives one minute; then double one minute three times gives eight minutes (the increase compounds).
This process might seem complicated, but once you’ve done it a few times it is relatively straight forward just by counting clicks on the scroll dials, and you can actually work out the exposure time whilst the camera is taking the photo.
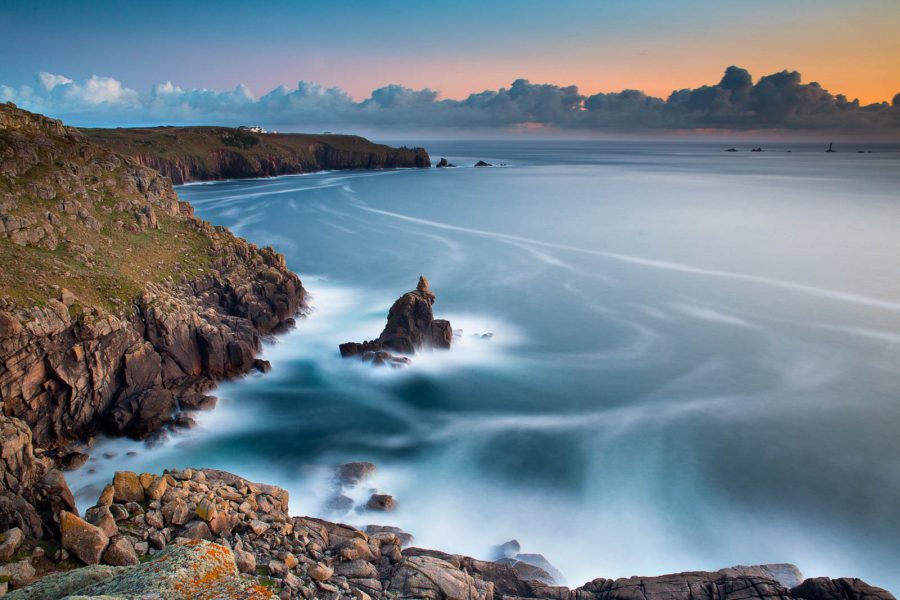
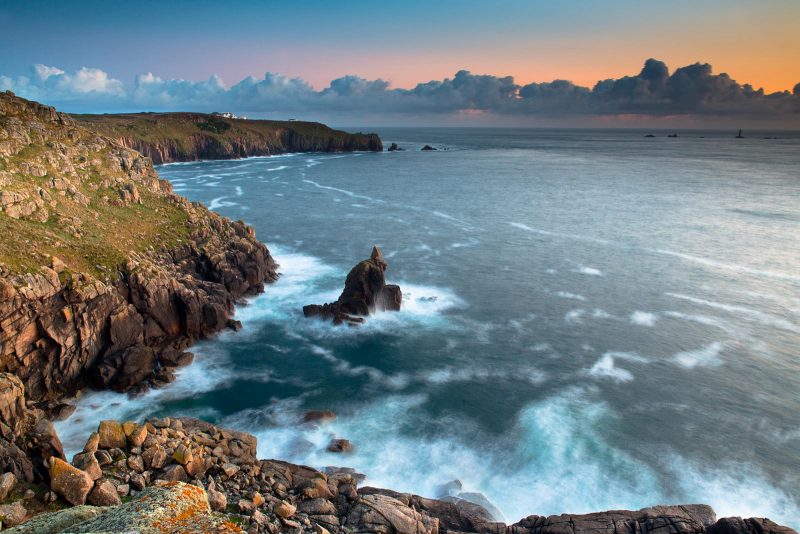
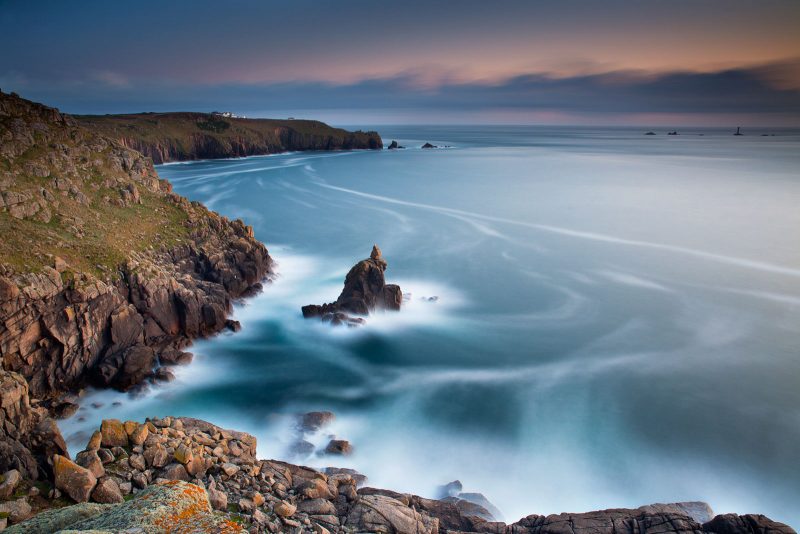
These three photos show a view of Lands End from Sennen Lookout, Cornwall. The first has an exposure of 8 seconds; the second is 8 minutes (using an ND filter). I preferred the sea from one and the sky from the other, so merged the two in post-processing to get the third image.

Read more: Long Exposure Photography Guide: Slow Shutters for Smooth Results
Other ideas for using long-exposures
When we think of long exposures, we automatically think of moving water. For me, living in Cornwall, UK, it’s almost always the sea. But there are some less obvious benefits when using ND filters to lengthening exposures.
These two shots of Trebah Garden, Cornwall, were taken at the same time and in the same conditions: the first was an exposure of 1/80th of a second; the second was 8 seconds, using a ND filter. Note that the longer exposure has given a clearer reflection.


I often find myself visiting a lake or pond at dawn, hoping to get calm water and a perfect reflection only to find a slight ripple has foiled my plan. In this case adding a 10-stop filter can be enough to smooth the water and enhance the reflection.
At popular tourist locations it is almost impossible to get a photo without people being in the way. In this situation I might use a 10-stop filter and, if they move around a bit during the exposure, they should disappear from view as if by magic! It isn’t always possible to make people disappear, but they can become a dynamic feature of the photo if an appropriate shutter speed is chosen which shows their movement.
On a slightly breezy day it can be nice to lengthen the exposure to show movement in foreground flowers, grasses or trees.


Read more: How to Photograph Trees Creatively
Long-exposures are used by firework photographers, too. Simply open up the shutter in Bulb-mode and leave it open. Put a piece of black card in front of the lens when nothing is happening and move this out of the way as colourful fireworks explode in the sky. This enables you to have several sets of colourful fireworks on the same image.

With long-exposures we get the chance to move the camera during the exposure (known as ICM – Intentional Camera Movement). The most obvious technique we often see for this is panning up or down, parallel with woodland trees. It can also be good to pan horizontally along the horizon on a seascape. Or try starting with the camera in one position and suddenly moving it to a second, almost achieving a double exposure effect. I have even been known to rotate the camera on a lens-mount during an exposure, though this probably works better with close-ups rather than landscapes.

Trouble-shooting your long exposure photography
If you notice that your images are being under-exposed, then this might be because your camera’s exposure meter is being fooled by light leaking in through the viewfinder. This problem tends to be most severe when shooting with the sun behind you in the middle of the day with a 10-stop ND filter on the lens, but can occur whenever shooting long-exposures, particularly when you are not looking through the camera. To avoid this, either make your exposures and take your photos in live-view (because in live-view the mirror is locked-up therefore stopping light entering the camera through the viewfinder), or put the eye-piece cover on your viewfinder before setting exposures and taking the photos (Nikon cameras have built-in shields). This problem can also be caused by shining a head torch on the back of a camera when taking exposure readings at night.
Colour casts can be caused by ND filters. Generally, the cheaper the filter then the worse the cast is, though check reviews online for the best filters. The only solution to this is in post-processing, but spend your money wisely in the first place.
Strange light patterns on parts of the image are usually caused by light leaking around the edges of the ND filter. Always put your ND filter in the slot closest to the lens where it should form a light seal; if it does not form a light seal then you have the wrong filter system. Light leaks can also be caused by light entering through the viewfinder of the camera so use a viewfinder cover (one of my expensive cameras leaked light even with the cover in place so I resorted to ‘blu tack’).
It’s impossible to give an ideal shutter speed because it varies from scene to scene and from one person’s preference to another. As photographers we are artists, and we are entitled to express ourselves in the way we wish. That’s a good line to give to the judge who has just slated your work!
Final tips
You might have just purchased your new 10-stop filter, but that doesn’t mean that every photo is enhanced by being taken at the longest shutter speed achievable! Learn to choose appropriate shutter speeds, and when to use filters (if at all).
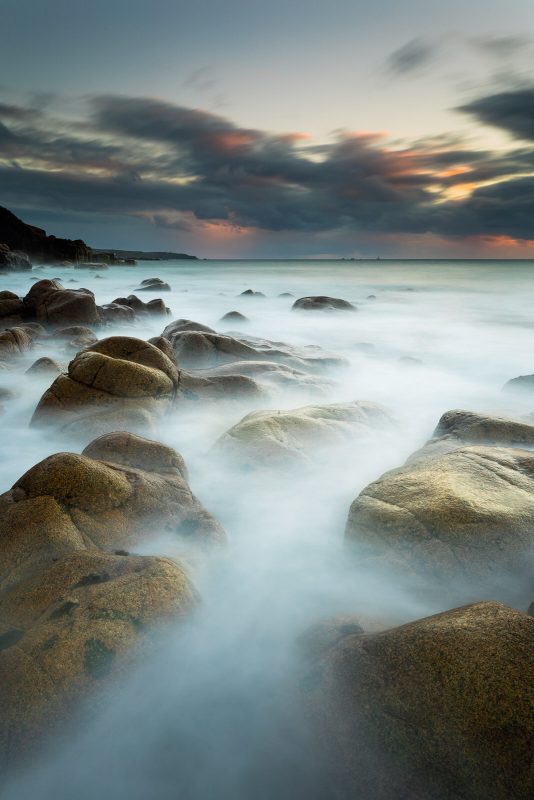
I find that longer exposures work well when there is a contrast in texture in the foreground. So a milky sea around sharp rocks tends to work well. But often it is desirable to keep some texture in the moving water. By trying out different exposure lengths on the same scene, you will see how at some shutter speeds there is a pattern of movement which can be used to lead the eye into the frame or add a sense of dynamism to the movement.
When in doubt about my own choice of exposure length, I use two further strategies. I will take the same photo with a variety of shutter speeds so I can choose from the comfort of my computer. I have also been known to merge two different exposures, like in the example earlier in the article.
Have you taken any long exposures recently? Share them with us in the comments!


