
Macro: How to Take Low-key Close-ups

Low-key photography is by no means a new technique, although it is normally more associated with portraits and still life shots than with photographing close-up images of the natural world. With a simple set-up consisting of just a camera attached to a tripod with a single flashgun triggered via an off-camera cord or remote trigger, it is possible to create images that have an almost studio like appearance.

Before you can start practising this kind of photography, it is good to have a basic understanding of how you achieve the low-key look. The principle is actually quite simple, you underexposure the image to remove all natural light and then use your flash gun to artificially light your subject. The main consideration you need to have is how powerful the artificial light will have to be to illuminate your subject, which in turn will dictate the size of the subject you can photograph.


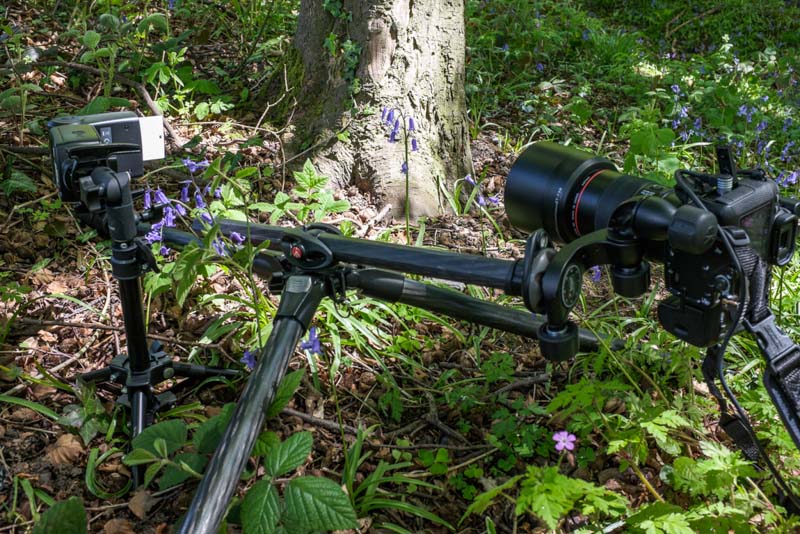
Thankfully, the ideal subjects for low-key close-up photography all tend to be small enough to be illuminated by a single flashgun. The image below shows a simple low-key set up in the field. You will notice that I have the flashgun attached to a small lighting tripod, which is by no means necessary although it can make the fine-tuning of the light’s position simpler. However for the majority of the shots I take, I simply handhold the flashgun. I’m using a YongNuo flashgun – the kit used doesn’t need to be expense.
Settings
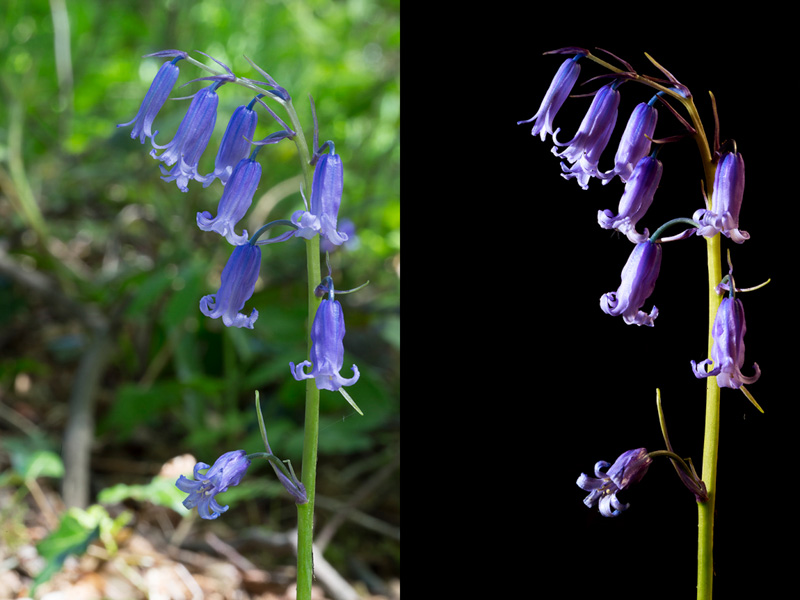
Once you have found your perfect subject (in this example it is a patch of bluebells in a local woodland), you will need to compose your image. Simple compositions work best. Try to isolate your subject – you will ideally need it to not be growing in a clump or near to other plants or trees. The reason for this is that you need to be able to illuminate just the subject to ensure that you have a clean, black backdrop.
Once your shot is composed (do not attach your flashgun yet) you need to switch your camera to manual mode. Now select the lowest ISO that your camera can be set to, select a nice high aperture (ideally above f/18) and set you shutter speed to the normal speed used for flash synchronization (normally somewhere between 1/180 – 1/250 second). Now take your shot, and if all is going to plan you should be presented with a completely black picture. Check your histogram reading, it should show a large spike in the darks to the left, with no light at all towards the highlights. Effectively this technique underexposes the image, so if it doesn’t look completely black try using a higher f-value (so that you are letting even less light pass through the lens) for your aperture.

Once you have a black image, the fun can begin. Attach your wireless flash trigger or off-shoe camera cord and switch your flashgun to manual mode. Now set your flash to about 1/8th power and position it at around 30cm from your subject, ensuring that it is located to the left or right of it (90 degrees from the subject when looking through the camera). Now take a shot and then check your image and histogram – if the subject is looking too dark simply increase the power of the flash, or decrease the power if it is too bright. You will need to review the positioning of the flash – is there any overspill onto the background? If so re-adjust the angle of the flash towards the subject. This procedure could take more than 20 frames to perfect.
By now you should have a perfectly exposed subject against a jet-black backdrop. However you will probably find that your subject is slightly underexposed on the side furthest away from the flashgun. Sometimes this can actually look really effective, however if you would like to try and balance the exposure you have two options – either use a second flashgun or use a humble reflector. I nearly always use the reflector. There are a number of pop-up reflectors available on the market (like this one) all-costing less than £20, or you could just simply carry some aluminium baking foil in your camera bag! It should be remembered that all you are looking for is something to bounce the light back. This could even just be a piece of white card.

Once you have mastered the basics of low-key close-up photography, you will find that it only takes a few minutes for you to set up your field studio. The added bonus of this technique is that it can be performed in virtually any weather conditions, as you are not only controlling the light but also the shutter speed so motion blur becomes less of an issue. Be warned though, this kind of photography can be highly addictive and may just change the way that you approach your floral portraits.
Further Reading: “Ideas for Photographing Wildflowers“


