
How to Photograph Mountain Gorillas

Being immersed within a group of mountain gorillas is one of the most wholesome wildlife photography experiences there is. Over my 20 gorilla treks, going with an advanced team of trackers and researchers, no two were ever the same. There are so many varying conditions you can experience, from wide open valleys in the harsh sunlight to the depths of the dark forest in torrential rain.
Tourist groups can only visit the gorillas for 1 hour a day, which can make it feel like there is a time pressure to get those perfect shots. Throughout this article, I will help prepare you for this. I will explain the best kit to take, ways to prepare for the challenging conditions, and some top tips for getting better photos of mountain gorillas.


Where can the gorillas be found?
Mountain gorillas are an endangered species with around 1,063 individuals remaining. They are the only gorilla sub-species with an increasing population, which is the result of some extremely dedicated conservation work over the last few decades.
The population is still very fragile to many threats, one being disease. COVID-19 could potentially infect the gorillas and, if this were to happen, it would be devastating for their population. It is now more important than ever for the species to be protected.
Find Gorilla Photography Tours on the Nature TTL Hub

The gorillas live in two different areas spread over three countries. The first is Bwindi Impenetrable Forest, Uganda, which hosts around half of the mountain gorilla population. This area reaches about 2,600m and is very much what the name suggests, an extremely dense forest. Seeing a forest like this is equally as special as seeing the gorillas – the amount of life it hosts is jaw dropping.
The second gorilla habitat is the Virunga Mountains which stretch over Rwanda, Democratic Republic of Congo, and Uganda. This area hosts the remaining half of the population and reaches around 4,500m and has areas which are less dense in vegetation compared to Bwindi.
The mountain gorillas can be visited in 4 national parks spread over 3 countries:
- Uganda: Bwindi Impenetrable Forest National Park and Mgahinga Gorilla National Park
- Rwanda: Volcanoes National Park
- Democratic Republic of Congo: Virunga National Park
Gorilla behaviour
Throughout a gorilla trek you will see, smell, and hear numerous new things. Upon first sight of the gorillas, you will instantly be taken aback by their intelligence and communications (gorillas have over 25 vocalisations which convey different emotions and messages).
They are generally quite calm and will often not even pay attention to people. However, as with any animal, there can be instances where they feel threatened so the male silverback can get defensive.
It is important to remember that they are wild animals and you will be in their habitat. The saying “if you respect them, they will respect you” is rather relevant to trekking with the mountain gorillas.

Before the trek, there will be a full safety briefing about how to act around the gorillas and how to respectfully take images of them. A couple of the points are:
- Stay 7 meters away from them at all times
- No camera flashes
- Stay as a group and stick together
- Listen to the trackers (they see the gorillas every day and have an incredible understanding of their behaviour)
Camera equipment
There are a few options on what kit to take into the forest. Personally, I take two bodies into the forest, one with a 24-70mm lens and the other with a 70-200mm. I take these to give a good range as 24mm is wide enough to capture the gorillas within their forest habitat suitably, and I find 200mm is enough reach for an intimate close-up.
The reason I take two separate bodies and lenses into the forest is to avoid having to change the lenses. You should not change lenses in the forest. This is because it can cause a condensation build up in the camera, which could lead to some costly damage meaning you may not be able to get your images.
Read more: Using Cameras in Tropical & Cold Environments
Many people may not have two bodies, so you could find yourself having to choose between two lenses. A couple of questions you could ask yourself to aid your decision are:
- Which has the best autofocus?
- Which has the best aperture?
- What images do I really want to take, is it the glorious wides or the iconic close ups?
Read more: What’s the Best Camera for Wildlife Photography?
How to overcome challenges
The gorilla’s habitat is an extreme environment. When taking images, there are a number of situations which may initially be seen as photographic challenges. But they can, in fact, be used to shoot some really unique mountain gorilla images.
1. Harsh lighting
The photographic challenge of harsh lighting is often spoken about as a problem on African savannah safaris. People may think that being in a forest would prevent this, but that is not the case. The gorillas are often found feeding or relaxing in open valleys and on clear mountain tops. The harsh light is caused due to the fact that the gorilla’s habitat is so close to the equator, but there are ways around it or to avoid it!

Harsh direct sunlight can cause the gorillas’ faces to become very shiny, resulting in the highlights being blown out in the images. There is not always an easy way to fix this, but a couple of tips are:
- Shoot in manual, because in auto or aperture priority your camera will try to deal with the bright light which results in an underexposed image
- Widen your aperture, which should soften the light a bit (you will have to be careful with focus for this)
If these do not work, this may be a time to try and focus on another gorilla in the shade – there are often many around so it should not be a problem finding another subject.
2. Pouring Rain
The rain can, understandably, prompt people to put their cameras away. However, it could be a great opportunity to create some lovely shots. To ensure the weather is not an obstacle, I would advise taking a rain cover or even just a plastic bag to protect your camera.
Depending on your aims, there are many shots that you could strive to capture involving the rain.
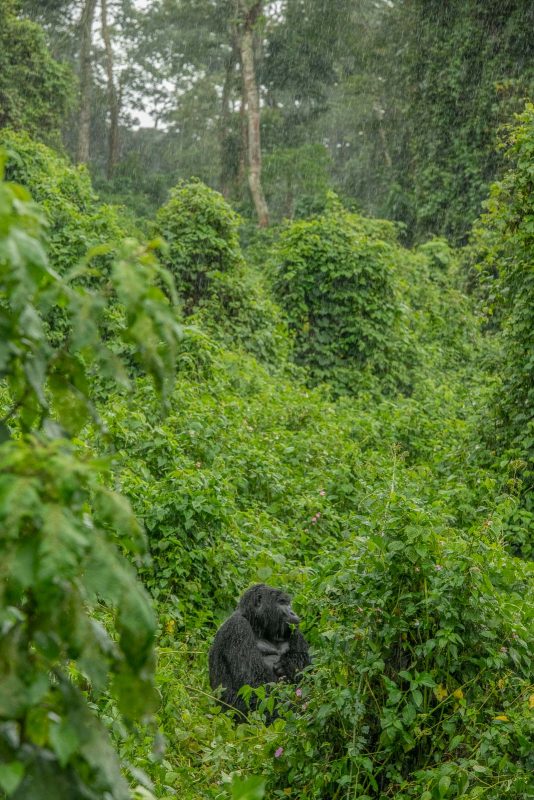
For example, you could choose to have the gorilla in focus with streaks of rain coming down around the subject. On the other hand, you could focus on the detail – rain brings out a lovely texture on a gorilla’s fur which really shows off the impressive waterproofing.
3. Gorillas obscured by vegetation
When the gorillas are hidden deep within thick vegetation it may seem like it might not be your day, but this is not the case.

A great way to overcome this challenge is to take advantage of the thick vegetation by capturing the contrast between it and the gorilla’s vibrant, orange eyes. Composition wise, you may need to get really low or high in order to get the right placement, but it will be worth it!
4. Dealing with darkness
Darkness can be an issue if you are in the depths of the forest as the canopy is very thick and blocks out most light. However, there will be beams of light which break through the dense canopy. If embraced, it can be used to show off some of a gorilla’s most eye-catching features: the face and eyes.

Some mid-range cameras may struggle to expose the jet-black gorilla fur in a dark environment, and that is ok. One solution is to focus on the gorilla’s face as that reflects light better than the fur, so it is easier to capture in low light.
Read more: How to Photograph Wildlife in Low Light
5. Other people
A further challenge of photographing the gorillas could be the fact other people are also on the trek with you. Sometimes, people may get in the way of a potential shot. If someone disturbs your shot, don’t be afraid to politely let them know.
You may, however, want to utilise others in your group. For example, silverbacks are often bigger than the average person, so someone could be used to show this size comparison. Or, it could be a chance to get a great image of your friends or family with the gorillas.

Tips for gorilla photography treks
Here are some of my personal top tips for photographing the mountain gorillas which I have learnt from my experiences with them. These tips should help you get a diverse range of images from your unforgettable gorilla trek.
1. Don’t be afraid to show them in their environment
When people arrive at the gorillas, they can understandably get hooked into capturing close-ups of their faces. This may result in leaving the forest with many similar shots. Getting wider angles of the gorillas in their habitat shows good shot diversity and a sense of immersion within their environment.

2. Always look around for other gorillas
The gorilla group is usually spread out, so the trackers will often take a group of tourists to one gorilla then move onto other individuals in the group. This does not mean the others cannot be seen.
There may be great photo opportunities behind you. If you turn around every couple of minutes, you may just capture some great shots of gorillas climbing, walking, or even playing!

3. Don’t rush it in the first 5 minutes
There is time! Take time to absorb the experience and watch the gorillas for the first few minutes of your hour. Personally, I remember the times when face to face with the gorillas much more than the times spent behind the camera. Not rushing into the photos will also give you time to work out the conditions of the day and think about the camera settings to get the best shots.
4. Try to get to their level
Getting on the gorilla’s level can give a really intimate view of an individual and can also demonstrate their size and strength.
There are many gorilla images taken from human standing height. To change it up a bit, get down to their eye level (knee to waist height) and you will notice how much more intimate your shots will be.
5. Camera settings
Advice for camera settings really varies on the ability of the camera you have. The best thing to do is really know your camera inside out before you go into the forest (it is good to test your camera’s capabilities, such as its low light performance).
ISO is usually what people increase to keep good exposure, but there is always the fear of taking it too far and images becoming too noisy. I personally shoot on a full frame camera and I do not find myself having to go over 4000 ISO, and the noise is not too bad. However, being able to raise the ISO to quite a high number does depend on your camera. Crop sensors will struggle more with raising the ISO, so be careful with this.

I am mostly able to keep the f-stop to around f/7, which gives a bit of freedom for focusing thanks to the depth of field. Unless you specifically want a tight focus or the darkness is a real issue, I would suggest you try to keep away from the widest apertures as you could end up not getting your entire subject in focus.
A good tip for shutter speed is to keep it the same or higher than your focal length. The darker areas of the forest can tempt you to go low with shutter speeds and this can lead to shake, resulting in blurred images. For a 200mm lens try to keep it to 1/200th sec, if possible.
Read more: The Real Reasons Your Photos Aren’t Sharp
6. Photograph the entire experience
The entire experience is incredible. You will be trekking through some of the most biodiverse forests in the world and there are many opportunities for some great images to diversify your gorilla portfolio.
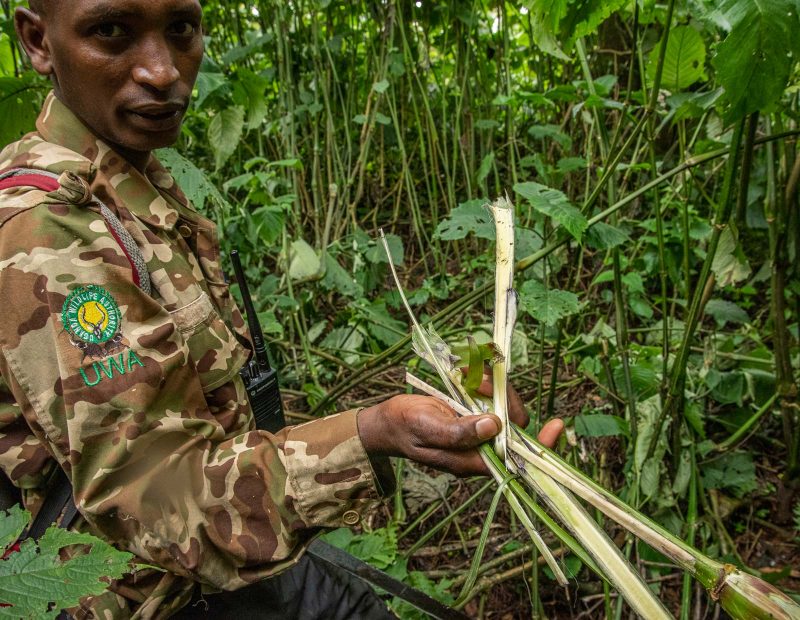
Some of these possibilities may be landscape shots of the rich rainforests, or shots of the trackers looking for gorilla signs. Signs of the gorillas are a great thing to photograph, such as their nests, food piles, and even their faeces!
In conclusion
Seeing the gorillas can be a lifelong dream. As it is expensive, people often weigh up whether it is worth it. It will definitely be worth it.
You will find that little snippets of the gorillas will become some of your fondest memories. Whether it is the moment when you and a gorilla shared eye contact, or trekking through the wild, dense rainforest, your experience will be unforgettable.
Hopefully, the information in this article has given you the confidence that will allow you to take some amazing shots of your experience. Best of luck!


