
10 Reasons Your Photos are ‘Average’

You see something amazing in front of you and figure that you must capture it on camera. You grab your camera, focus the shot and press the shutter. The result? A fairly plain, average photo that doesn’t add up to your expectations. If you’ve ever felt like this, then have a read through these possible reasons that your photos are ‘average’. Once you’ve figured out what the problem is, fix it and keep shooting!
#1 Not Adjusting the White Balance
Are you shooting in JPEG? Are you leaving your white balance in ‘auto’? A lethal combination! If your colours appear flat and unsaturated, you should alter the white balance of your camera. Even if you’re just using the preset functions (instead of the Kelvin values), you’ll find that your photos spring to life on your LCD. The presets are self explanatory: ‘cloudy’ is for overcast days, ‘sunny’ is for direct sunlight, and… well the rest are obvious too.


Whilst shooting in raw file format allows you to adjust the white balance during post production, trying to do this with a JPEG file will not work as well. I shoot in raw, but I still adjust the white balance on the camera as it allows me to get a better ‘feel’ for the shot as I take it. Try it and watch your photos come to life.
#2 Shooting with an Unnecessarily High ISO
All that noise and grain in your photos is caused by high ISO speeds. Different cameras have different capabilities, and it is up to you to understand what performance you can expect from your own equipment. It is easy to forget to change your ISO speed as the light conditions adjust – I’m guilty of this too. I can be shooting one day in low light conditions, with a high ISO speed, and then forget to change this straight away during my next shoot. If you forget to change your ISO speed, you will find that you could be shooting in bright conditions with a high ISO of 3,200, for example, and introduce unnecessary noise into your photos. This degrades the quality, and can add to the ‘average’ photo feel!
Further Reading: “Choosing the Optimum ISO Speed“

#3 Assuming Your Camera Will Do the Rest
Never expect your camera to take a great photo for you. Even the best flagship cameras won’t take a better photo than an entry-level camera on its own. High specification cameras allow greater flexibility for more things, but the factors that make a photo have the ‘wow’ factor is down to the photographer. A camera can’t compose or experiment – it just fires the shutter as instructed.
Introduce your own artistic flare into your photos and make sure you fully understand your camera. That is what separates the men from the boys, not their cameras. In fact, some of the best photographers don’t shoot with flagship cameras for the simple reason that they don’t need the extra flexibility they offer.
#4 Thinking That Every Photo Needs to Be Great
Ask any professional or skilled photographer to look through their computer recycle bin. Rummage around and you’ll find an endless quantity of discarded photos. For every fabulous picture, there are countless failures and below-par photos. Don’t make the mistake of thinking that you are no good if you take a bad photo – in fact if it is the other way around then you are probably doing something wrong!

#5 Not Putting in the Time Necessary
It may sound like a simple point, but the photographers who are taking the best photos are dedicating a huge amount of time to the task. I once heard that to be an ‘expert’ in your field, you must donate thousands of hours to it – that is definitely true for photography. I often go to my hide for hours on end and return empty handed, either because my target species hasn’t shown up or I just haven’t taken anything more than an ‘average’ photo.
Set yourself a photographic ‘project’, and work to develop a portfolio of images of a particular theme. Whether that be a location for landscapes or a particular species for wildlife photography, having an end goal will help you to achieve the photos you desire.
Further Reading: “Photographing a Species In-depth“
#6 Not Eliminating Shake and Blur from Your Photos
The biggest killers of a photo, in my opinion, are shake and blur. This can come from fast movement of your subject when using an insufficiently fast shutter speed, or from movement of the camera. If you’re using a long lens and handholding, make sure to turn on any image stabilisation that your lens may have (some don’t have it). Even better, use a tripod to stabilise the equipment. If you don’t, you may introduce camera shake into your photos.
When photographing a fast-moving subject, be sure to use a quick enough shutter speed to freeze the action – you may need to increase your ISO speed to accommodate this. It’s better to have a noisy photo than a blurred one.
Further Reading: “How to Photograph Fast-moving Mammals“
#7 Refusing to Edit Your Photos
There are a lot of photographers who refuse to edit their images, preferring to get everything ‘right in the camera’. I hate to break it to you, but when you’re shooting in JPEG the camera is making its own post-processing adjustments to your pictures. It applies ‘picture styles’ that are configured in your menu, removes vignetting and even sharpens shots a little. Surprised? Well, that’s partly why JPEGs can sometimes be ‘good to go’.
However, the camera doesn’t always get it right – these are adjustments are automatic and not specific to each particular photo. If you’re shooting in raw, the camera retains all the data in your photo and doesn’t compress it. It also doesn’t make any of its own adjustments, leaving this up to you. Every raw file requires some degree of post-processing, and if you don’t do this you’ll never get a photo that’s ‘right’. Don’t be afraid of editing your photos – it isn’t cheating; you should view it as a ‘digital darkroom’.
Further Reading: “All You Need to Know to Process a Raw File in Lightroom“
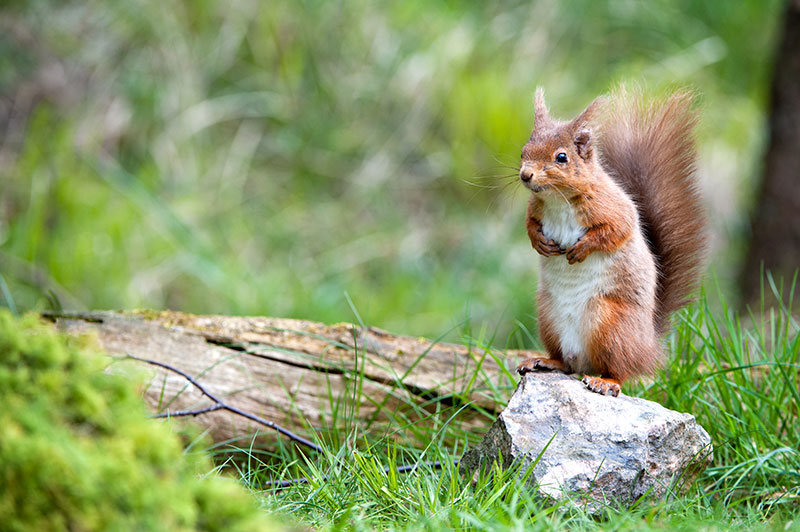
#8 Not Paying Attention to the Background
The background is just as important as the main focus of your photo. With wildlife photos, you will probably want a nicely soft and diffused background (also known as bokeh). If you don’t understand what achieves this, you may find that your subject is lost in a busy, messy background. You should also look out for distracting highlights and objects in the background – they are a lot more obvious on a big screen, and can sometimes ruin a photo.
Further Reading:
- “The Importance of Backgrounds“
- “How to Create a Beautiful Bokeh“
- “Choosing the Best Foreground and Background“
Having a good background can be the difference between an ‘average’ photo and a ‘great’ one. Not always, but it is definitely a contributing factor! No aspects of a photo should be entirely ignored.

#9 Failing to Maximise the Light’s Potential
Light is hugely important to a photo; it can make or break it. Do you really understand the difference between good and bad light? You should try to maximise the potential of the available light – experiment a bit, different is good!
With wildlife, low evening light can be great for creating dramatic backlit photos. For landscape photography, the very same ‘golden hour’ can add a completely new dimension to a location. Don’t be afraid to try something new!
Further Reading: “Master Backlighting in Wildlife Photography” and “Making the Most of the ‘Golden Hour’“
#10 What Do You Think?
The tenth reason is… well, what do you think it is? Post in the comments below and share what you think is your most common reason for ‘failed’ photos.


