
How to Use Foregrounds & Backgrounds in Macro Photography
Foregrounds and backgrounds are important visual components in all types of photography. In landscape photography it’s more natural to think about these elements and how to incorporate them, because you are capturing an entire scene. They can be a bit less obvious, and even forgotten, in portrait and macro photography, because you’re so focused on the subject.
The foreground is whatever is closest to the camera or in front of the subject. The background is whatever is furthest from the camera or behind the subject. Used correctly, foregrounds and backgrounds can add more depth to your image and make it feel more composed.


In this article, I’ll share my tips about why, when, what, and how to use foregrounds and backgrounds in macro and close-up photography.
Hopefully you can use these tips to spark some new creativity within yourself, and inspire some compositional ideas that both you and your viewers will be excited about.
Why and when to use foregrounds and backgrounds
1. Getting lost in the details
Macrophotography is primarily about magnifying and capturing very small subjects, which makes it easy to get caught up showing off the incredible details that are not easily visible to the naked eye. Because of this, it’s easy to forget other aspects of the composition, including foregrounds and backgrounds.
2. Make a deliberate composition
You may want to isolate the subject with clean, minimal surroundings and, if it’s a deliberate choice, it’s perfectly fine to do so. However, including foreground and background elements can help better frame the subject and make for a more interesting or compelling image for the viewer.
Ask yourself if you are making a deliberate choice about the composition, or simply trying to capture the subject in focus. It’s important to know the answer to this if you want to create artistic images, rather than simply document something.
Read more: How to Create a Frame Within a Frame

3. Complement the subject
Good foregrounds and backgrounds in macrophotography can, and should, frame and complement the subject, balance the total image, and lead the eyes of the viewer to the subject. Including these compositional elements can also broaden the audience whilst telling a story about the subject and its environment.
As a wildlife photographer, I like to capture a beautiful scene that also lets the viewer see where my subjects like to feed, nest, and rest.

4. Tell a story
Imagine that, as a portrait photographer, your subject is a baker. If you capture just a simple headshot with a plain background, you will still need to somehow explain that this person is a baker. However, if you photograph them in front of an oven, or behind a kitchen counter with some baking products or a few baked goods on display, the viewer sees a more complete story about the subject and what they do.
Apply this baker portrait principle to macro photography, and you can quickly see when and why it might make good sense to include foreground or background elements.

5. Breaking out of a rut
Making a deliberate composition, complementing the subject, and telling a story are all great reasons to use foreground and background elements. Sometimes they can be used just to get out of a creative rut and spark ideas. Whatever the reason, giving your composition some thought is always a wise idea and makes your photograph more unique to you.
What and how to use foregrounds and backgrounds
Now that you’ve learned when and why to incorporate foregrounds and backgrounds in macro photography, let’s move on to what and how. I primarily photograph insects and nature so, for me, the what and how typically come from the natural environment.
I try to capture things as they are as much as possible, but changing your angle, moving an intruding branch or blade of grass, or positioning something colourful behind the subject are creative ways to ‘stage’ the natural environment.

1. Floral arrangements
Using flowers is one of my favourite ways to frame a subject. Flowers are a great choice because they introduce colour, texture, and beauty to the image.
Also, as someone who likes to sell artistic prints, I am keenly aware that when people think about purchasing art for their walls, they typically think very strongly about these elements.
Read more: Ideas for Photographing Wildflowers

Flowers can also tell a story about your subject. It’s commonly known that flowers attract pollinators, but have you ever thought about the fact that they also attract insects that prey on pollinators? Photographing a spider with a floral background can not only create a beautiful composition, but also tell a story about where it hunts for food.
2. Leading lines
I also love to find natural leading lines in nature. Leading lines ‘lead’ the eye of the viewer straight to the focal point or main subject. The lines of a leaf can do this very effectively, creating almost a runway or arrow effect.
Look for natural leading lines by changing your point of view. Move from side to side and up and down, looking through the viewfinder for them to appear. As long as you respect and do not harm the subject, don’t be afraid to ‘prearrange’ the composition by tilting something in or out of frame to create those lines.

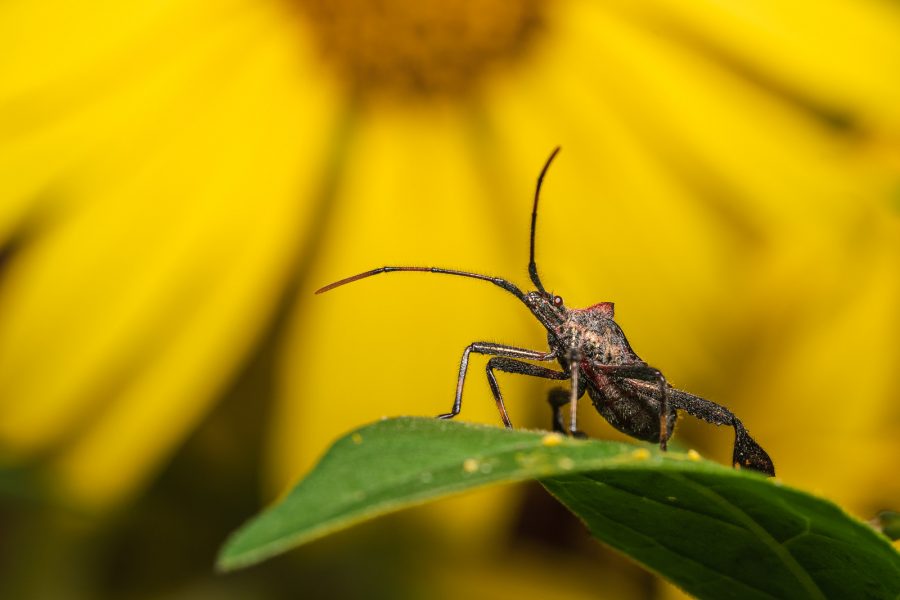
3. Uniform or complementary colours
Another great way to frame the subject is by using uniform or complementary colours in the foreground or background. Complementary colours are opposites on the colour wheel and can really make a subject pop. Uniform colours can give a more minimal look or add emphasis to the colours of the subject. Vibrant colours quickly catch a viewer’s attention and can make an otherwise boring subject appear exciting.

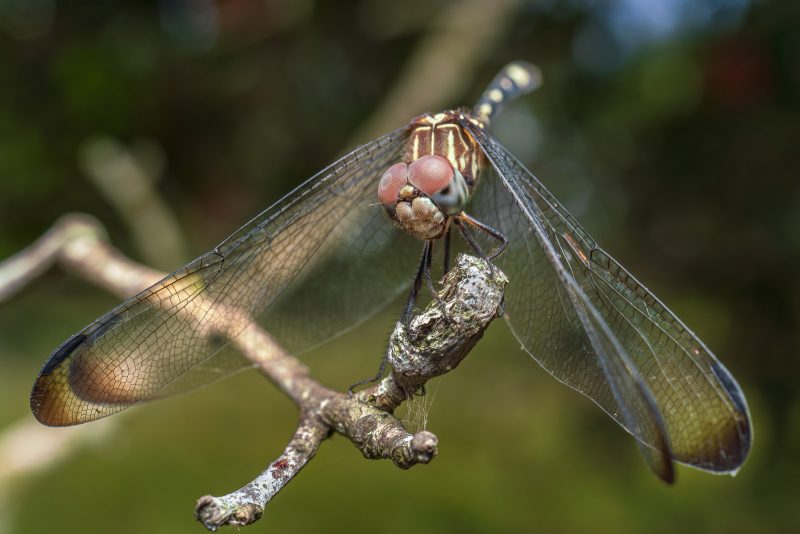
4. Bokeh blur
Having a creamy bokeh blur in the foreground or background is also a wonderful way to add visual interest while letting the subject stand out. Shooting with a macro lens can actually make it easier to achieve a really nice bokeh, because the increased magnification gives you a very narrow depth of field, even at a high f-stop.
Items that are just a few inches in front of or behind your subject will readily fade into a bokeh dreamscape. Take advantage of this while framing your subject. Colours, patterns, and light can really make for a visual treat when blurred by bokeh.
Read more: Create Beautiful Bokeh

5. Rule of thirds
Earlier, I mentioned using foreground and background to move your viewer’s eye from one side of the image to the other. Using the rule of thirds, you can create a natural progression from foreground in the bottom third, to subject in the middle third, to background in the top third.
You can also arrange these elements so that it draws the viewer’s eye from one side of the image to the other. A blurred foreground to the left, a blurred background to the right, and the subject in the centre-right is one example of how to achieve that.

6. Don’t compete with yourself
However you use the foreground or background, make sure it doesn’t compete too much with the subject. Bright areas draw the eye, and clutter can also compete for the viewer’s attention.
A trick I often use to help me decide if something is competing with the subject is to cover that portion of the image with my hand. If the subject then stands out more, it means that the hidden area is likely competing with the subject.

If you are still actively shooting, try clearing some of the competing clutter, or adjusting your angle to avoid the distracting area. If you are already in post-processing, use photoshop tools to remove or tone down items that might draw the viewer’s eye away from the subject.
In conclusion
I hope you’ve enjoyed this article and have gained some insights into what, when, why, and how to utilise foregrounds and backgrounds in macro photography.
Ultimately, your photos are your art, and you should always make choices that make you happy as an artist, whilst not forgetting your intended audience. Just make sure that you are making creative choices and not simply snapping mindlessly.


