
How to Sharpen Photos in Luminar 2018 & Luminar 3

Sharpening photos is part of a natural workflow when processing and editing your photos. It keeps them crisp and looking great, but it’s not to be confused with “fixing” blur and other technical defects. Sharpening works best to emphasise good technique where a photo is already sharp. This tutorial will look at how you can sharpen your photos properly and effectively using the Luminar 2018 editing software.
There are a number of ways you can sharpen photos using Luminar 2018, and each of these will approach the task in a slightly different way. Here we’ll look at the Sharpening Filter, the most common (and in my opinion the best) way to sharpen your photos.


If you’re new to Luminar 2018, each of the tools in the software are called filters. You can find them by clicking “Add Filter” in the sidebar and searching in the menu that appears. Sharpening should be done after your initial raw adjustments, and to make sure you don’t lose those you need to create a new adjustment layer before changing the filter workspace. To do this, click the + icon next in the Layers panel.

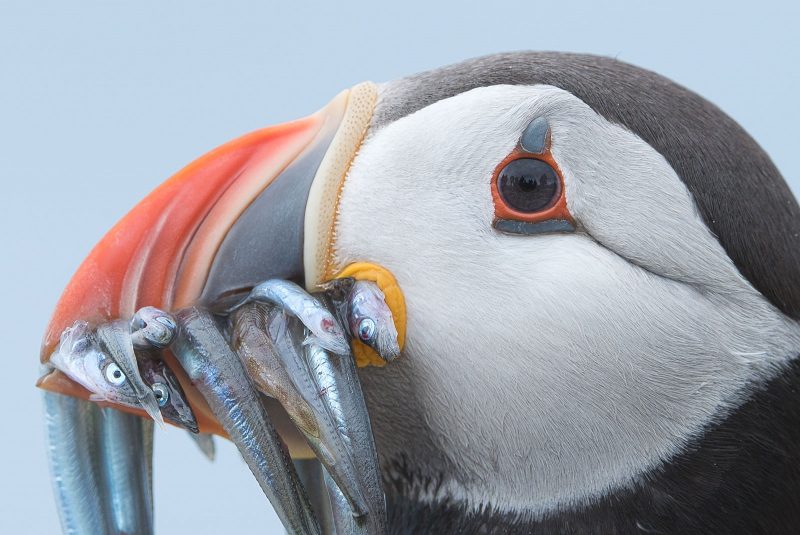
Once you’ve done that and have set up your workspace, you’re ready to go. This is the original, unsharpened, version of the photo we’re going to look at. As you can see, it’s already very sharp. However, I want to add a subtle adjustment to make those pores and feather details really pop.

Not got Luminar yet? Download it now and use code NATURETTL for £9 off your purchase.
The Sharpening Filter
This is the best filter for sharpening photos in Luminar 2018. It is the natural “go-to” option, and it’ll remind you of the Details sliders in Adobe Lightroom.

Amount – This slider determines the intensity of the overall adjustment. This is the first step where you can easily get things wrong. It’s tempting to go for maximum sharpness, ramming that slider up to 100. However, doing this makes things look incredibly unnatural. Take a look at this before and after comparison:


I would suggest instead sticking somewhere around the 40-60 mark. It depends what your original image is like, but this is a ballpark you are rarely going to want to move out of.
Radius – Sharpening works by detecting edges and enhancing them. The radius tool looks at the area around each of these edges, and a higher value will sharpen more of the areas around the edges. This is another easy way to overdo your sharpening, and I recommend staying around the 35 mark on the slider. Again, play around to see what suits your image best.
Top Tip: You can always preview the difference your adjustments are making by toggling the eye button on and off in your filter panel.
[optin-monster-shortcode id=”x9sl39uxmpofw5ftazut”]Masking – You might know this one as “Threshold” from Photoshop. It allows you to determine which areas of the image are actually adjusted in the first place. It works well for preventing sharpening from being applied to the background. A value of 0 will sharpen everything in the image, and a value of 100 will sharpen nothing.
Dehalo – A new slider to Luminar 2018, Dehalo will allow you to remove haloing that occurs from sharpening photos. This typically comes in landscape images where you have a lot of sky in the background. You may see brighter areas near to the horizon where you’ve sharpened the shot. Dehalo will work to remove these. It will have an effect on the overall image though. Consider leaving it at the default value, or experimenting to see how it affects your image.
So I’ve made my adjustments, and here is the before and after:


If you’re struggling to see the difference there, then here is a much closer crop of the eye details:

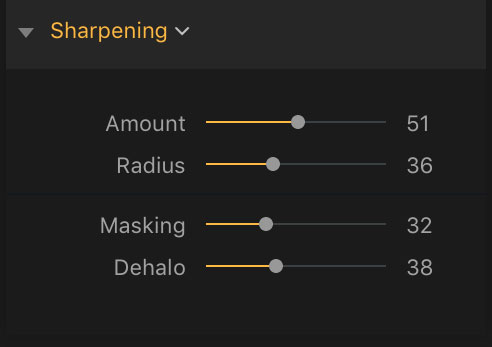
Here’s a screenshot showing my final settings to achieve the above affect. Notice that nothing is pushed too far to the right, and the way to get good results is to do things in moderation. Always compare the before and after with the original, and you’ll quickly see if you’re overdoing something.
Final Thought
Seriously, don’t overdo it. Sharpening should be a subtle adjustment that you do at the end of your processing workflow. If your photo needs so much sharpening that you’re moving the sliders all the way up to 100, then chances are the technique was flawed when you shot the photo in the first place. You can’t remove camera shake, and instead should brush up on good practices for taking sharp images. Here are some tutorials we have to help you:
- The Real Reasons Your Photos Aren’t Sharp
- How to Get Sharp Star Photos
- 10 Tips for Sharper Landscape Photos
- How to Get Sharper Photos Without Expensive Lenses
We also have some other key Luminar 2018 tutorials that you should be sure to read:
Don’t forget, you can get £9 ($10) off your Luminar 2018 purchase with code NATURETTL at checkout.


