
Tips for Photographing Landscapes in Polar Regions

Capturing polar landscapes can be a fun challenge when in the field. Polar landscapes can lend to a variety of photos of what our most extreme and unique regions of the world offer.
These tips will help you to prep your camera for use in cold conditions and what to look out for in your landscape shots.


#1 Follow the light
Light plays a very dynamic role in our polar regions. During the winter months, the Arctic is left in complete darkness. Conversely, during the summer the Arctic will be lit up in 24 hours of daylight.
In Antarctica, it is the opposite: it is left in darkness during summer months and is lit up during winter months. This is because the Earth orbits around the sun on a tilted axis.

Both of these seasons offer very different styles of photography. During the polar night (or dark season), it is possible to see the Aurora Borealis in locations like Canada, Alaska, Iceland, Greenland, Norway, Sweden, and Finland. During the polar day, everything will be visible which brings about opportunities to capture landscapes and ice-scapes in full detail. This may also provide some opportunities to see more wildlife within your landscapes.
Read more: How to Photograph Arctic Wildlife
I recommend looking online for inspiration as to what kind of polar landscapes you want to capture, and the style of lighting you are looking for, when planning your trip.
During this research, take a look at the lunar phase calendar and other weather reports. This will prepare you for some night-time photography.
#2 Spend at least a week there
The polar regions often have unpredictable and less than ideal weather. During the polar day, it can be very foggy or hazy; during the polar night you may experience cloudy evenings.
Seeing phenomena like Aurora Borealis is not guaranteed wherever you go due to changing weather conditions. To ensure that you have an opportunity to capture the landscapes or weather phenomena you desire, spend at least a week in your desired location.

#3 Go with a guide
Guides are imperative for any polar photography excursions. They know the best places for photography, are kept up-to-date with other locals and can keep you safe. They are very informative and can also help you with bettering your skills as photographer with their firsthand experience.
#4 Keep warm
Staying warm is essential in the field. It will make an experience in cold weather a lot more comfortable and safer.
Make sure that you always carry many layers with you while traversing polar regions. Carry a pair of extra socks, gloves, and a hat in case they get wet. Choose warm fabrics like wool, fleece, and down to insulate properly.

I also recommend learning about the signs of hypothermia and frostbite. This can help you or a friend when out in the field. Signs like drowsiness, unexpected lack of talking, or being sleepy are signs of hypothermia. These are signs that can be overlooked, so it is important to pay attention.
#5 Acclimatise your gear
Before shooting in temperatures below freezing, be sure that your gear is acclimatised.
To do this, place your camera bag outside for about 20-30 minutes before shooting. This ensures that the camera gear will not fog up immediately when taken out of the bag, and will be ready to use in the cold weather.
#6 Carry extra batteries close to your skin
Keep your batteries in your jacket pocket or a warm place close to your skin. This ensures that the charge does not get shortened from the cold temperatures.

#7 Polar day: Take a mosquito face net and bug spray
Photographing landscapes in the tundra of the polar regions may mean you encounter bugs. For your comfort, bring bug repellent items like bug spray and nets.
If you are north of the tundra, you don’t need to worry about bugs!
#8 Protect your equipment
As weather is unpredictable in the polar regions, bring heavy-duty covers for your camera. Make sure your camera bag is waterproof and has the potential to float, too.
If your camera seems to act strange in cold conditions, you can wrap your camera body in a scarf or use handwarmers indirectly on the camera. This can help with glitches or finicky buttons caused by the temperature.
#9 Polar day: Adjust the camera for snow
Polar landscapes can be challenging to capture due to the amount of white from snow and ice. Underexposing the image can cause landscapes to look grey rather than white.
To work around this, adjust your exposure value by +1/3 or +1 1/13 to compensate the exposure. This will ensure that whites remain properly white.
#10 Filters
Be mindful of what filters you bring if you decide to use them.
Polarising filters are not effective for polar photography. While they may take out the glare or darken the sky, they can ruin the rest of the photo.
Use skylight filters or split image filters to take out any glare from the sky.
Read more: The Essential Guide to Filters for Landscape Photography

#11 Double check your landscape
Whether doing night or day photography, be sure that there are no surprise objects in your landscape. Telephone poles, wires, research equipment, or small cabins can reveal themselves in post-production.
Be sure you look at maps, refer to geotags on social media, or use a guide to ensure that your landscape does not include these objects (unless desired, of course) as they can be easily missed in the excitement.
#12 Use the foreground
Whether you are capturing photos during polar day or night, having a static object in the foreground can help break up the landscape.
For example, if capturing photographs of the Aurora Borealis during polar night, try using trees or mountain ranges to add more contrast and shape into the skies.

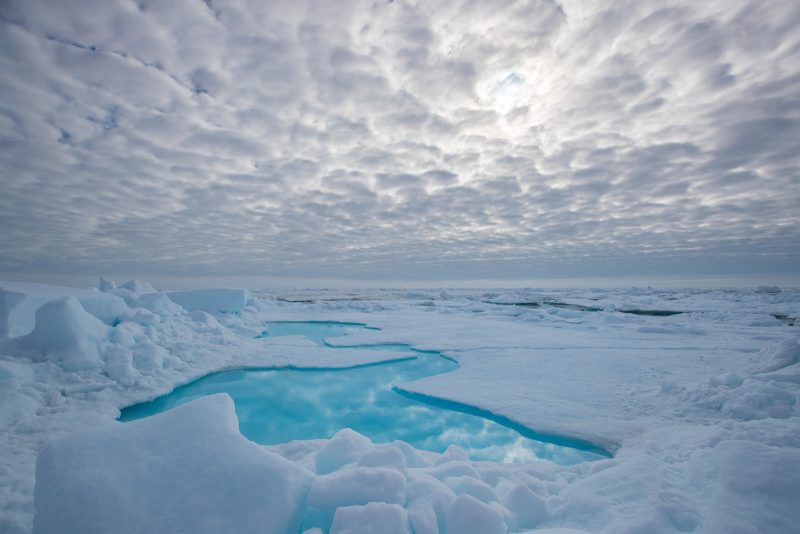
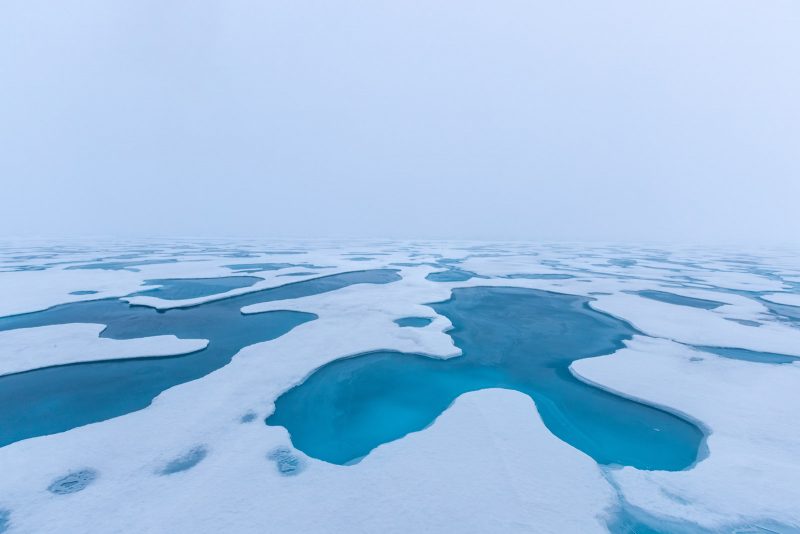
During the polar day, interesting pieces of ice or glaciers can show the variability of the landscape. This helps contextualise the landscape around you.

#13 Polar day: use the sun as your subject
During polar day, it can be difficult to take a photo without the sun being part of it. Better expose the sun by increasing the aperture value, and introducing it into the frame.
This causes sun stars, which adds more character to the sun and your photograph.
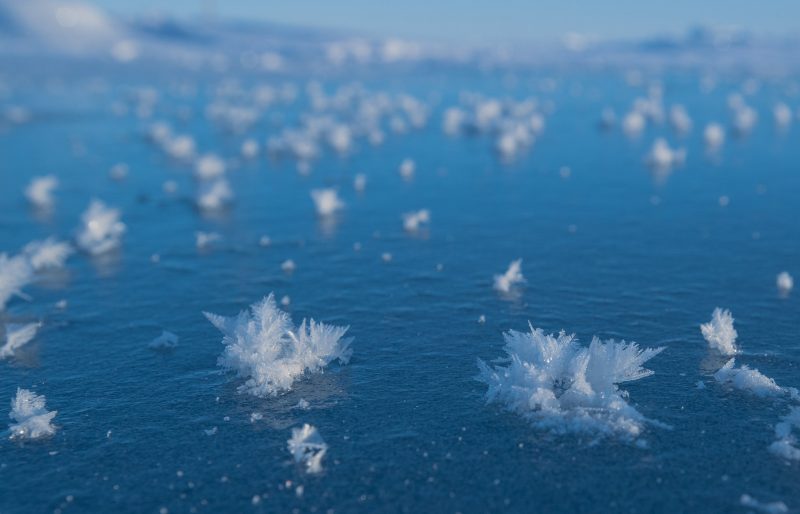
#14 Focus on the smaller details
Take the time to explore the small, delicate details of the landscape around you. In the tundra, the flora can lend great detail and colour to a scene.
Ice structures up-close, like frost feathers, lend a delicate perspective of the polar landscape. These small details help capture the complex nature of our polar regions.

In conclusion
While there are many obstacles that can be encountered in the field like weather and safety, accept these realities. These regions are some of the most extreme in the world, playing a large role in our global climate.
Here, we truly are at the mercy of nature and all that it presents. This is something I find to be the most beautiful part of photographing the polar regions: its fierceness and fragility.
Above all else, enjoy your time and what it has to offer.


