
How to Frame Your Landscape Photos

Some landscapes are so incredibly beautiful that you can blindly point your camera at them, press the shutter button, and walk away with a wonderful image. But where is the creativity and fun in that?
My point here is that landscapes are beautiful just by themselves, so taking a photo of a pretty landscape is quite easy. But creating a compelling scene with that landscape involves much more thought process and attention to detail. Here are eight of my best tips on how to create a compelling frame with that awesome landscape in front of your lens.


1. Compose with intent
Bob Ross. Yep, didn’t think you would be hearing about Bob Ross while reading this article, did ya? If you’re not familiar with Bob, I suggest indulging yourself with his videos on YouTube. If you know who Bob Ross is, then you’ll quickly be able to recall his stunning afro, calming voice, and incredible paintings.
I like to reference Bob as I teach landscape photography. Think about the beginning of his show: he would walk you through exactly what he wanted to paint in his scene.
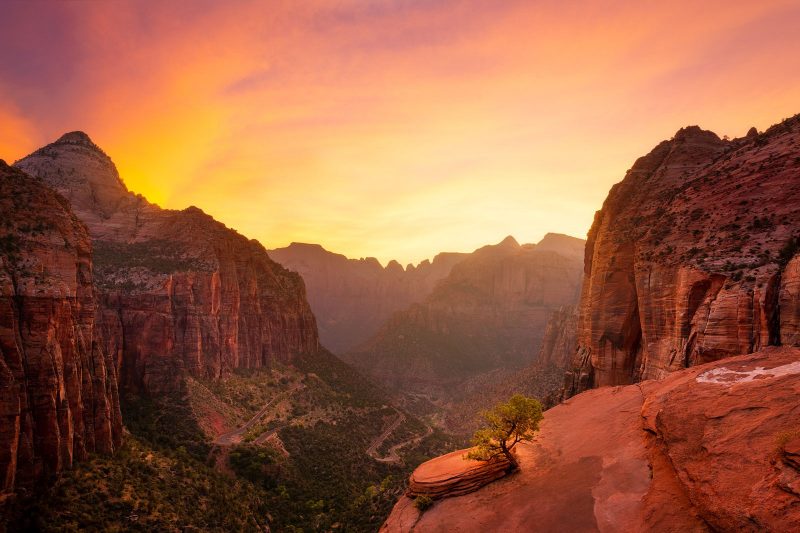
“A mountain towering in the background with a river coming through the scene, maybe some light coming over the ridge here, and of course, a happy tree in the bottom of the frame.”

What did he just do there? Before even touching a drop of paint to his canvas, he had a vision for what he wanted to create. BE LIKE BOB!
Go out to your landscape location and have an idea of what you want to capture. Have an idea for what features of the landscape in front of you are visually appealing and how you want the light to work through the scene. Consider various elements for foreground, and think about what elements of the scene you may want to exclude.
Having a vision before even pulling your camera out of the bag will really help you go into a shoot with one foot forward to capturing a successful frame.
2. Be patient and use Live View
There’s nothing worse than showing up to an awesome area, with epic conditions in front of you, and you haven’t given yourself enough time to scout and find a composition. Plan accordingly and make sure that you get to your sunset location an hour or two before. For sunrise locations, if possible you should scout the day before and geotag composition locations.
This way, when you show up in the pre-dawn hours you can easily find your composition. While scouting for your composition, be patient. That “perfect” composition isn’t going to be right in front of you the moment you walk up. Walk around with your camera on Live View; get high, get low, move left, move right… search for the composition.
3. Consider a variety of focal lengths
Not all landscapes need to be shot with a super wide-angle. Some of my favourite landscapes have been captured at 70mm, 200mm, and even 500mm!
If you feel like you are having trouble finding a composition with your wide-angle, try throwing on a tighter focal length and honing in on more specific details of the landscape.
Read more: Why You Should Use a Telephoto Lens for Landscape Photos

4. Horizontal or vertical?
I’ve noticed that photographers often forget one critical thing while out shooting landscapes: their hands can “rotate”, and therefore so can their camera.
Not all landscapes are created equal. Some landscapes just don’t work in a horizontal or landscape orientation. So, if you feel you are struggling with framing up your shot, try a vertical orientation. It just may reveal an awesome composition.
If you are in an area that has lots of vertical lines, or if you feel you are always wanting to look up, a vertically-oriented frame may be a good choice!

5. Watch the edges
Once you find your composition, it’s time to really start finessing the image by paying attention to the small details. In particular, your frame’s edges. We often get so focused on what’s in the centre of our frame that we overlook small flaws on the edges that eventually become negative factors.
There are a few things to watch for: the first being distracting objects. This can be a random tree branch, a road, a piece of trash, etc. Also watch for bright or really colourful areas that don’t serve a purpose to the frame.
I suggest that, for mountain scenes, that you try your best to not have the edges of the mountains lead up and out of the frame – unless it’s symmetrical. Make sure to keep a keen eye on any subjects that may come close to the top of the frame. You want to keep a bit of room in this area.
For example, with mountain peaks, make sure there’s a bit of space between them and the top of the frame to establish a horizon and / or a sky.
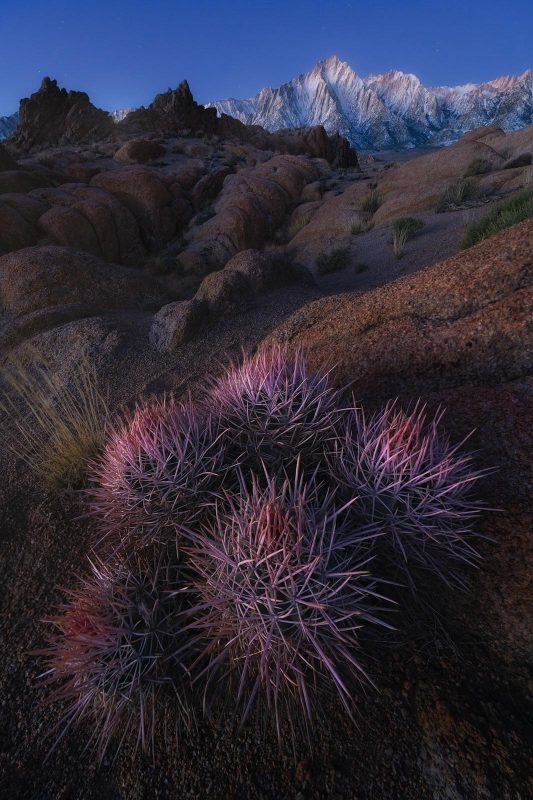
6. Foreground
I personally love foreground in my compositions. I feel that it can be a fantastic way to help reveal an environment to the scene, but also create flow. Whether it be via leading lines, colour contrast, or repeating patterns, proper foreground can move your viewer’s eye through your frame.
I will encourage you to make sure any foreground use is purposeful, however. A random stick or rock may not do the trick, but a fallen tree that points off to the horizon – or a nice set of warm coloured fall foliage leading to a cooler toned waterfall – can really improve a composition.
Watch: Landscape Composition – Using Foreground to Create Depth
7. Panoramas
There are definitely some scenes out there where a wide-angle lens just won’t cut it. These are massive scenes that are full of drama, subjects, and light. When I come across moments like this, I often resort to creating panoramic images. A panorama will allow you to create a frame as wide as you’d like, but I’d like to provide you with a few tips to utilise as you create them.
Read more: How to Photograph Panoramas

First and foremost, you can create an enormously wide scene – but shoot your pano with your camera in a vertical orientation. This will give you more vertical space in your final image so your image doesn’t necessarily look like a skinny, long film strip.
Next, make sure to shoot with a bit of a bookend to your image. Basically, shoot more than you think you need to in case you have to crop. Finally, make sure to overlap each frame by about a third. This will give your stitching program enough data to properly stitch each frame together.
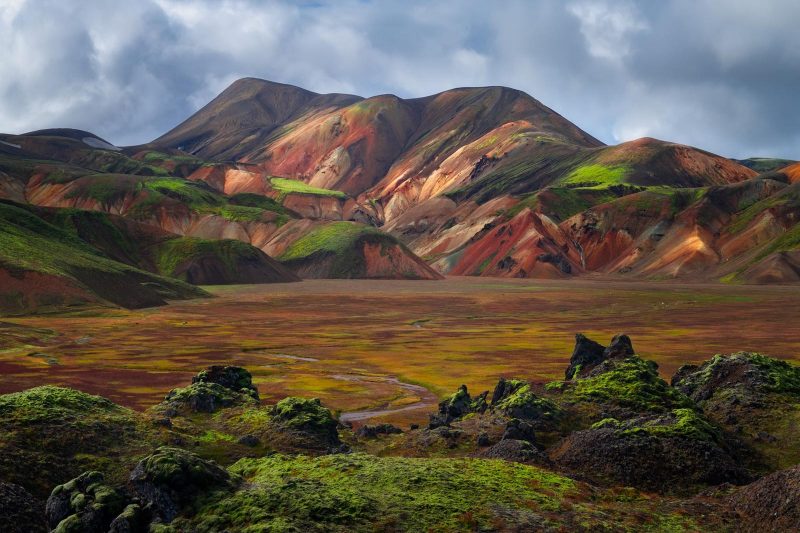
8. Use scale
Some scenes are so incredibly massive that it’s truly hard to comprehend just how vast that landscape is. For frames like this, I like to incorporate something for scale. This could be a friend, a building, or a structure – or even another natural subject like a tree.
When using something for scale, make sure that it is easily identifiable within your frame; I always encourage a pop of colour as well. You don’t want something for scale that your audience has to search for, so make it easy to identify. I also suggest placing it in an area of the frame that offsets the main landscape.

In conclusion
Well that’s it! I hope these tips help you better understand how to create compelling landscape compositions with proper framing!
Remember to let your creative juices flow, but also pay attention to the small details – they go a long way!


