
How to Make a Day to Night Time-lapse Video
If I had to shoot one kind of time-lapse video for the rest of my life, it would definitely be day to night time-lapses. Why? Because they are, in my opinion, the reason why time-lapse photography exists in the first place. They are tricky to shoot, but they are mesmerising to watch!
Watching the transition from day to night in a few seconds is very exciting and rewarding on so many levels. If you are able to catch the perfect sunset along with the right composition and subject, you will be proud of your work. Day to night time-lapses are magical, challenging, and fun at the same time!


But, do you know how to really shoot the perfect day-to-night transition?
After talking with a lot of people on social media, I realised that a lot of people don’t really know the best way to capture the perfect day-to-night transition.
Is there a best way anyway? Well, yes! Let’s take a look at how to make a day to night time-lapse video.

Choosing the subject of a time-lapse
I’ve already covered the best gear you need for shooting time-lapse videos, which you can read in my general time-lapse tutorial. That applies here too, so instead of repeating myself let’s get onto the important stuff.
There are tons of possible subjects when it comes to day to night time-lapses, but one thing will make the difference: constant motion.
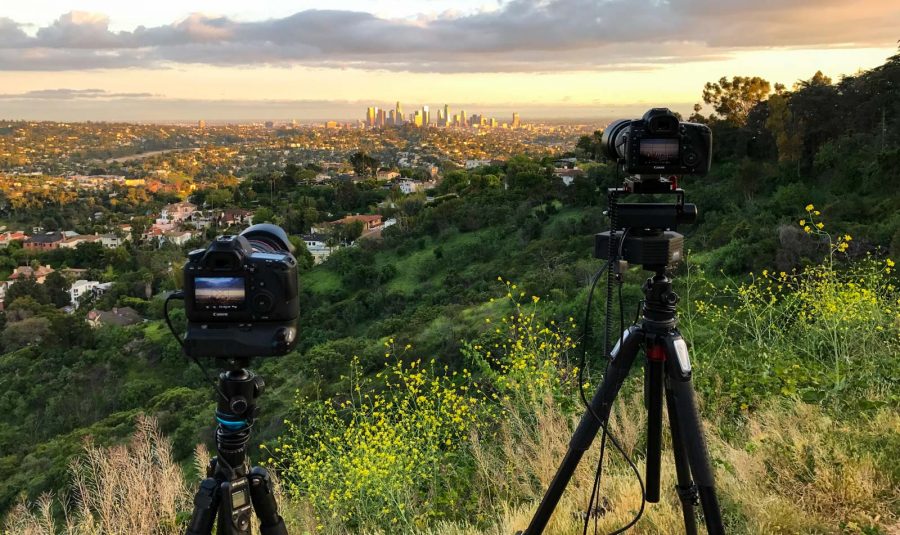
Having constant motion, from the first frame to the last frame, will make a big difference. My favourite subjects of them all are cities and urban landscapes. Cities are amazing; they are full of life both day and night. It’s very easy to find a great subject for a day-to-night time-lapse in an urban environment.
It could be a city skyline, a street, traffic, or architecture. Mixing a fixed element, such as a city skyline, with beautiful clouds at sunset is the best combo for a beautiful day-to-night time-lapse.
Choosing the right interval for a time-lapse
When you shoot a day-to-night timelapse of a city skyline, you often capture different elements going at different speeds. The city skyline does not move, but everything around it does (such as the cars, the people, and even the clouds). So how do you choose the right interval since everything moves at different speeds?
Since you are time-lapsing a day-to-night transition, you will be shooting for a long period of time – usually around 1 hour and 30 minutes or so. Selecting a short interval, such as 1 or 2 seconds, will give you way too many pictures and a final video that is way too long.
After almost 10 years of shooting time-lapse videos, I realised that ending up with a 20 to 30 second long video for a day-to-night time-lapse is actually the best option.
The best interval to shoot day-to-night timelapses is between 5 and 8 seconds. I use 5 or 6 seconds if I have fast-moving elements in my composition, and between 7 and 8 seconds when not. You can also use an interval of 9 or 10 seconds when shooting for more than 2 or 3 hours. This will reduce the number of pictures!
Think about your subject being the actual light changing and the day-to-night transition, rather than the city skyline or the cars down below.

Camera settings for a day to night time-lapse
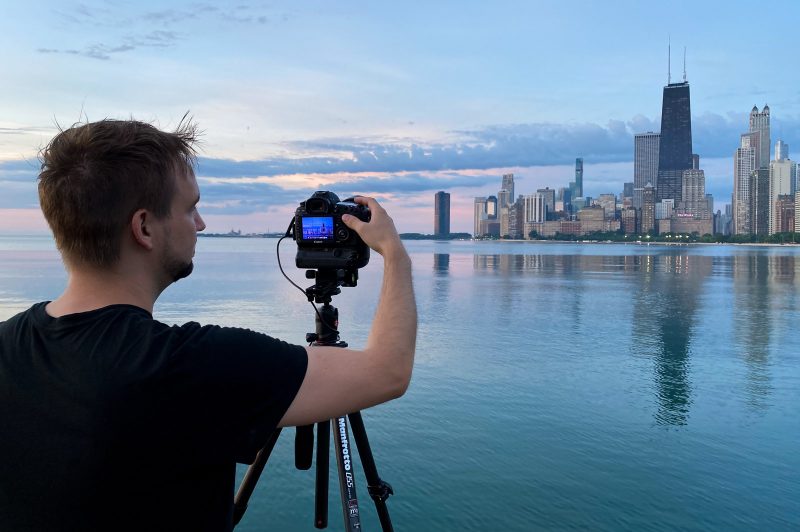
Great – you have your subject, your composition, and your interval. Now you are ready to shoot!
Since you are shooting a day-to-night time-lapse, you will need to set up your camera with day settings to start with.
To make it easy, select ISO 100, an aperture between f/6.3 and f/8, and adjust your shutter speed. We will change all 3 settings to create the day-to-night transition.
Controlling your camera settings
The most important thing to remember while shooting a day to night transition is that you need to be able to fully control your camera settings (shutter speed, aperture and ISO). The main reason for this is to avoid, or at least reduce, brightness flicker and to keep a shutter speed faster than your selected interval.
Should you use manual mode or AV?
If you decide to go with Manual mode, you will be able to keep full control over any settings on your camera and the specific order you want to change every single one of them.
If you decide to go with AV mode, you won’t have to worry about touching the camera or messing up the transition, but it comes with some pros and cons.
Pros of shooting with AV Mode: The camera works for you; you don’t have to worry about changing the settings or touching the camera.
Cons of shooting with AV Mode: The AV mode was designed for handheld shooting. It means the camera will often start by changing the ISO before the shutter speed during a day-to-night, and will change the shutter speed first during a night-to-day sunrise. You want to keep the lowest ISO and slowest shutter speed possible at all times – it always looks better.

Shooting with AV mode is also taking the risk to see your shutter speed being slower than your selected interval when night falls. There is not much you can do on your camera to stop this because you don’t have as much control as Manual mode.
Nowadays, both work great thanks to LRTimelapse and its powerful Visual Deflicker. I highly recommend you to stick with Manual mode in order to keep full control over your camera settings and avoid any unwanted issues.
Changing the settings in Manual mode
If you decide to go with the M mode of your camera (and I congratulate you for taking the plunge), you need to keep an eye on your exposure at all times in order to decide when to change the settings. And you can use a couple of tools built into your camera in order to do so: the LiveView and the EV (Exposure Value).
You are free to use the histogram as well to make sure you don’t burn the highlights. I rarely use it, though, as Canon’s LiveView is very accurate and I usually slightly underexpose my images with the EV.
Even after 10 years of shooting time-lapse videos, I use both LiveView and EV to create my day-to-nights. I utilise the LiveView when the light is changing really fast, such as after the sunset or right before the sunrise. But be careful as using the LiveView for 2 hours or so will drain the batteries faster. I recommend using a battery grip if possible to extend the battery life.

Shooting day-to-night time-lapses with only the EV of your camera will come in handy to save the battery, but can be challenging if the contrasts are high between the sky and your subject. Keep your exposure between 0 and -1 stop at all times to make sure you are not burning the highlights.
Most of the time, adjusting your settings and keeping the right exposure for the sky will be the best way to go. This will sometimes create a silhouette look of your subject, but at least you don’t end up with tons of clipping and flicker which can sometimes be hard to remove in post-production.
Around sunrise or sunset, the sky might turn very bright. In order to avoid clipping, you can easily keep your exposure between -1 and -1 1/3 stop. It’s always easier to get information back from your shadows than your highlights. I personally don’t use my histogram, but you can pair it to the EV in order to make sure you won’t end up with too much clipping in the sky.
Okay so you now have your composition, your camera settings, and your interval for your day-to-night time-lapse. You are now ready to shoot!
Setting up a day to night time-lapse
Select an unlimited number of frames on your intervalometer and launch the timelapse. Keep an eye on your LiveView or EV at all times! When you decide that your image might be a little bit too dark, or if you feel that it is the right time to change the settings, go ahead and change the shutter speed one increment at a time – but no more.
You always want to start with the shutter speed, then the aperture, and then the ISO last to keep the lowest ISO for as long as possible (the opposite during a night-to-day).
For example, let’s say you are working with a 7-second interval.
Once you reach 4 or 5 seconds, you are now ready to change the aperture and the ISO. Sometimes, I decide to keep the same aperture all along and just go straight to changing the ISO. Changing the ISO requires me to push a couple of buttons, which takes more time than changing the shutter speed or aperture. That’s the reason why I always make sure to keep 2 or 3 seconds between the end of my shutter speed and the next photo in order to have enough time to change the ISO settings.
But be careful, as most intervalometers also send an autofocus signal to your camera which blocks you from doing anything on the camera a few seconds before taking the picture. Make sure your camera is switched to manual focus mode on the body and/or lens to avoid this.
I recommend shooting a minimum of 5 to 10 images between changes in your camera settings in order to get a better deflicker in post-production. Changing the settings too fast can cause more brightness and contrast flicker which might be hard to remove without paying some extra bucks for a few plugins.
If you are not feeling comfortable with a full day-to-night transition at first, change your shutter speed a couple of times during a regular day time-lapse and see how easy it is to do the transition. Once you feel more comfortable, do the full day to night transition.
What about aperture priority mode?
If you decide to shoot in AV mode, which I don’t recommend doing, you should select a medium aperture – between f/6.3 and f/8 – and auto ISO with a minimum and maximum value (usually 100-500). With those settings, you should be able to end the time-lapse with a shutter speed under 6 or 7 seconds at night. Set your camera to keep things within -1 stop of exposure at all times in order to save the highlights in the sky, exactly like when shooting Manual mode.
But be careful as you do not want to end up with a shutter speed slower than your interval. Some cameras have an option to select the maximum shutter speed you would like to use. This comes in very handy to avoid issues with shutter and interval selection.
If you are shooting with Canon, like I do, select your ISO and aperture knowing what your shutter speed should be like at night. Usually, for a basic cityscape time-lapse, I end up with a shutter speed of between 4 and 5 seconds, along with an interval of 5 to 8 seconds (and ISO 200-500 and f/6.3 or f/7.1). You might have to shoot a few times in order to know the best camera settings to use for your own gear and subject.
Practise, make mistakes, and learn.
Final comments on settings
In any case, select the mode that you feel the most comfortable with, but remember: do not shoot with an ND filter on or full auto mode.
Also, do not change the settings if the sun is visible in your shot. This will create what I call sun flicker, since the sun and the area around the sun is very bright and usually creates clipping.
Start your time-lapse a little overexposed if needed and wait for the sun to set before starting the exposure ramping. For a sunrise, you can change your settings until a few minutes before the actual sunrise. Here’s a video I made about shooting with the sun in shot to help with that:
Creating a day to night transition in post production
Once you are done shooting your day to night time-lapse, then comes the post production part. You will, of course, need to smooth out the exposure ramping voluntarily created while changing the settings before you can share the time-lapse!
The only and easiest way to do so is to use LRTimelapse and its powerful Holy Grail Wizard. The Holy Grail Wizard will be available only when shooting in Manual Mode (M) and not in AV Mode. That is another reason why shooting in M mode usually works better in post production. If you shot your time-lapse in AV Mode, you can only use the Visual Deflicker tool to smooth out the exposure ramping.
The Holy Grail Wizard will smooth out the exposure ramping made during the transition, but also acts as a Visual Deflicker. LRTimelapse also offers a Visual Deflicker later on in the workflow. Using both the Holy Grail Wizard and the Visual Deflicker will make you create flawless day to night transitions.
Load your sequence into LRTimelapse and follow the workflow. Usually for a day to night transition, I select between 10 and 15 keyframes. These keyframes should be the points where the exposure makes a noticeable jump worth smoothing out manually.
In order to get the most out of the Holy Grail Wizard, you need to centre and flatten the yellow curve as much as possible using Rotate and Stretch. You can quickly see that your Holy Grail Wizard curve is the opposite of your luminance curve, which is what we need to clean the bulb ramping.

To learn more about the Lightroom Workflow, please read my other time-lapse article where I explain in detail how to sync the keyframes and save the metadata in Lightroom.
Colour correcting a day to night time-lapse in Lightroom
Analyse your sequence before doing the colour correction. Watch it a few times in LRTimelapse to get an idea of how you would like the final product to look like. Read the image sequence and determine what the most prominent colours are that you would like to boost and make more vibrant or saturated.
A day-to-night transition is divided into 5 different sections: Day, Golden Hour, Sunset, Blue Hour and Night. Colours and white balance will then change a lot during the day to night transition, but I recommend doing only small changes from one keyframe to another, especially when it comes to contrast, filters, or white balance.
Doing strong corrections from one keyframe to another might create contrast flicker or other unwanted issues. Contrast flicker is usually created by Lightroom when big elements such as clouds, cars, or people show up on your images really fast. Lightroom does not apply contrast in a linear way, which is a big issue for time-lapse sequences.
How you can avoid contrast flicker
These 5 Lightroom tools are usually the source of contrast flicker: Contrast, Whites, Blacks, Clarity, and Dehaze.
To avoid contrast flicker, don’t use too much of those 5 tools. Utilise the Curves instead of the Whites and Blacks, as the Curves tool has a more linear way of applying contrast to your frames.
If you tried everything and still end up with contrast flicker, which is something LRTimelapse does not fix (only brightness flicker), you can use a powerful plugin called Flicker Free by Digital Anarchy. I have been impressed by this plugin and am now using it on every single time-lapse I shoot to remove both brightness and contrast flicker.

When colour correcting a time-lapse sequence in Lightroom, remember 3 things:
- Read and analyse your sequence before colour correcting in Lightroom
- Do small changes between keyframes in order to avoid any issues
- Stay natural and don’t overdo it – it always looks better (especially if you would like to sell your work later)
Once you are done with Lightroom, save the metadata and switch back to LRTimelapse in order to create the Visual Previews and deflicker the timelapse.
Follow the LRTimelapse workflow shown in the application until you reach Visual Deflicker.
For a day to night time-lapse, I often select 2 or 3 passes at a value of between 10 and 20. The program will then automatically deflicker the sequence 2 or 3 times. If your sequence seems to have a lot of brightness flicker, add more passes and choose a bigger value. This tool is powerful and 10 or 20 usually does an amazing job. The chances of ending up with brightness flicker on your final video are slim after this.
Things to remember when shooting day to night time-lapses
Capturing beautiful and flawless day to night time-lapse videos has become very easy with today’s cameras and software available. But what you, the photographer, are doing with those tools will make a big difference.
Select the right subject with constant motion from start to finish. This will make a big difference when it comes to Holy Grail time-lapses.
Choose the right interval for a day to night timelapse (usually between 5 and 10 seconds). Remember, your main subject is the light changing, so you don’t want to shoot with a 1 or 2 second interval and end up with 4000 images.
Change your settings 1 increment at a time, which is usually equal to ⅓ or ¼ of a stop – this will make the day to night smoother straight from the camera and the processing job easier for you and for LRTimelapse.
Keep your colour correction natural and soft between keyframes. You can obviously make the colours more vibrant and accentuate the contrast, but remember to go easy to avoid any issues such as contrast flicker.
Utilise the Manual mode of your camera instead of AV. Use your LiveView and Exposure Value to decide when to change the settings.
You can practise exposure ramping with a regular day time-lapse by changing the settings a couple of times. Once you feel more comfortable with exposure ramping, shoot a full day to night transition.
Take the time to deflicker your image sequences using LRTimelapse Holy Grail Wizard, Visual Deflicker, and plugins such as Flicker Free if needed. There is nothing worse than a time-lapse video full of flickering.
If you would like to learn more about day to night timelapses and all aspects of timelapse photography, you can check my online classes available here!


