
How to Use GoPros for Underwater Photography

Most of us will have seen some of the vivid, ultra-stabilised films or spectacular wide angle shots of scenery or adrenaline sports taken with a GoPro.
These devices are some of the most portable, robust, and surprisingly capable cameras around and, due to their design as action cameras, they’re ideal for taking hassle-free yet high quality photographs underwater.
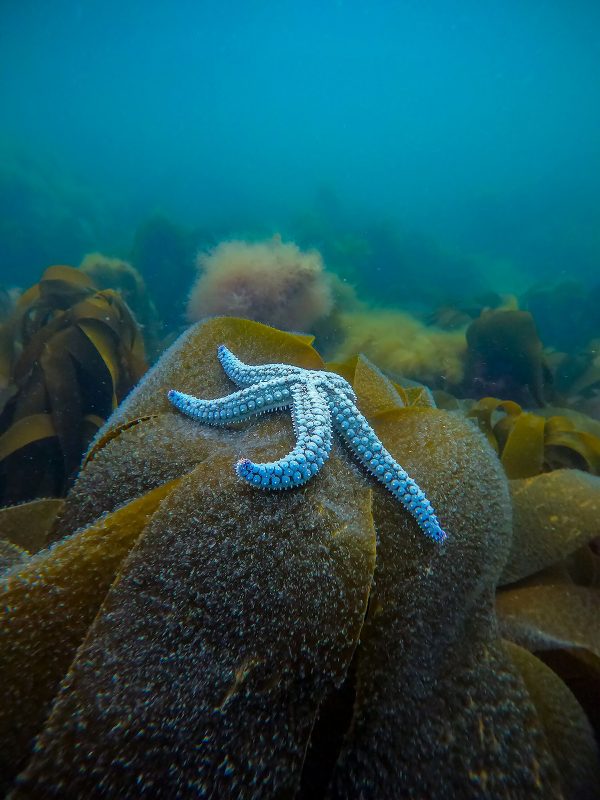
Beautiful images of whale sharks, mystical kelp forests, and even small sea slugs can be showcased by a GoPro set up. However, getting the most from a GoPro for underwater photography involves certain considerations, as GoPros work in a rather different way to many conventional cameras.
Pros and cons of using GoPros
It’s helpful to begin with the limitations of GoPros for underwater imaging, because knowing these helps us to get around them.
Firstly, GoPros can’t focus close to anything. They are designed primarily for wide-angle shots, and anything within about 30cm will be blurry. Photographing tiny creatures or close-up detail without additional lenses is limited, so don’t get too near to your subject.
Secondly, the physical size of the sensor is small, even in comparison to many compact cameras. A lot of the amazing images that come from GoPros are partly thanks to software wizardry.
It means that, if shooting in RAW, some robust post-processing is often needed to get the most out of the images, which might initially not look too impressive.
But equally, RAW files are especially valuable to extract the maximum information. Some degree of noise reduction also helps because, in darker conditions, this can be noticeable in GoPro images. Despite this, they can also produce wonderfully atmospheric shots in low light.
Thirdly, GoPros provide limited control over things like exposure and focus. This can be fine though, if you just want to point and shoot.
Despite the above, GoPros are extremely portable and, with later models at least, you can literally jump in the water and start shooting. With underwater photography, half the battle is simply getting all the kit in with you and into a place where the action happens.
I own both GoPros and a more ‘complete’ camera set up, with chunky housing, strobe, and arms. Although I love using the latter, at times it’s just not practical. Bulky camera set ups can be hard to travel with, potentially compromise buoyancy and trim, or even distract from essential tasks, like keeping track of air and depth.
GoPros have those issues too, but their size and simplicity mitigates them a lot.
Composition

Fundamentally, this no different from using other cameras, except that dynamic range can be more limiting, especially if capturing a comparatively dark foreground object while looking up at a bright surface.
These are classic underwater shots and, since GoPros don’t work with strobes, the usual tricks of putting the sun behind you, or hiding any sun ball, help manage this. Also, video lights can be used to good effect.
Conversely, GoPros have major advantages over other setups. For example, there’s no fiddling around with strobe or exposure settings while that crucial shot disappears. Their small size means you can move them into tight spaces or quickly react to opportunities.
Holding a GoPro out or down to capture that eye-level shot of a fish or other creature is often simple, especially if attached to a selfie stick.
Adding accessories
Another major benefit of a GoPro is the huge range of existing third-party accessories, from selfie sticks to lenses (but beware of compatibility with different GoPro releases). Newer GoPros are already waterproof, with no housing needed for depths suitable for snorkelling, or even shallow diving.
Beyond that, you need to get an underwater housing. Compared to conventional camera set ups, these are cheap. If you’re photographing larger objects, this may be all you need. A floating selfie stick is also a good idea, although be aware that these won’t provide enough buoyancy if you add certain housing and accessory lenses.
Once you have underwater housing, several companies (such as Backscatter and Polar Pro) make coloured filters for diving, to correct hues often found in relatively green temperate or blue tropical waters.
A wide range of trays for GoPros allow underwater lights to be added. This is useful if diving deeper into darker or murkier conditions, or if taking close-up images.
Finally, the companies mentioned above also make close-up and macro lenses, enabling GoPros to get much closer to smaller creatures. Read on to find out more about this.

Settings
GoPros really have just one lens, which gives a wide angle of view. This has certain implications: if you select some of the narrower angles of view (e.g. ‘linear’ or ‘narrow’) to zoom in a little, the GoPro crops and then enlarges the image using its own software.
The results are still impressive, but sometimes a drop in image quality occurs. If you shoot in RAW these narrow lens settings are not supported, since RAW outputs the entire sensor. So, for settings with a narrower field of view, you can take what GoPro gives you.
The results can be impressive with apps like SuperPhoto, but the cost is the limited editing power with a JPEG. Alternatively, you can get the whole RAW file and work with that, including cropping later if desired.
With RAW files, some degree of processing, e.g. in Lightroom, is needed to make the most of the images. So, if that’s beyond what you want to do, shooting in JPEG and using some of GoPro’s own image types can give great results and open up other field of view settings.

There are some further features that I’ve found helpful on many occasions. The timer, setting a delay of three or ten seconds before the capture, makes getting that selfie shot easier, or simply gives you time to move the camera into position before taking a photo of your subject.
Burst mode is also useful, taking a specified number of images within a second or a few seconds. If the action is fast-moving, or you just want to maximise your chance of a great shot, then this can be a valuable option.
However, it can give mixed results in low light and, if shooting in RAW, there can be a delay while the GoPro processes the multiple image files. In some cases, it may be better to take stills from film footage: with the newer GoPro models that can shoot 4k, or even beyond 5K, frame resolution can be up to 15MP.
The trade-off is that few people can use or work with 5K, and the space taken up on memory cards is huge.
Otherwise, GoPros don’t allow rapid changes of settings when taking photos, and the touch screen won’t work underwater. Thankfully, they do allow a number of custom presets to be saved, and these can often be moved through by pressing a combination of the shutter and mode buttons.
I tend to have two types of settings for both film and photos (generally for wide-angle and macro).

Macro
The lack of close focus might seem incompatible with close-up and macro work, but solutions exist. In particular, Backscatter and Polar Pro make macro lenses that attach to the underwater housing (or accessory filter systems).
I’ve tried several of these, and the results can be good. However, these lenses can also be frustrating because the distance has to be precise to obtain good focus, and the capacity to shoot small critters can be mixed.
For something like a large tropical nudibranch or a tennis-ball sized fish it’s fine, but for the tiny nudibranchs we get in the UK, the lenses just don’t cut it and the creature is still far too small. It also takes a lot of practice to obtain good sharpness, especially as GoPros have no capacity for focusing on specific objects.
Instead, I’ve used Backscatter’s close up lens far more than the macro. This is not as powerful, but it still enables you to get much closer to fairly small animals and bring into sharpness some of their detail, while at the same time not having to be so precise with distance. This is very useful when photographing in swell or current!

One of the outcomes of these lenses is that, with the wider angle lens settings, the outer margins of the image can be blurred, especially with powerful macro lenses. Macro lens manufacturers often suggest using the narrower settings for macro work, and this produces sharper results.
As above, the downside is that you’re no longer using the full sensor, and so lose the capacity to shoot RAW. For close-up lenses I find the blurring is small, and not always a bad thing. So, I stick with RAW and the wider settings. But for macro, there’s less leeway.
Split shots
Few images capture the imagination as much as split shots, such as magical coral reef scenes with lush tropical forests above, or divers exploring below a boat. GoPros can be surprisingly good at these shots but, like other camera set-ups, not without the addition of a dome port.
In fact, the lens on a GoPro is so small that it would be extremely tough to get usable split shots with the camera alone. Like other accessories for GoPro, the good news is that there are many third party domes available at a reasonable cost.

The downside of using a GoPro for split shots comes back to limitations on things like sensor size/ dynamic range, and control over exposure.
With a GoPro you generally can’t set the exposure time, so the common solution of slightly under-exposing the underwater shot, so information from RAW files can still be recovered later, while properly exposing the above-water element, requires a work-around.
GoPros allow you to set exposure compensation values, so telling the camera to under-expose the image can prevent the above-water element from being blown out. Naturally, shooting in RAW is a major advantage in recovering dynamic range. Noise can be an issue, unless it’s a very bright day.
Read more: Underwater Split-Shots – Top Tips for Over-Under Photos
In conclusion
As with any camera, the key to getting the most out of a GoPro is to know the settings and limitations inside out, and to practice a lot.
GoPros can produce stunning images right out of the camera. However, really utilising their power and advantages requires tinkering with the settings to maximise what the camera is capable of recording.
With accessories, GoPros can even take close-up images and split shots, utilise video lights, and, as much as anything, enable you to travel with a camera and take stunning photos and video that you simply wouldn’t have captured, had it not been for the GoPro’s portability and simplicity.
It’s hard to go far wrong with a GoPro as a first underwater camera, or even as a complementary addition to a larger set-up.


