
How to Photograph Winter Landscapes

In our mind’s eye, the winter landscape is a magical scene of pristine snow and azure skies. This wonderland version of winter is somewhat of a dream yet when the ‘weather gods’ are in a favourable mood, such fantasies come true and we can enjoy some spectacular photography. A dusting of the white stuff transforms ordinary landscapes into something of extraordinary beauty, adding another layer of interest to scenes that we might otherwise pass by. The often transient nature of snow creates an added sense of urgency to don the thermals, dash out into the countryside and start shooting.
Waking up to fresh snow is like waking up on Christmas morning as a child, where the world is a very special place, full of new and exciting things, each one vying for attention. But a covering of snow isn’t the sole ingredient for great pictures and the same basic photographic principles of good subject, good composition and good lighting are required to create memorable images. This may sound obvious, but if you are anything like me then it’s very easy to become overwhelmed by the beauty of a snow-laden landscape and begin to photograph indiscriminately. Some perspective is therefore required to concentrate the mind and to seek out a suitable subject that befits the conditions.


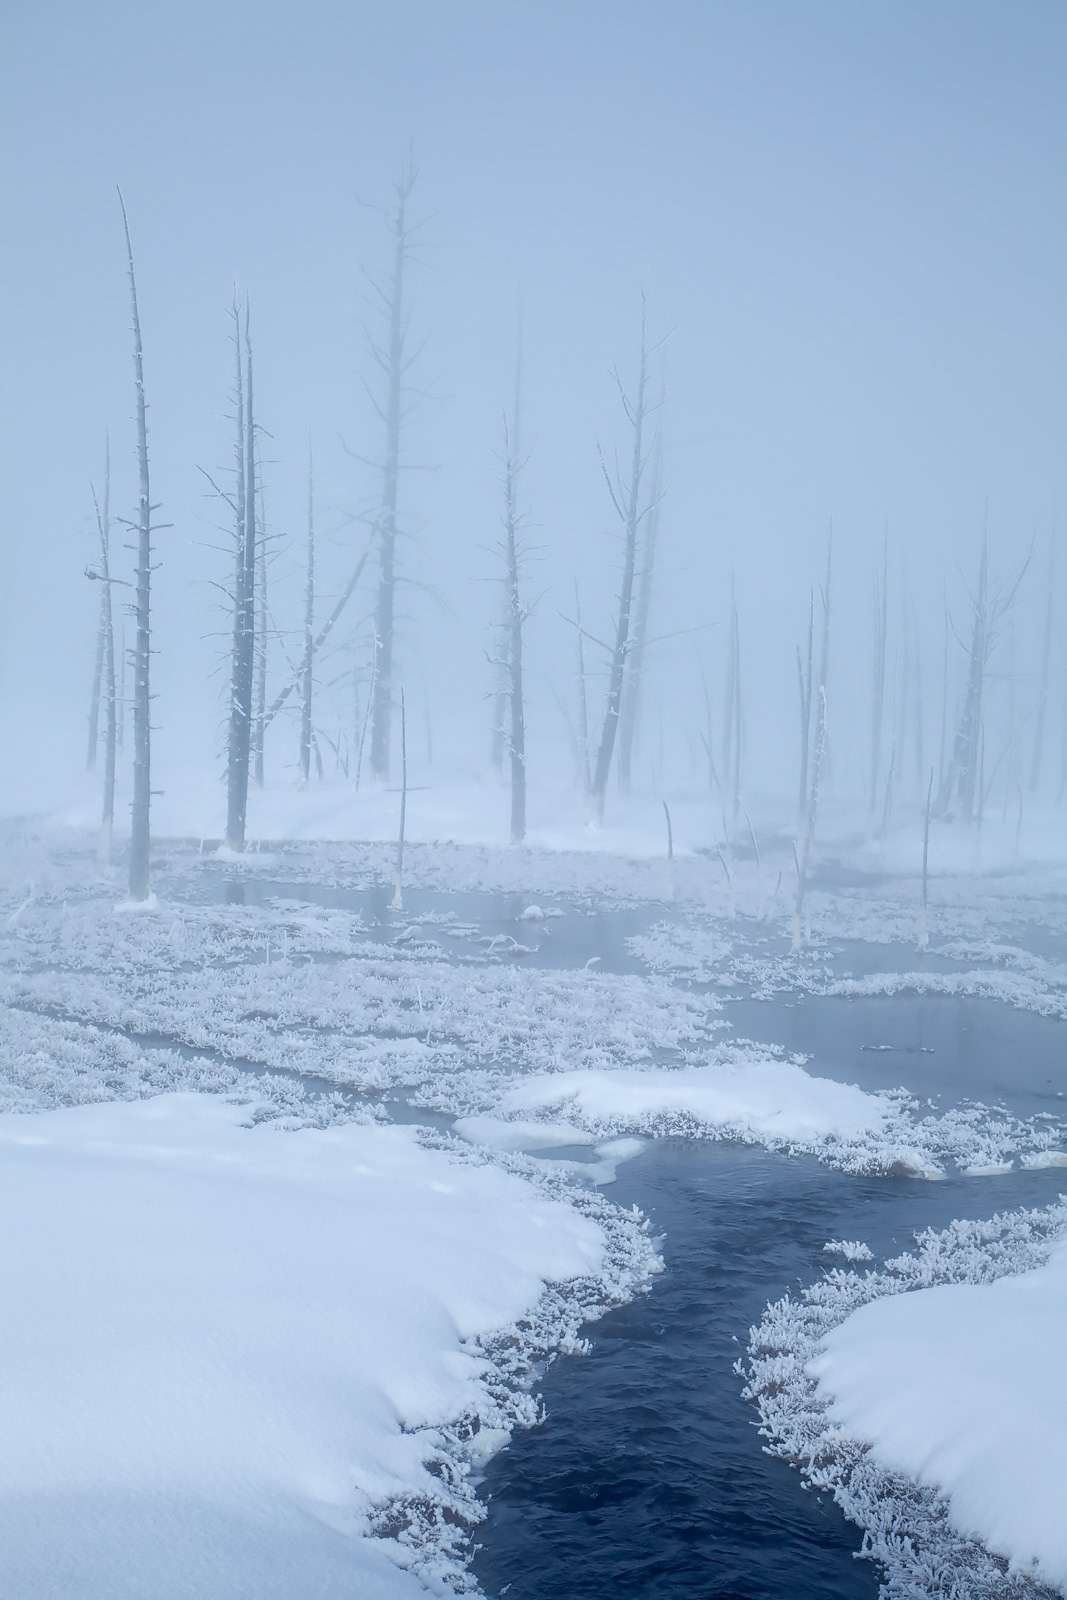
Winter weather comes in many forms, and some are better than others for certain types of landscape images. Fresh snow and clear blue skies may steer you towards a wide-angle view, whereas overcast conditions will require a different approach with a tighter composition. Winter landscapes are not confined to snow scenes of course, since the colder months also bring with them the prospect of frost, which can be an even better alternative. Fog and mist are also very much a feature of winter and these weather phenomena similarly radically transform the landscape, simplifying features and allowing for more minimalist images to be created.
The winter sun is special, casting a beautiful low-angled light across the landscape, accentuating shadows and revealing shape and form, giving images a three-dimensional look. Generally, side-lighting is best for this. A further benefit of low-angled sun is that light has to pass through more of the earth’s atmosphere. This filters out blue light, giving ‘white’ snow or frost a warmer tone, providing a perfect compliment to the cooler tones of shadow areas.

Whilst we often crave bright sunshine, overcast conditions are equally useful for winter landscapes, reducing contrast and creating a subtle, softer light. More intimate landscapes that contain no sky work very well. These kinds of scenes tend to lack strong colours making them ideal candidates for conversion to black and white. Strong compositions that contain a wide range of tones helps to create striking monochromatic images. Abstract images that rely on shape, form, texture and shadow can also be very effective, adding a sense of mystery and intrigue.
Further Reading: “Mastering Black & White Landscape Photography“
Unsullied snow makes a perfect blank canvas to create very simple compositions that feature a single focal point, such as a tree. In overcast conditions, snow can be totally featureless but this is ideal for images with lots of negative space where the main focal point is quite small in the frame, or to provide a clean white background devoid of any distractions. Conversely, when snow is illuminated by direct sunlight, the contours and undulations of the snow are revealed by the play of light and shadow. These lines and shapes can form the basis of a photograph either on their own as an abstract interpretation, or as foreground interest to another feature in the landscape.

Snow or frost-laden trees look great when photographed as part of a wider landscape, or in isolation against a blue sky or crisp white backdrop. Woodland interiors offer a welcome alternative in foggy conditions, where the bare skeletal forms of trees can be shot as a recession of tones as they fade with distance. Against a blue sky, the woodland canopy can be photographed from below with an extreme wide-angle lens to depict the converging branches laced with rime frost or snow. This is best done at midday when the sun is at its highest so that the branches are more evenly backlit from above.

The cold temperatures of winter also herald the prospect of frost and ice, each providing a myriad of photographic possibilities. Hoar frost that engulfs every stem, twig and branch in a sugary coating of ice crystals is a magnificent sight, often occurring after a period of mist or fog when there is a lot of moisture in the air. Damp hollows, rivers, lakes and other inland waterways are often laden with mist in winter which makes for some interesting images with the added bonus that hoar frost is most likely to form in these areas once the temperature drops below zero on clear calm nights.

These still, cold conditions also allow ice to build up around bodies of water, creating interesting shapes and patterns to use as foreground interest or as subjects in their own right. Successive nights and days that follow a freeze, thaw pattern produce layers and shards of ice around lakes where the gentle motion of the water pushes and pulls the fragments into a contorted frozen sculpture. These glass-like ice fragments reflect light falling on them appearing blue when cast in shadow but transformed into sparkling gold when lit by the low winter sun.

One of the challenges of shooting snow, ice and fog is arriving at a correct exposure. It is very easy to either burn out the whites or underexpose the shot depending on how you take your meter reading. Pointing most cameras at a predominately white or pale scene will lead to an underexposed (too dark) photograph. This is because the camera is programmed to meter everything as if it were a mid-tone, which is why white snow can often turn out grey! To overcome this when using one of the automatic metering modes, such as Aperture Priority (Av), it is necessary to dial in some exposure compensation; usually between +1 to +2 stops will be required to correctly expose the whites. This can easily be checked by viewing the histogram after taking the shot. The graph should be biased to the right of the histogram, showing a predominance of paler tones. Ideally, the graph should be very close to, but not touching the right hand side, so as to avoid losing detail in the brightest part of the picture.
An alternative, and arguably more reliable technique, for ensuring accurate exposure is to shoot in Manual mode and find a mid-tone within the scene you’re photographing from which to take a spot meter reading. This is best done by setting the desired aperture first and then altering the shutter speed until the exposure indicator bar aligns with the ‘0’ in the middle of the scale. This reading can then be used to accurately shoot your snowy or foggy scene, providing the light stays constant. It is still a good idea, however, to check the histogram has a graph biased to the right but no burnt highlights. Activating Highlight alert on your camera is also useful, as this provides a visual indication if the whites have been burnt out (black or red blinking areas on image review). If this is the case, you’ll need to darken the image by decreasing the exposure time (i.e. use a faster shutter speed) or dialing in some minus exposure compensation.

Winter, perhaps more than any other season, offers a greater chance of extreme weather and an opportunity to create unique images. Freezing conditions, fog, frost and snow may not go down well with commuters but I and almost every landscape photographer out there will be rejoicing. Bring it on!


