
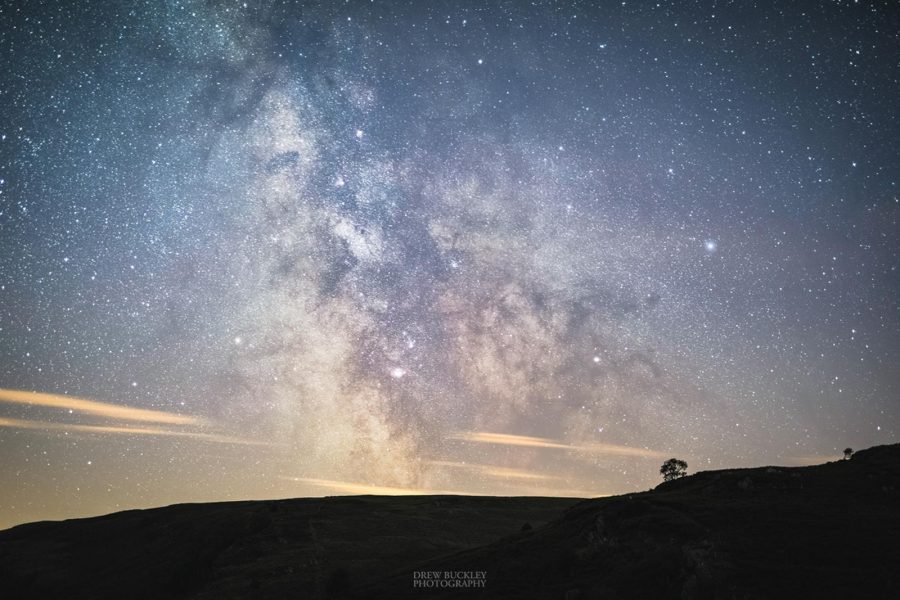
How to Stack Star Photos to Reduce Noise in Photoshop
The process of stacking images in dark sky photography isn’t a new technique. Astro-photographers have been implementing this technique for well over a decade, especially in deep space imaging, using telescopes to photograph distant galaxies, nebulae and constellations. In recent years of my own night sky imaging, I started to become extremely obsessed with getting a cleaner final image, comparable in quality to my other daytime images. Not an easy task in astrophotography, as it’s generally about pushing the limits of a camera sensor’s capability. One could suggest to shoot with a tracking mount (a device that moves your camera with the stars), therefore you can use a lower ISO over a longer exposure to obtain ‘cleaner’ images. I do use a tracking mount on occasion, but in some situations or certain time constraints it’s not possible, so that’s where image stacking comes in.

The main reason for image stacking is to reduce visible noise and, in turn, create a cleaner image. For instance, when taking a photo of the night sky using a high ISO we will see more detail, but some dimmer stars could be mistaken for noise. As noise is random in its appearance, if we were to take another image then some of these previously obscured stars would now be rendered in the frame, with noise covering up other stars elsewhere in the image. Therefore the more photos you take, the more uniform the background noise becomes, allowing more stars and detail to be drawn out. Then by taking many images of the same scene, aligning them together and overlaying one on top of another, this starts remove the random noise (grain and colours) leaving the scene full of stars, detail, and ultimately a cleaner image.


Overall, this process opens up a whole new style of shooting, allowing the photographer to shoot shorter exposures (getting sharper stars and combating star trailing) and at higher ISOs (more information captured) – win, win!


Learn more: The Ultimate Guide to Star Photography
Reducing Noise by Stacking Star Photos in Photoshop
It is essential to make sure you know the entire process to stacking star photos before you head out on your shoot. This way you can capture all of the images you need, then you can play around to your heart’s content when you’re back at home and in the warm. Below is the process of image stacking in Photoshop & Lightroom. Some of this tutorial does require a good understanding of layer masking, blending modes, and generally knowing your way around the programs.
First up is choosing your shots. Depending on what type of shot you’ve taken depends on how many to use. In wide-field images / landscapes, it’s not always more is better; so I’d recommend around 5-10 as a good amount. This should then give you a wide range of noise captured across the frame to, hopefully, remove in the stacking process. This means you need to shoot an amount of frames consecutively when out with the camera.
Step 1: Find the Frames
I use Lightroom to begin with, so in here I’ll select my 9 frames. Once you’ve highlighted them all, right-click and select “Edit in > Open as layers in Photoshop”.

Photoshop should spring to life or, if it doesn’t, open Photoshop and the images will now load into layers.

Step 2: Mask the Foreground
As the Earth was spinning as we were shooting our sequence, you’ll notice as you flick through the layers/images that the landscape stays in the same position while the stars will shift on every frame. Not wanting star trails when we overlay them, we need to align one to another. Also, as we have foreground in the shot we need to mask this out for the aligning process which we’ll cover later.
Choose the top layer and click on ‘Add a mask’ – if you’re not familiar with layer masks, then basically whatever you paint white remains, while painting areas black is hidden from view. They’re not erased though; just hidden.

Grab a paintbrush by pressing “B” on the keyboard, right-click anywhere on the image and change the brush to a size to suit you. Use a “Hardness” of up to 100% for sharper edges.

Now just start clicking and painting over the landscape region to mask out the landscape, until it resembles something like this.

Step 3: Copy the Mask
Next up we need to copy this mask to the other layers – you do this by holding down Ctrl (or Cmd on Mac) and clicking on the mask in the layer. This brings up the marching ants showing the selection.

With the selection made, you want to select the layer below and press the ‘Add a mask’ button again. This then masks out this layer with the same selection.

Do this process for every layer until you have something that resembles this:

Step 4: Stay Organised
To keep things tidy, you can select all the layers and put them in a group if you wish by hitting Ctrl + G on PC / Cmd + G on Mac – and rename this group to “Sky” (or something similar), by double clicking on the group name.

What I usually do at this stage too is to duplicate the group by right-clicking the group and choosing “duplicate group”. Rename this group layer to ‘Land’ and hide it’s visibility by clicking the eye icon.

Step 5: Align the Layers
Open up the Sky group and select all the layers by clicking the top layer, holding shift, and clicking the bottom layer.
To align them, go to “Edit > Auto-Align Layers”. Make sure Auto projection is ticked, and if needed choose Vignette removal and Geometric Distortion if you’ve used extreme wide-angle lenses. Generally, though, I leave these two unchecked and correct this later on if need be.

The aligning time will differ depending on your computer’s speed, but it’ll finish the process eventually. You’ll notice the canvas size would have changed slightly to accommodate the movement across the layers.

Step 6: Remove the Mask
Now, remove the layer masks for each layer by right-clicking on each of the masks and choosing “Delete Layer Mask”. The land should now reappear on all layers.

Step 7: Blend the Layers
Select all of the Sky layers again, right-click on any layer, and choose “Convert to Smart Object”. Once that’s processed, then all that’s left is the final step of blending them all together. Again, with the layer selected, head up to “Layer > Smart Objects > Stack Mode > Median”.

After it’s processed the output, you’ll instantly notice how clean the sky looks with just the stars shining through and any visible noise has been reduced.
How to Manually Realign Layers When Stacking Star Photos
However, if certain areas of your “Sky” group stacked layer isn’t pin sharp, this is down to errors in the Auto-Aligning stage, therefore we’ll have to go back in the history and Manually Align them. The process is a bit more involved, but ultimately we should end up with a better result.
Step 8: Undo the Changes
Using your History panel, undo changes back to Step 2 – select the layer above the base layer, and change its blending mode to Difference.

The image will now change to a black and white version, highlighting the difference between this layer and the one below it.

Step 9: Align the Layer
If you move the Difference Layer around, either with the mouse or by nudging the layer with your keyboard’s direction keys, you’ll notice the image changing, and in some situations the image will go completely black. This indicates that the Difference Layer is perfectly aligned with the Base Layer underneath it, and that’s exactly what we want.
To get the right alignment, I’d recommend transforming the Difference Layer by pressing Ctrl + T on PC or Cmd + T on Mac, and rotating, warping, and skewing the layer to line the layers up. You’ll notice when it’s aligned as you won’t see any white.


Make sure to look all around the image to roughly align the Difference layer with the Base Layer below it. Press Enter on the keyboard to accept the changes.
Step 10: Repeat the Process
Change the blending mode of Difference Layer back to “Normal”, then change the Blending Mode of the layer above this one to Difference, and repeat the same process for every layer. Making sure to align each layer to the one underneath it using the Difference blending mode.
Once complete, repeat Step 7 – converting all the layers to a Smart Object, then changing the Stacking mode to Median. Now you should be done with the Sky!
As you can see in the example comparison below, Auto-Align did a decent job. However, in the area around the tree and to the right of the frame, the stars became blurry, losing their intensity. When we manually aligned the sky, it improved the detail massively – so even though it took a little more work, it’s a much better result.


Stack and Sharpen the Foreground
So that’s the sky stacked. But you’ll notice the landscape is blurred too, so if you want both the sky and landscape sharp, then you’ll need to mask in just the ‘Land’ group on top of the Sky layer.
Step 11: Stack the Land
Using the “Land” group that we created earlier, expand the group, select all of the layers and convert them to a smart object and follow step 7 again. You’ll have the following:

Step 12: Mask Away the Sky
Add a layer mask to the Land layer and paint away the Sky with a black brush, like we did in step 2 above.

Step 13: Finishing Up
Now Turn the Sky group visibility on, revealing the ‘Sky’ group beneath.

Crop to suit, by pressing C and using the mouse to remove the empty edges – and you should be finished.
Here’s a close-up comparison between the stacked image vs. a single original image.


As you can see, a lot of the visible noise has been removed leaving just the stars on a smooth background. Remember this result is before any further processing or enhancing of the original image. By hitting save, we will re-import it back into Lightroom where you can make further adjustments and, with not much work, can improve the image to something like this.

In summary, there’s definitely more work involved in this way of processing, however the benefit outweighs the effort as it produces a cleaner, better looking image, improving the aesthetics of your images.
Other Programs to Reduce Noise by Stacking Star Photos
Over the years using this technique, specific star / night sky programs have been launched for astrophotographers. A popular one for Mac users, called Starry Landscape Stacker, is very good and I have heard great things about it.
However, there’s not been a Windows-friendly program until recently, when a free program called Sequator came onto the scene. I’ve used this briefly over the past couple of months and it seems to be a great piece of software. You literally drop images into it, define a sky region or area, and the software does the rest. It even blends foregrounds correctly too!
There’s a few options and blending/aligning settings to tweak and experiment with, but so far it does seem promising. Even so, when there are errors thrown up, you can’t beat the “old fashioned” way of manually doing it in Photoshop, so I’d urge everyone to experiment and see what works for you.
Further Reading: How to Get Sharp and In Focus Stars in Starscape Photos


