
How to Photograph Sunrises and Sunsets

Photographing sunrises, along with sunsets, can be one of the most incredible experiences – especially if you get some beautiful light. You don’t want pressure or lack of knowledge to ruin that experience for you, so here is my guide on how to photograph sunrises and sunsets.


Why Do We Photograph Sunrises and Sunsets?
It can be overwhelming to think that millions of people each day, all over the world, are photographing sunrises and sunsets, but how many of those people actually stop to consider why they are photographing it? To truly capture this moment you have to know why people do it and what it is that makes it so special, then you can reflect your reasonings in your work.
The answer is quite simple really, but understanding it will change your outlook. Among other reasons, we primarily photograph sunrises and sunsets for the colour that is produced in both the clouds, the atmosphere and potentially the main subject we’re photographing. Without getting too technical, the path for light to reach our particular location is longer because of the angle of the sun. Shorter wavelength colours like blues and greens are almost completely removed, leaving longer wavelength colours like oranges and reds that we regularly see at those times of day.
Where Do I Start?
They key to maximizing the opportunity to capture something unique and beautiful is preparation. Prior to photographing a location you should visit it during the day to look for compositions and figure out where the sun will rise or set, and familiarise yourself with as much of the area as possible. The last thing you’ll want to be doing is be rushing around all over the place trying to capture the light with no plan. Creativity doesn’t ignite under pressure, so the more preparation, the more creativity. Figuring out where the sun will rise and set, where the light will hit and the shadows it will cast are all really important things, and there are helpful tools out there to make it easy. ‘LightTrac‘ is my favourite iPhone or Android app out there for tracking the sun at your exact location. It’s simple, easy to use and well priced. Once you have got your location selected, you will want to make sure you arrive at least 40 minutes prior to sunrise or sunset. The colour show can sometimes start 20 minutes prior to sunrise or sunset. This will give you an additional 20 minutes to find a composition and set everything up.

What Do I Need?
As far as equipment goes you will need the following:
- Camera
- Lens (Preferably a wide-angle for landscapes)
- Tripod
- Memory card & spares
- Battery & spares
- Graduated Neutral Density Filter – such as the Cokin P121F (allowing you to properly expose both the land and sky in the image).
What Settings Should I Be Using?
There are no right or wrong settings when it comes to photographing sunrises and sunsets, but there are ones that are going to give you the most potential to create something unique. The most important mode to be in at this point is Manual, and to get the most out of your images you should be capturing your photos in RAW.
Aperture
The aperture of your lens is a physical opening that allows light into the camera. We measure its size in f-stops. The lower the f-stop value, the wider the aperture opening is and thus lets in more light in (and also gives a shallower depth of field). An aperture of f/16 is going to work best for photographing sunrise and sunset scenes that feature foreground. The reason behind this is simple: it will allow as much of that scene to be in focus as possible. If your scene was a reflection, for example, and you didn’t have any foreground features, an aperture of f/7.1-9 will work better because you don’t require relatively close objects to be in focus.
ISO Speed
ISO measures the sensitivity of the image sensor in your camera to light. The lower the number, the less sensitive your camera will be to light. A higher ISO will result in grain and noise, lowering the image quality. For sunrise and sunset, a low ISO is going to be more beneficial in producing the best quality image. A low value will also make longer exposures easier to achieve, giving more interesting results.
Shutter Speed
Your shutter speed is the least important out of all of the settings. That doesn’t mean it’s not essential, but it just means that you have to prioritise getting the other settings correct first. A faster shutter speed will allow you to capture a sharp scene, which can be useful if there are any moving objects within your sunrise or sunset scene. A slower shutter speed will allow you to convey movement, which can work well with clouds, lakes and rivers. Your shutter speed will vary throughout the time which you are photographing because of the light continually changing in the landscape. Generally, a sunrise or sunset shutter speed can be between 1/40 of a second right up to 30 seconds. A longer exposure can usually be achieved when the sun is no longer visible. Keep a close eye on your histogram to ensure you are not over or underexposing the photo, and adjust as needed for the right exposure. At these times of the day you’ll find that slightly underexposing is going to help because it’s easier to bring out shadows during editing than it is to pull back the highlights.
What Should I Photograph?
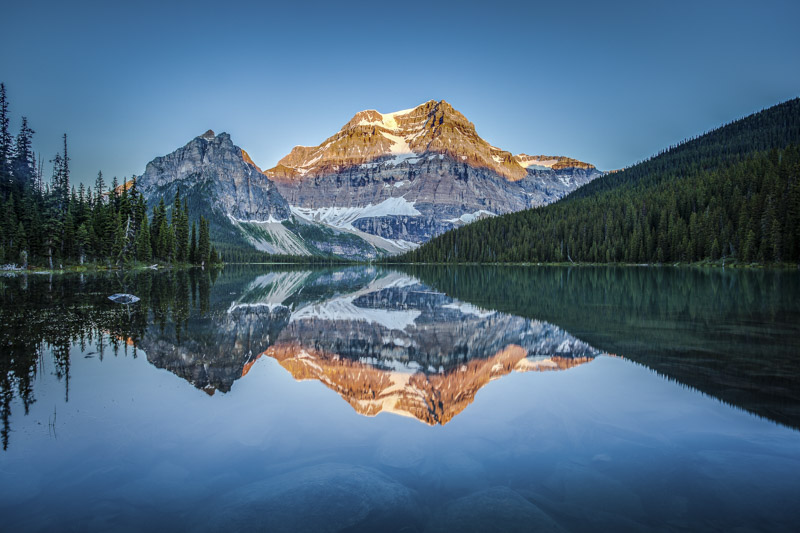
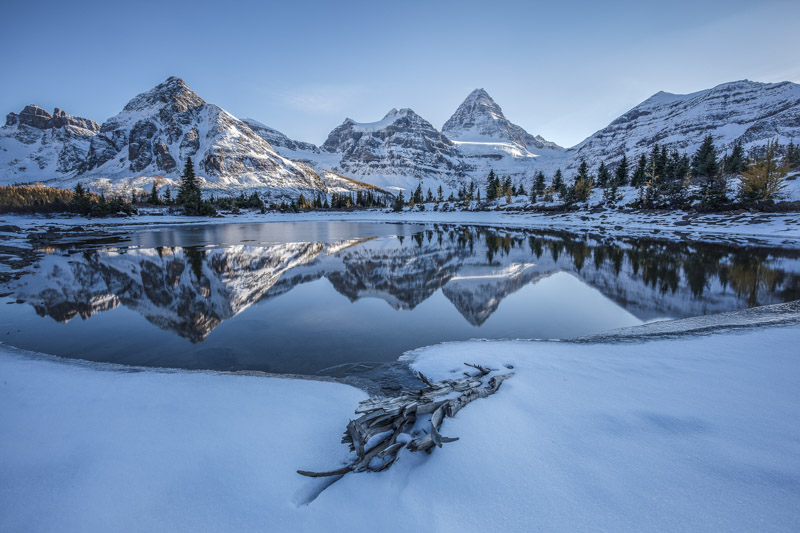
By now you’ve probably figured out that most of the hard work comes before you actually press the shutter. It doesn’t stop here either. You don’t want to just set up your camera and tripod and point it into the distance… You want to compose a scene that is going to make it as easy pleasing as possible to look at. Select some attractive foreground such as rocks, flowers, logs and other similar objects. This helps to anchor the photo and give your eye something to focus on first, before it works its way through the rest of the scene. Ensuring that your foreground doesn’t cut into the horizon of your scene will prevent the photo from appearing crowded. You want to try and keep everything simple and neat.
In your mid-ground, a field, meadow, lake, or stream will work well. It’s important to not let the mid-ground take all the attention in the photo, so keep your tripod lower to the ground and it will limit the space this takes up in the frame.
Finally, your background will be where the eye settles after looking at the photograph. So whether it’s clouds, hills, mountains or just clear sky, make sure it’s level, balanced and not too overwhelming in size (or too small).
What Do I Do ‘In the Moment’?
After you’ve applied all of the following steps, just click away. Remember that 200 photos of exactly the same scene is just going to be frustrating to go through later, so limit yourself to 10-15 images for each composition. Once you feel like you’ve captured one scene, don’t be afraid explore and find another composition to work with. This will give you a few different things to work with and compare to each other, and it can be a great way to find out what compositions do and don’t work for you.
You will find a Graduated Neutral Density Filter very helpful in balancing the light between the sky and your foreground. It’s not essential, but it will hold back the intense light that can be created at these times of the day, while still keeping your foreground and the rest of the scene nicely exposed. A great introductory Graduated ND filter to own is the Cokin P121F.
Limit the amount of empty sky you’ve got in your composition. Keeping the horizon in the upper third of your frame will help with this and eliminate any empty space. Autofocus does a great job of focusing on your scene, but sometimes it wants to focus elsewhere – so you should manually focus on your main subject (not the foreground).

Don’t be disheartened if you don’t get the best sunrise, or the colour didn’t quite turn out as you had hoped. Consider it a learning experience and make the best of what you’ve got. Some of my personal favourite images are moody and stormy sunrises and sunsets with dark clouds which allow longer exposures. Use your time wisely; play with different compositions then go back and try again another day. Within no time at all you’ll develop an eye for seeking out the best foreground; instinctively knowing your settings and being able to read the clouds, sky and light to predict what’s going to happen.
So, there you have all the essential skills and techniques to get you photographing sunrises and sunsets. Here are a couple of final tips from my personal experiences:
- Use a shutter cable release. If you’re photographing at slower shutter speeds, when you press the shutter it can create camera or tripod shake, resulting in a slightly blurred image. Using a remote cable will make sure this doesn’t happen and it can help when your compositions are awkwardly placed as well.
- Spend no less than 5 minutes creating a well composed image, and spend no more than 10 minutes photographing it before moving onto another composition. This will give you lots of compositions, and will slowly increase your ability to find new compositions that work for you.
- Bring along a rocket blower. Condensation can build up on the glass of your lens when the lens’ internal temperature is lower than the outside air temperature. Do not use a cloth to remove this moisture, as you will leave marks all over your lens – keep using your dust blower and it will dry up the moisture in no time.


