
How to Reduce Noise in Photos in Lightroom
If you own a digital camera or have used one, chances are you would have come across the term ‘noise’ before. It is usually unnoticeable on the back of the camera or when viewing the whole image on your computer. However, if you zoom in to 100%, you’ll see lots of blocky dots across the shot; especially on the out of focus background and in the shadows. Thankfully, you can, to some extent, reduce its visible appearance by using computer software such as specialist noise reduction programs. These do an excellent job as that is what they’re designed to do, however you can achieve fairly good results using Adobe Lightroom.
What is Noise?
To counteract noise, first you have to understand how it got there in the first place. Noise found on your photographs is partly due to the sensitivity of your camera’s sensor. The way the sensor captures light is by having millions of tiny buckets, called photosites, which in turn appear as pixels in the final image. Most sensors these days carry a high amount of megapixels. The sensor in my camera for instance is just over 22 megapixels. That means there’s 22 million little photosites to capture light spread across its sensor. It’s not always good to have lots of megapixels on your sensor, as this is how noise can occur. The physical size of the photosite is very important as fitting lots of these on a smaller sensor can cause problems. This is why, as a general rule, full frame sensors are better at handling noise, mainly because there’s more physical room to fit in all those photosites.


It’s not just the physical size vs megapixel ratio that causes noise: the camera’s sensitivity setting also plays a massive part! ISO value is used to increase the sensitivity of each and every photosite to available light. The lower your ISO value, the less sensitive it is to light (resulting in less noise), and the higher you set your ISO, the more sensitive they are (more noise). This is because of the digital signal to noise ratio between each photosite capturing light; the signal being the light intake from the photosite on the sensor. If the sensitivity of the photosites are amplified, the signals are increased and here is where each photosite’s signal can interfere with its neighbours’. Levels of noise are always present and fairly constant at a low level. In normal shooting conditions with good light, the level of signal outweighs any noise present resulting in a high signal to noise ratio (SNR), and likewise when light levels drop, the signal level drops nearer to the noise level meaning the noise is more visible and, in extreme cases, overriding what is being captured. Generally, you want to keep your ISO speed as low as possible for maximum image quality. ISO is the setting you really have to push when available light is low.
How to Reduce Noise

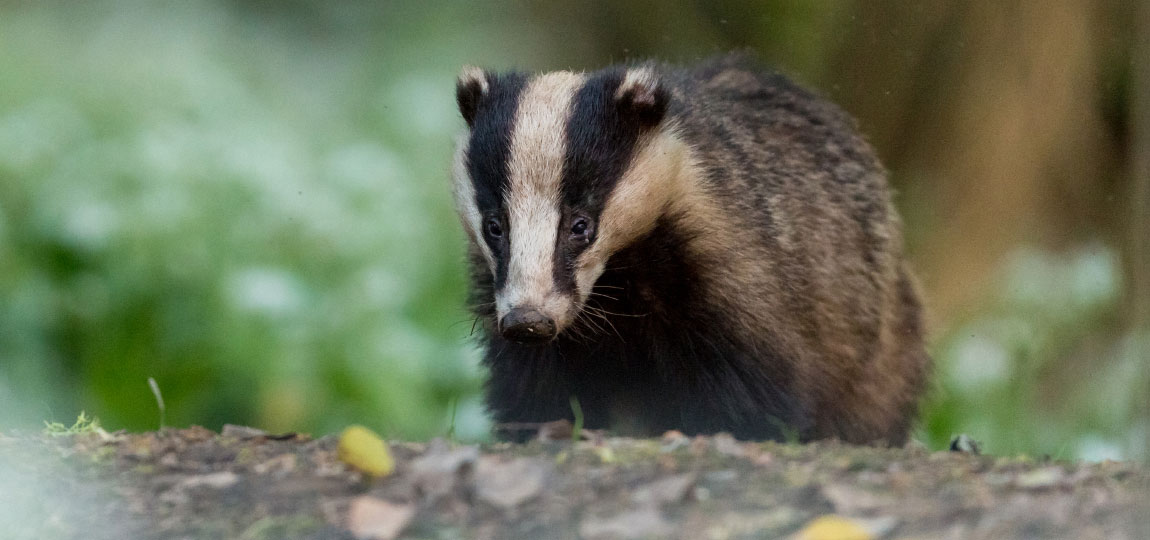
In this photo, I was already shooting with the lens wide open at f/2.8, and using a lower than optimum shutter speed of 1/125th second, so the remaining setting that has to boosted is the ISO. I pushed mine up to ISO 4000 for this image to render it correctly exposed and balanced with the other two settings.
Lightroom comes with its own noise reduction tool, so let’s see what we can do with this shot.

Before getting to the noise reduction stage I’d recommend you correctly process & sharpen you RAW image using my previous tutorials.
Taking a closer look by zooming in, you can see the noise is most visible in the shadows and the out of focus areas.

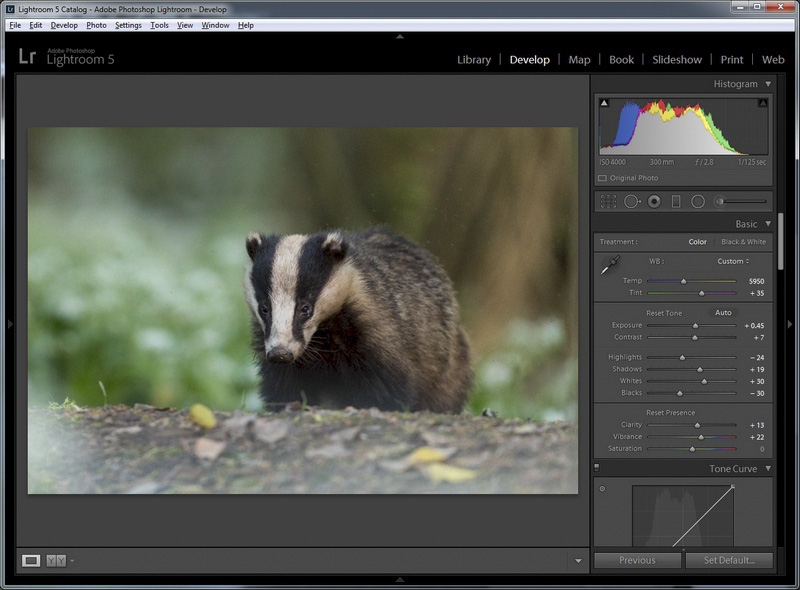
A quick process using techniques in the Basic RAW Processing tutorial, and we have our processed image
Zooming in on the main screen will help you to see what will happen in real-time when we start playing with our sliders. Also, use the “magic button” by holding down Alt/Option on your keyboard whilst moving the sliders. This will temporarily change it to black & white, making it easier to see what is happening.
First up is the Luminance slider, which is controlling the amount of noise reduction applied.


As you can see, moving the slider from 0 to 100 transforms our image and removes the graininess to it. However, in this case it hasmade it somewhat blurry and a bit extreme as we’ve lost the details in the badger’s fur. So, reducing the level will reduce some of the noise whilst still resolving the details. A value around 50 is good for an image with a lot of noise such as this.
Next is the Detail slider. Using this will enhance any details across the scene such as feathers, fur and mainly what is in focus. It does, however, affect the noise too, so again use this to reach a balance somewhere in between.


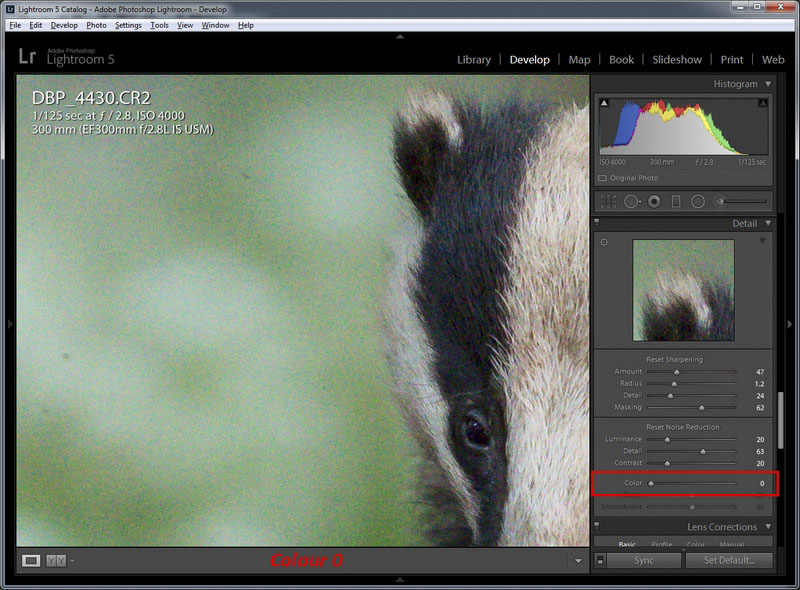
Next up is Colour Noise. This is those ugly green & magenta dots you see on images sometimes. Lightroom defaults to put this value to 25, but let’s wind it back to zero to see what it looks like without any correction.
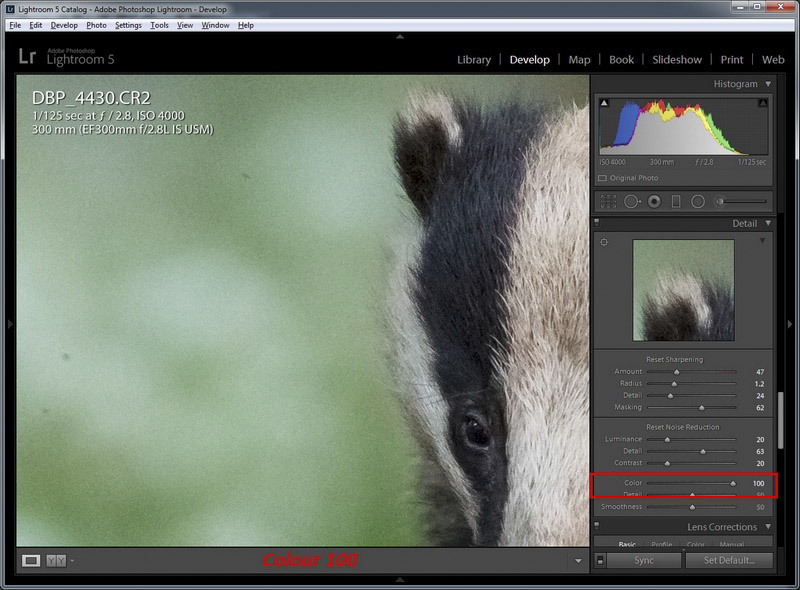
Pretty hideous isn’t it! Boosting this up to 100 removes all of the coloured dots, but using a value this high will remove so of the colour variation which would have naturally occurred in the image, so again a balance in between will be sufficient. I used around 50.
You can play around with the Detail & Smoothness of the colour settings but I always leave these both on the default of 50.
So to recap, let’s look at what we started with, with all values as they were.

Then our adjusted image…


It’s a massive improvement, providing a now very useable image for print, even though it was shot at a high ISO. With modern day camera sensors improving all the time, it means you can now get great photos even after the sun has gone down, which in turn opens up a whole new array of possible subjects to shoot.


