
Optical Phenomena at Night: Halos, Coronas, Moonbows

We are all familiar with rainbows. But, from time to time, we see some other beautiful, impressive, and sometimes intriguing atmospheric optics displays produced by light coming from the Sun, the Moon, or even the brighter planets. Some of them are quite frequent while others can be extremely rare.
Photographing atmospheric optics displays is not tough at all, from a technical point of view. The hardest part is spotting the displays in the first place!


Every time I go out, I look up and scan the sky. No matter if it’s day or night. After watching the skies for so many years, I tend to anticipate when certain phenomena are going to happen, and I will try to give you some hints that will help you anticipate it too.

Moonbows
I bet you’ve all seen rainbows during daytime. But have you seen rainbows at night? For a rainbow to become visible, we need a bright light source and some falling rain.
During the daytime, the Sun is the light source. But at night that light source is the Moon, and the resulting rainbow is usually called a moonbow.
We see moonbows for the exact same reason we see usual daytime rainbows. Light gets reflected and refracted inside spherical raindrops.
Rainbows (and, of course, moonbows) are always visible opposite the light source. So, don’t look at the Moon expecting to see a moonbow. Look in the opposite direction.
Moonbows are quite faint, so a Full Moon will generate the brightest ones. But even with moonbows seen during a Full Moon, don’t expect them to be easily visible. They are still faint and it will be quite difficult to spot a moonbow from inside a city.

In order to anticipate moonbows, look for passing showers during nights with a Full Moon. I have only seen a moonbow once, but I expected that it was going to happen. I was out photographing the Full Moon and I had seen curtains of rain in the distance.
Photographing moonbows is not very difficult. You definitely need a tripod as exposure times will be pretty long. You also need a wide-angle lens. A focal range between 14 and 24mm will be the most useful.
An aperture of f/4 is enough, and a low ISO in the range of 100 to 400 will suffice. Play with exposure time until you are happy. Be careful, though, not to have an excessively bright final image as it might look too much like daylight.
Include some stars in your photo, if possible. As always in wide-angle night shots, don’t forget about composition. And remember to be quick with moonbows – sometimes they’re gone in a minute or less.
Halos
A lot more often than moonbows, we can see some other atmospheric optical phenomena around the Moon. Some of them can be mistaken for rainbows, but the physics behind them is totally different.
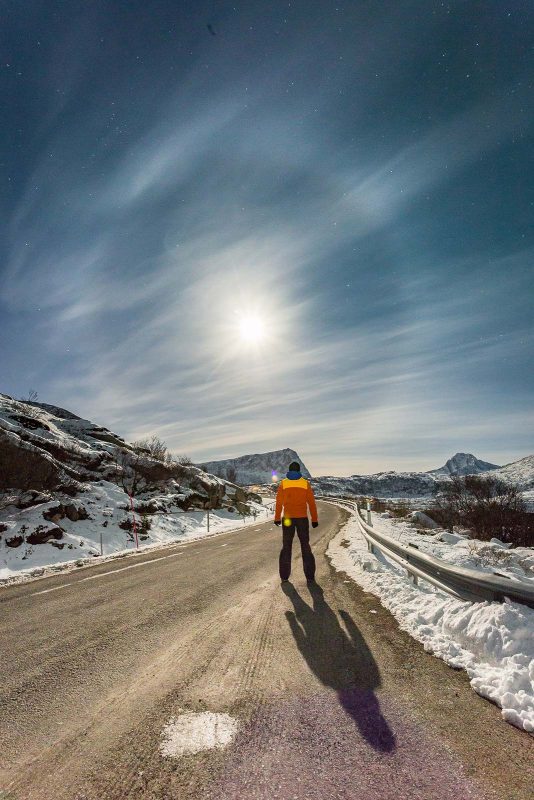
Probably the most common such phenomenon is the halo. It looks like a colourful circle around the Moon (or the Sun). With a rainbow blue is on the inside of the arc, but in halos red is on the inside of the circle and blue is on the outside.

Halos are large and will always have a radius of 22 degrees, and are way more common that you might think. They are, in fact, more common than rainbows. You just need to look for them.
Sometimes, you might not see the complete halo and some parts of it might be missing. If you want to be sure that what you see is actually a halo, you can very easily measure its diameter using only your hand.
Stretch you arm in front of you at eye level and spread the fingers of your palm. The distance between your thumb and little finger will subtend an angle of 20 to 25 degrees in the sky.
So, if the radius of the circle you see around the Moon equals the distance between your thumb and little finger, there’s no doubt you have a halo in front of your eyes.

Halos need ice crystals in the atmosphere to become visible, so look out for them when there are cirrostratus clouds in the sky. Cirrostratus are very thin high altitude clouds made out of ice crystals.
Not all ice crystals will produce halos, though, and that’s why we don’t see halos every time there are cirrus clouds in the sky.
At the moment, the most widely accepted theory says that poorly aligned crystals are needed in order for halos to form. That is one with a quite large tilt from its equilibrium position. Light gets refracted inside these hexagonal crystals, passing through two faces inclined 60 degrees to each other.
Most rays will be deflected at an angle near 22 degrees. No light will be refracted at a smaller angle, and that’s why the inside of the halo looks darker that the rest of the sky.
Red light is refracted less than the other colours of the spectrum and that’s why it is visible on the inside of the circle. Also, red will be the most obvious colour when looking at a halo. The other colours will be washed out.
Being large displays, you will need a wide angle lens to photograph halos. A full halo barely fits in the field of view of a 24mm lens.
I would recommend focal lengths between 8 and 20mm to photograph lunar or solar halos. Lunar halos are dim and you might not always see colours in them. A camera will always reveal those colours, though. You need a tripod for shooting lunar halos.
In terms of settings, start with ISO 800 at f/5.6 and play with the exposure time. The Moon will, of course, be overexposed. I usually use apertures in the range of f/5.6 to f/11 to photograph lunar halos to maximise depth of field as I will always have some sort of foreground in these photos.
Don’t use any filters when shooting straight at the Moon as you might get ugly reflections. Also, if you want your halo to have more contrast in the final image, it’s a good idea to hide the Moon behind anything suitable in your frame.
If the Moon is in the frame, you will need to apply some contrast in post processing in order for the halo to become more obvious.
Note: Be careful with observing and photographing solar halos. Ensure that you are not looking directly at the sun, even through your optical viewfinder.
Moondogs
Nighttime halo displays won’t usually show more than a trivial 22 degree circular halo. Sometimes, you might be able to see Moondogs (a brightening of the halo circle to the right and left of the Moon) or lunar pillars.
They are more often seen in the daytime, and these displays can go bananas and be exceptionally complex. In the below photo you can see a normal 22 degree halo, a solar pilar, and an upper tangent arc.

Coronae
Much smaller displays can be visible around the Moon or the Sun and are often mistaken for halos. They appear in the form of coloured rings around the light source and are called coronae. Water droplets are responsible for their visibility.
The tiny drops of water diffract light, and the scattered light waves interfere and generate concentric rings of darkness and light. Practically every spectral colour generates its own corona, and the corona that we see is actually a sum of all these individual monochromatic coronae.
Coronae always have a bright centre surrounded by red and yellow fringes, but the best ones will have multiple coloured rings around that central aureola. The rings are not neatly defined, being rather blurry instead.

Coronae don’t always have the same diameter. They are usually around 15 degrees in diameter but they can change size depending on the clouds that cross in front of the Moon.
To photograph coronae, choose a longer lens: 70 to 300mm is a good focal range. Again, you will need a sturdy tripod and an ISO around 800 to 1600.
In the case of coronae, I can’t give you any tips on exposure and aperture. That’s because coronae are very different in brightness from one display to another. You will always have to expose for the corona, and not for the Moon. The Moon will always be overexposed and that’s unavoidable.
Starting with an aperture in the range of f/2.8 to f/4, and an exposure time of 2 – 3 seconds, is a good point to begin from. Coronae are very transient phenomena so react quickly and be ready to change your settings quickly.
If there are parts of the sky that are clear, you can also use wide-angle lenses and the corona will become more of a secondary subject. A good example is a photo of the Northern Lights I took a few years ago.

But coronae can also be seen around brighter planets like Venus, Jupiter or Saturn. As these are pretty dim, just use normal exposures typical of landscape astrophotography.

Red bows
I started the article with rainbows (well, moonbows), and I want to end it with them too. But with a more special type of rainbow that, technically, is still visible at night.
I am talking about rainbows produced by the Midnight Sun. If you’ve never heard about the Midnight Sun, this is something visible only between the polar circles and the poles. For various durations (depending on latitude), the Sun doesn’t set during summertime and you can basically see it at midnight.

If we have a rainbow that happens when the Sun is very, very low in the sky, the rainbow will look different: it will be red. All the other colours will not be visible as they will be scattered by air molecules. Of course, this also happens when rainbows are produced at sunrise and sunset.
In conclusion
I hope this article has sparked an interest in optical phenomena at night.
In order to better understand why all these phenomena happen, I strongly recommend you take a look at Les Cowley’s website Atmospheric Optics.
Good luck!


