
Lightning Photography: How to Shoot Electric Storms

There are so many fascinating aspects to storms, but lightning photography is my favourite thing about them. At only one inch wide, five miles long, and 10 times hotter than the surface of the sun, being able to document this electrical energy as it reaches from the sky down to the Earth’s surface is nothing but addicting.
Each bolt is so incredibly different from the previous; it’s this uniqueness that makes documenting these weather phenomena so much fun.
It has been 18 years now of photographing storms and lightning, from film to the digital era, and I’m excited to share with you all of my top tips for lightning photography.

How to stay safe near lightning
It may be obvious, but I need to say it: BE CAREFUL! I’ve had a few close calls over the years while out photographing storms and, needless to say, no shot is worth being turned into a crisp for.
Although you can’t plan for where lightning will strike, there are a few things you can do to lessen your chances of becoming a human lightning rod.
1. Don’t make yourself the tallest object around
It’s as simple as that. Lightning usually strikes the tallest object, so make sure you are photographing from a sheltered location. The worst place to be is photographing in the middle of a field.
Examples of a sheltered location could include beneath an awning, or from inside your vehicle. Beneath a tree is not a safe location.
2. Try to avoid standing in puddles
Electricity from a nearby strike can easily shock you by traveling through the water.
3. If the hair on your arms stands up, seek shelter
Leave your gear and get inside as quickly as possible, as you are becoming electrically charged. As cool as that sounds, it’s not – you’re becoming the lightning’s new best friend.
4. Know your limits
As you see a storm approaching, the lightning will be striking closer and closer. Don’t wait until the lightning is right next to you or behind you. At that point, you have increased your odds of getting struck.
Lightning can actually strike up to 80 miles away from a storm!

Camera equipment for lightning photography
So now that you are safety conscious, what photographic gear do you need to create awesome images? It’s quite a simple set up, actually.
When I’m out, I carry with me my Nikon D850 camera body, a Nikon 14-24mm f/2.8 lens, a Nikon 24-70mm f/2.8 lens, a cable release, a Strike Finder Lightning Trigger (use code NATURETTL for a discount), and a sturdy tripod. All of these pieces of gear play an important role in helping me capture my images.
The Nikon D850 gives me 45.7 megapixels of goodness to work with within my frame. This incredible amount of resolution allows me to crop in a bit in case the lightning is too distant, all whilst maintaining excellent resolution and a safe distance.
The Nikon 14-24mm and Nikon 24-70mm lenses allow me to have flexibility in my framing. Obviously, the 14-24mm is a much wider lens, so the lightning needs to be a lot closer to be prominent in that frame, while the 24-70mm gives me that extra reach needed to photograph distant strikes.
If I am shooting lightning with the 14-24mm, I’m usually hunkered down in the car with the tripod outside the car door and the cable release coming in through the car window.
Understand different types of lightning
If you’ve ever seen a thunderstorm, you have probably been amazed at all the different ways that lightning can present itself. It’s important to be able to identify the kind of lightning in which your storm is producing to better set yourself up for success.
With that said, be ready to be flexible because most storms produce several variations of lightning, so you want to have an idea of what your photo goals are for that storm.
Each type of lightning can be quite visually appealing but can require different settings and positioning. Let’s take a look at my three favourite types of lightning to photograph.
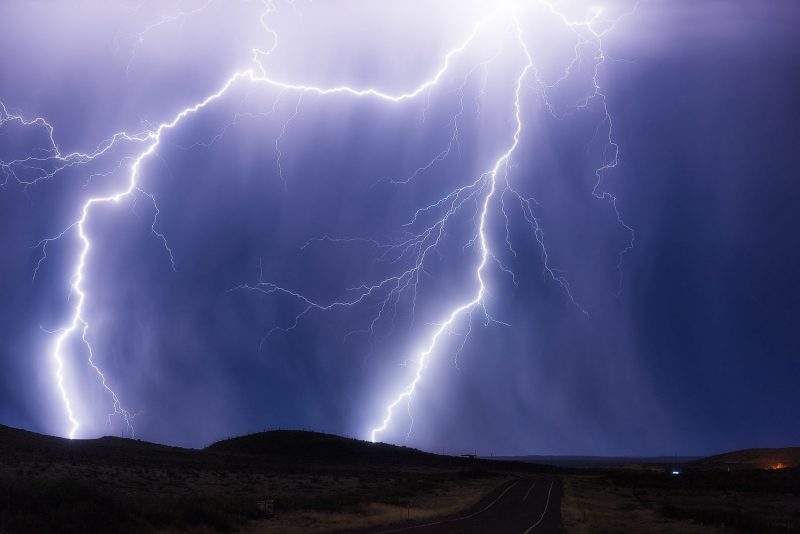
1. Cloud-to-Ground
When you think of a traditional lightning bolt, this is what you are envisioning. As you may be able to guess by the name, cloud-to-ground lightning bolts extend from the base of the clouds to the ground.
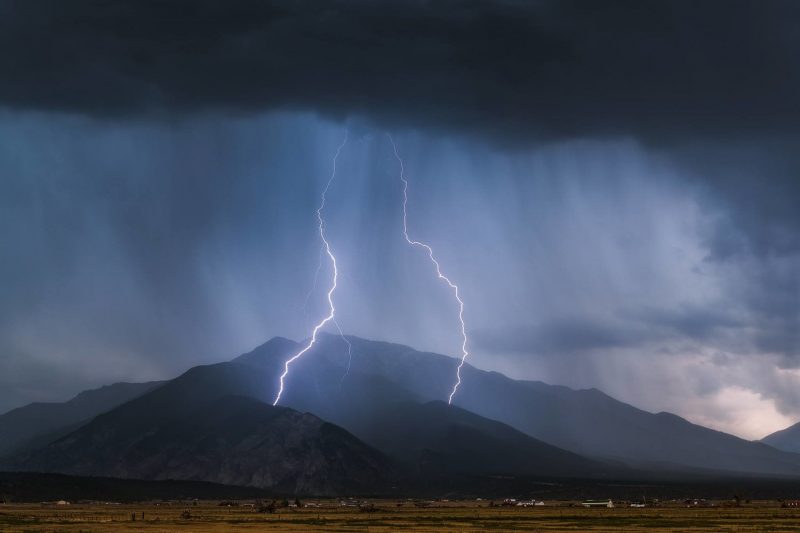
This is my favourite kind of lightning to photograph, but also the most difficult. Cloud-to-ground lightning can be found almost anywhere within a storm, but I find that the leading edge is the best location to shoot these bolts as they are usually away from the rain and quite visible.
The bolts can be quite detailed, with hundreds of branches extending throughout the air away from the main channel. You will want to adjust your settings depending on how close or how far the lightning is. The closer the bolt, the brighter it will be.
2. Anvil Crawlers
Usually located on the backside of the storm in the anvil region, this kind of lightning can resemble an intricate spiderweb as it crawls across the sky.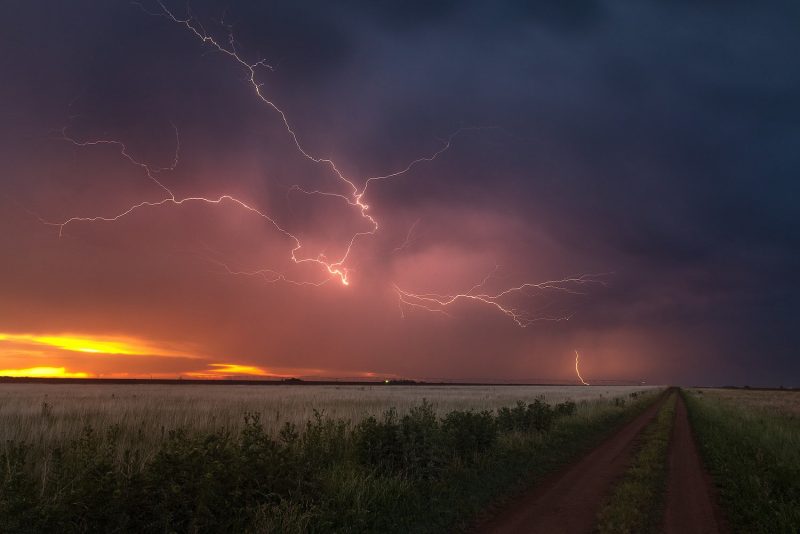
I find it is often quite situational to photograph as, most of the time, other cloud layers obstruct the view of this lightning. In order to increase your odds of shooting anvil crawlers, you should position yourself behind the storm.
3. In-cloud
The interior of a thunderstorm is quite the electrical wonderland. However, clouds and rain obscure the majority of the detailed lightning within a storm, so usually in-cloud lightning just appears as a cloud that flickers in the sky.

In-cloud is not necessarily my go-to lightning to photograph but, under the right conditions, it can be quite beautiful.
Know when to pull the trigger
Lightning can occur at any time of the day, but lightning photography can be both easy and difficult depending upon the time of day.
Nighttime lightning is by far the easiest time of day to shoot, as you can leave your shutter open as long as you’d like in order to capture your scene.
Daytime lightning is the hardest time of day to shoot lightning as brighter skies contribute to shorter exposure times, and large numbers of images have to be taken in order to capture one bolt.
Typically, during the day, I will utilise a lightning trigger in order to increase my odds of capturing a bolt. I recommend checking out Strike Finder (use code NATURETTL for a discount) if you plan on shooting daytime lightning.
Even with a trigger, you can still miss strikes due to the bright scenes. Lightning during twilight is my favourite time to shoot. Blue hour, and even reminiscent sunset colours, can bring a totally new feel to your images.
The lightning just pops more during this time of day. The light is low enough that you can use longer exposures, but still capture colour within the sky.
Camera settings for lightning photography
As you have probably gathered so far, photographing lightning can be quite the challenge to prepare for. Well, it doesn’t get any easier with your settings. By understanding what kind of lightning you want to photograph, what kind of lightning your storm is producing, and the time of day, you can gather a good starting point for your settings.
With lightning, you cannot utilise your camera’s metering. The meter will simply read off the dark sky and not the lightning itself, so getting the correct exposure takes some trial and error.
Here are some of the settings in which I recommend for each type of lightning. These are of course only guidelines based on shooting during twilight or night. Use these as a starting point and adjust accordingly.
1. Cloud-to-ground
- Close strikes (within 0-3 miles distance): ISO 100 | f/16 | Bulb
You are using your cable release to trigger your shutter. Wait until a close bolt strikes and then close your shutter.
If a storm is producing a lot of in-cloud lightning, be sure to make sure your frames aren’t becoming washed out during the long exposure.
- Distant strikes (3-10 miles distance): ISO 200 | f/8 | 20”
Due to the lightning being much further away, it is not as bright in your frame. Therefore you will need to utilise a higher ISO and lower aperture to allow for the lightning to be visible.
2. Anvil crawlers
- ISO 125 | f/13 | Bulb
Anvil crawlers usually don’t happen as frequently as the other kinds of lightning, so you will need to take multiple attempts and be patient to capture them.
Although they can be quite bright, you want to once again make sure that any in-cloud lightning does not wash them out. If you feel that your storm is producing too many interior flashes, close your shutter and try another frame.
You want to capture anvil crawlers towards the beginning of your exposure to avoid too much motion in the clouds and having those details softened.

3. In-Cloud
- ISO 400 | f/8 | Bulb
This kind of lightning is best used to reveal storm structures and shapes. I prefer to distance myself from the storm by a few miles.
Make sure to open and close your shutter in between bright flashes as too many flashes can create a double, or even triple, exposure effect in your frame.
Focusing your shot
Once you get your camera set up on your tripod, you will want to get your focus accurate. For lightning, manual focus is the way to go.
I recommend using Live View to zoom in on your horizon and to focus on a distant power line, structure, or light (if shooting at night). If you are incorporating any sort of foreground within your image, you will want to focus on that instead of the lightning.
Your depth of field should be great enough to keep not only your foreground sharp, but your lightning sharp as well.
Read more: Where to Focus in a Landscape Photo
Composition tips
You will be completely stoked once you start capturing lightning, but should also be driven to add more to your lightning photos than just the storm itself.
If you can find a scene that adds a nice compositional element to the frame, include it! The only thing that will change with adding a foreground to the image is your focus.
When it comes to finding a foreground element for a lightning photo, I always like to try and find one of two things. Firstly, I love old, ruined structures; I love that human vs nature contrast.

The second kind of foreground I keep an eye out for is something that can portray scale. These storms are massive, and the average lightning bolt is five miles long. Therefore finding an element that can develop a sense of scale is great to include in your frame.
These elements could be anything from a distant farmhouse to radio antennas and even putting a person (safely) in a field for scale.
Another great tip for foregrounds is to make sure the subject makes sense and it works in unison with the lightning. By that I mean, you wouldn’t really want a convenience store as your foreground. Find something that tells a story.

If you do include a foreground subject, that is now your audience’s focus point and the lightning is simply going to be a supporting role in the background. Try and get a sense for where the lightning is striking and compose your frame accordingly.
You don’t want the lightning to be striking right behind your subject (unless that is the look you are going for). Being able to see the point of contact between the lightning and ground is a key moment in your image.
In conclusion
Patience is key. Don’t be frustrated if it takes a few storms for you to capture that first lightning image.
I promise you, the patience pays off and it is so worth it! Now get out there, enjoy nature, stay safe, and get creating amazing lightning photos!


