
Black and White Landscape Photography Tips

Whenever someone mentions black and white landscape photography, I immediately think of the iconic images of the Yosemite wilderness captured by Ansel Adams. Perhaps this is quite unsurprising, as I was first introduced to the work of Adams when I was undertaking my formal black and white photography training – and it was indeed his iconic images which first compelled me to become a landscape photographer.
Ansel Adams was, of course, a film photographer with the majority of his most famous images being shot with large format equipment. He was also well known for the amount of post-processing work he would undertake on his images with the view of creating the perfect print. He would spend hours, even days, in his darkroom working on his prints. Even the smallest error would force him to restart his post-processing – there wasn’t an undo option in the pre-Photoshop age.


Luckily digital photography has made capturing black and white images a far simpler process than in the days of Adams. No longer do you have to learn complicated processes for capturing your negative image, or harbour intensive darkroom skills to produce the final print.
However, there is more to the process of shooting black and white than simply converting your colour images to greyscale in Photoshop, and there are a few simple steps you need to follow to produce stunning monochrome images.
Learning to see in black and white
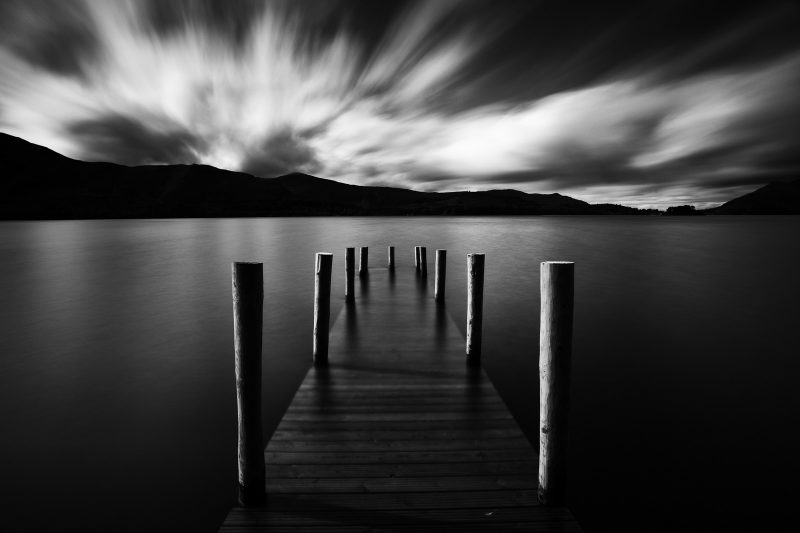
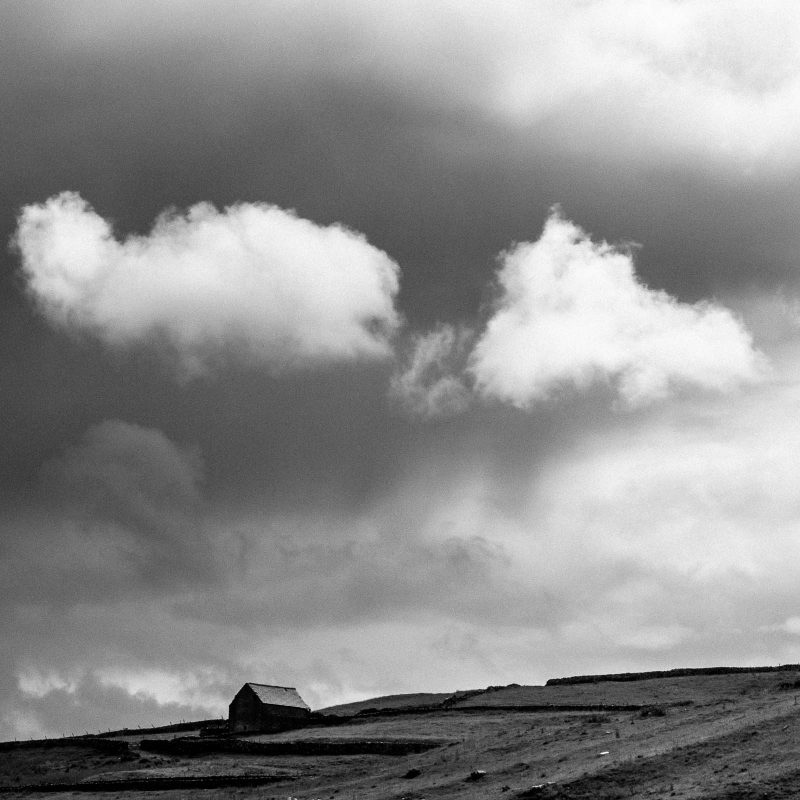
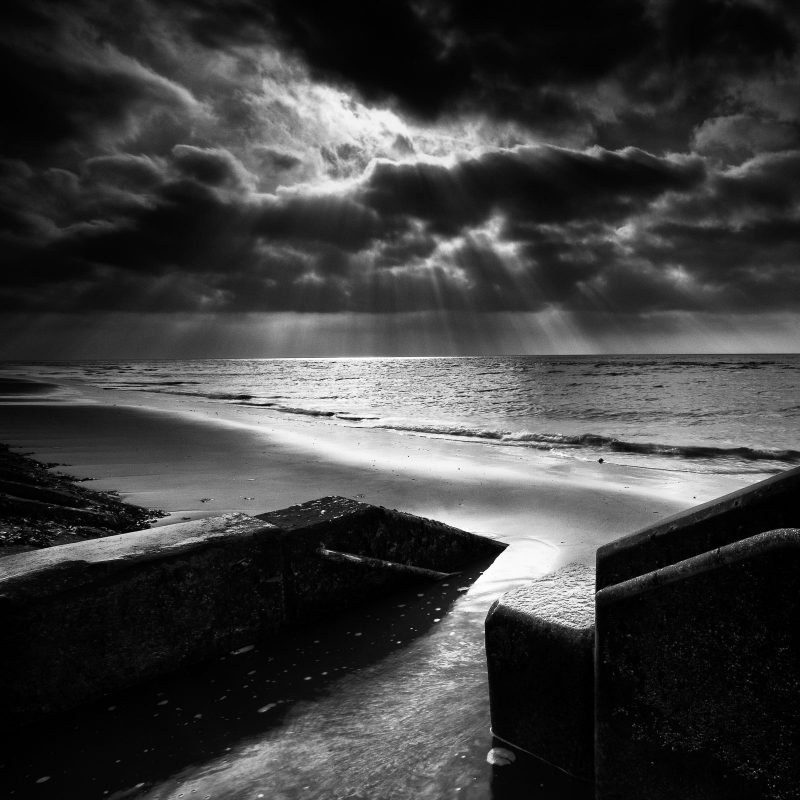
By far the most important part of the process is understanding what makes a successful black and white image. In general, simplicity is the key with regards to composition and learning what to exclude from your frame is just as important as knowing what to include.
It can also be beneficial to consider texture and form within your photograph. Look for shapes to include within your composition and try to use contrast between light and dark to your advantage.
Whilst that can also apply to colour photography, perhaps the hardest aspect of shooting monochrome images is understanding how colour translates to black and white. The problem is that different colours, that look strikingly different to our eye, can actually appear virtually identical in black and white.
Back in the days of film, it was essential to use a coloured filter to help separate and exaggerate the contrast between certain colours. For example, a blue sky will render as a very light grey in monochrome and can be hard to distinguish from clouds in the sky.
However, a red filter will make the sky render a very dark grey, making the contrast between the clouds and sky far more dramatic and pleasing to the eye. Thankfully, the use of coloured filters can now be replicated either during post-processing or at the actual time of capture.
Perhaps one of the most powerful features of using a modern digital camera for black and white photography is that by selecting a monochrome picture style, and using live view on your DSLR, you can actually preview how the colour within your frame translates to greyscale in your final shot.

Mirrorless cameras are even better for this as the image you view via the EVF will actually be in monochrome – this is just one of the reasons why I now exclusively use mirrorless cameras for my photography.
One thing to remember when selecting a picture style is that if you are only shooting JPEG images on your camera, the final image will be black and white as expected. However, if you are shooting raw format, the final image will be colour.
A coloured raw file ironically gives you many more options for producing a stunning monochrome image at the post-processing stage as it will allow you to select the desired digital colour filter after capture, as opposed to having to choose it before pressing the shutter if shooting JPEG only. Personally, I shoot raw & JPEG – but this is simply because I love the in-camera results from my Fujifilm cameras.
Technical considerations
The technical side of shooting a black and white image is almost identical to shooting a regular colour shot. If you are shooting JPEG only, I would recommend that you expose your image for the highlights – even if this means that the dark areas of your images have little or no information in them as rich blacks can be really beneficial for black and white landscapes photos.
The easiest way to expose for the highlights is to use spot metering. However, if you are shooting with a tripod, you could simply evaluate the histogram. I would recommend that raw shooters use the ETTR (expose to the right) method and try to maximise the information they have in the file for the final stages of post-production.
Read more: Understanding Different Metering Modes
One final thing to keep in mind during shooting is that having high ISO noise when shooting a black and white image can actually make a positive addition to the feel of your image. This means that a tripod is actually not as much a necessity as when shooting colour images – that is unless you want to use strong neutral density filters to capture very long exposures, which is a very popular technique for black and white photography
After the shoot
Back in the days of film, the negative was the starting point for your final image and in many ways this has not changed with the advent of digital photography. The editing stage is the point at which you can let your creative side run wild.
The beauty of creating a monochrome image is that the lack of colour means that you are not confined to processing your images in a style that appears realistic or true to nature, which means that you are free to experiment.

If you are new to post production, and the thought of using Photoshop is overwhelming, I would recommend purchasing a stand alone photo editor designed to solely process monochrome images. My personal favourite is Silver Efex Pro by DxO – an extremely powerful piece of software that offers not only flexible processing options, but also a number of built in presets which can create a powerful monochrome image at the press of one button.
I wonder what Ansel Adams would have thought about that!


