
How to Take a Long Exposure Photo on iPhone
This comprehensive guide will teach you how to take a long exposure photo on an iPhone, even if you’re just starting out. It’ll unlock the secrets of long exposure shots on an iPhone, helping to you shoot great images even if you’re just starting out.
Photography is an art that freezes moments in time, but with long-exposure photography, you can create an illusion of movement, turning a static scene into a dynamic masterpiece. This technique is no longer reserved for larger cameras or professional photographers wielding fancy cameras like DSLRs or mirrorless cameras.
The capability to create light trails, blur moving water, or show the path of stars is now at your fingertips, thanks to advancements in modern iPhone cameras.
Let’s dive into the magic of long exposure on iPhone and take your smartphone photography to the next level.
What is Long Exposure Photography?
Long exposure photography uses a longer shutter speed, leaving your camera’s shutter open for extended periods. This allows more light to hit the sensor and captures any movement within the frame in a single image. On larger cameras (such as a DSLR), this involves adjusting settings manually.
With iPhones, the process is simplified, yet still allows you to create breathtaking photos. Since iPhones can’t take images with the shutter open for a long time like a DSLR, the long-exposure effect is created by blending together multiple images.
What You Need for a Long Exposure on iPhone
Before you start experimenting with long exposure photography on your iPhone, you need two things. First, ensure your iPhone is updated to iOS 11 or later. This update introduced the Live Photos long exposure feature.

Second, invest in a basic tripod mount for your iPhone. Whilst not absolutely necessary, this will dramatically improve your final result.
This is because using a tripod for long-exposure shots removes any camera shake, which causes blurry photos, and increases your chances of getting good results.
Setting Up Your iPhone for Long Exposure Photos
For successful long exposure on iPhone, you’ll need to get yourself ready before pressing the shutter. In order to get the best results, follow these steps:
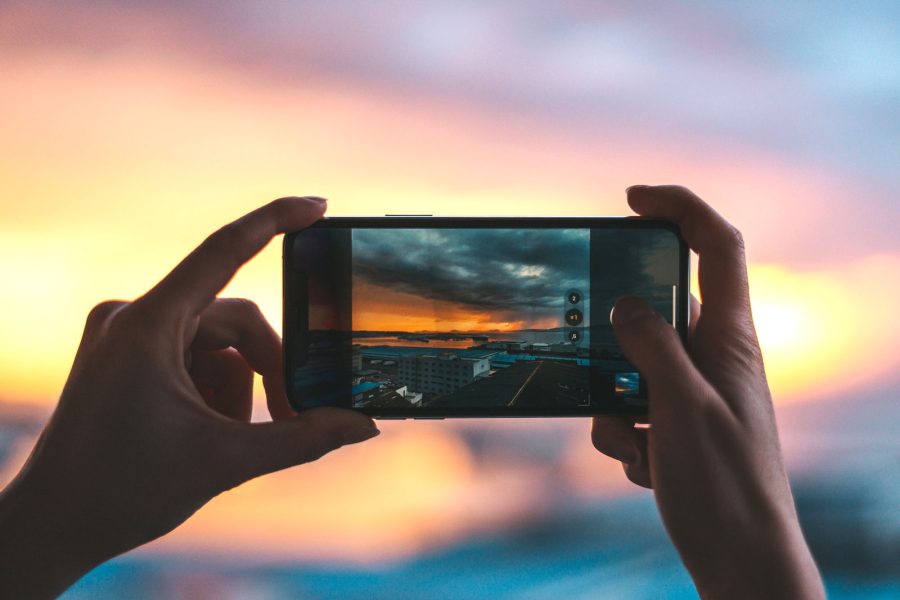
- Open the default camera app on your iPhone and ensure it’s in ‘Photo’ mode.
- Activate Live Photos by tapping the Live button that resembles a bullseye at the top of your screen. When Live Photos is on, the icon turns yellow.
- Frame your shot, focusing on a moving subject, like a bustling city street or road for light trails or a waterfall for a smooth, silky effect on the water.
- Mount your iPhone on a tripod to ensure stability. If you don’t have a tripod, rest your iPhone on a flat, stable surface to reduce camera shake. Whilst it’s not ideal, you can try to hold your phone as steady as possible if you have no support.

How to Take a Long Exposure Photo on an iPhone
After setting up your iPhone, it’s time to take your long exposure shot. The process is really quite simple:
- Tap on your screen where you want the camera to focus.
- Slide the sun icon next to the focus box up or down to adjust exposure settings. Slide up to brighten your photo, or down to darken it.
- Tap the shutter button to take a photo. Hold still until the “Live” indicator disappears. Your iPhone records what happens 1.5 seconds before and after you press the shutter, so keeping your iPhone still during this period is crucial.

Creating the Long Exposure Effect
As mentioned earlier, when using an iPhone for long-exposure photos, you will need create the effect after the image is taken. This is done by blending the frames taken during the 1.5 seconds of video in “Live” mode.
So, it’s time to transform your Live Photo into a long exposure shot:
- Open the Photos app and select the Live Photo you just took.
- Swipe up on your photo to reveal the Effects panel. You’ll see four options: Live, Loop, Bounce, and Long Exposure.
- Tap on ‘Long Exposure’. Your iPhone will immediately apply the long exposure effect, blurring any motion in your photo to create a smooth, continuous effect.

Tips for Mastering Long Exposure Photography on iPhone
Now you know the basics of how to take a long exposure photo on an iPhone. Here are a few more tips to refine your skills:
Experiment with Different Scenes: Try different scenes and sources of movement for varied effects. Rushing water, passing cars, and moving clouds are excellent starting points. All the normal principles of long-exposure photography apply to iPhone photography.
Adjust Exposure Manually: When shooting in challenging light, manually adjust exposure before shooting. If your scene is too bright, swipe down on the sun icon. If too dark, swipe up. This allows you to achieve a balanced exposure and helps you shoot when the sky is particularly bright against the landscape.

Use Third-Party Apps: While the iPhone’s built-in Long Exposure mode is a fantastic tool, third-party apps like Slow Shutter Cam and NightCap Camera offer more control over your settings.
Practice, Practice, Practice: Like any skill, long exposure photography on iPhone gets better with practice. Experiment with different settings, subjects, and lighting conditions to find what works best.
Understanding Light Trails in Long Exposure Photography
One captivating effect of long exposure photography is light trails. Light trails, created by moving light sources during the exposure, can bring life and movement to your photographs, particularly in cityscapes or night scenes.

To capture light trails on your iPhone, find a location with moving lights – busy roads at dusk or night are perfect. Follow the steps outlined in previous sections to capture and create the long exposure. The iPhone will blend the frames of the Live Photo, causing the moving lights to streak across the image.
Using Long Exposure Mode on Your iPhone for Water and Clouds
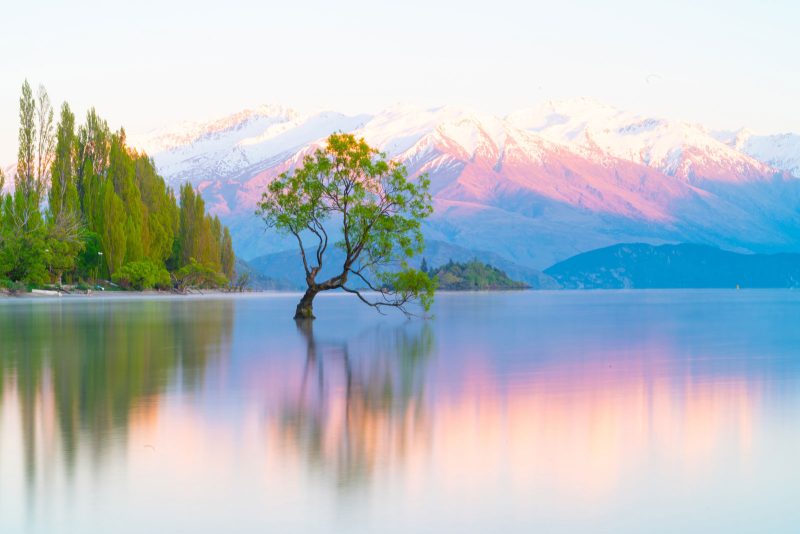
Long exposure is famous for its ability to turn fast-moving water into a smooth, silky visual treat. You can create this effect by photographing waterfalls, river streams, or waves on the beach with your iPhone. The long exposure will blend the movement of the water over time, creating a smooth and serene effect.
Similarly, photographing clouds moving across the sky can result in dramatic and ethereal images. The long exposure effect will capture the path of the moving clouds, creating streaks across the sky.

Troubleshooting Common Challenges
While the process of long exposure on iPhone is fairly simple, you may encounter some challenges. Here are some common issues and their solutions:
- Blurry Images: If your final image is blurry, it’s often due to camera shake. Even a slight movement during the Live Photo capture can cause this. Always use a tripod or steady surface to avoid this.
- Overexposed Photos: If your images are too bright, you might need to adjust the exposure manually before capturing the Live Photo.
- Lack of Effect: If there’s not enough movement in your scene, the long exposure effect might not be noticeable. Try finding a scene with more or faster movement.
Exploring Further with Third-Party Apps
While the native camera app on your iPhone provides an excellent starting point for long exposure photography, third-party apps can offer more advanced features and greater control.
Apps such as Slow Shutter Cam, ProCam, or NightCap Pro allow you to adjust your shutter speed manually, among other settings, providing more versatility for your long exposure adventures.
In Conclusion
Unlocking the magic of long exposure photography on your iPhone opens up a new realm of creativity and storytelling.
By mastering the built-in features and then expanding your toolkit with third-party apps, you can create captivating images that evoke emotion and tell stories of time passing.
As with any photographic technique, the key to mastering long exposure on iPhone is to practice, experiment, and have fun along the way. Happy shooting!


