Introduction to Macro Photography: Equipment

I guess it is no great surprise that compared to large and impressive wildlife, so-called bugs, creepy crawlies and wild flowers can get rather overlooked by nature photographers. At first glance, they are generally less impressive and interesting subjects. However, take a closer look. In close-up, you can reveal the true beauty, colour and design of all things small. At higher magnifications, you can highlight the exquisite beauty, colour and form of insects and flora. Viewing the natural world more closely will give you a fresh perspective – so if you have never done so before, it is time to swap your telephoto for a close focusing lens and try out macro photography.


What Equipment Do I Need?
Close-up and macro photography is often regarded as a specialist area, requiring dedicated and pricey kit. To some extent, this is true. The best option for shooting close-ups is a dedicated macro lens – a lens with corrected optics, designed specifically for close focusing. They are convenient and easy to use. However, there are a number of close-up attachments available that offer a good and inexpensive introduction to shooting close-ups.
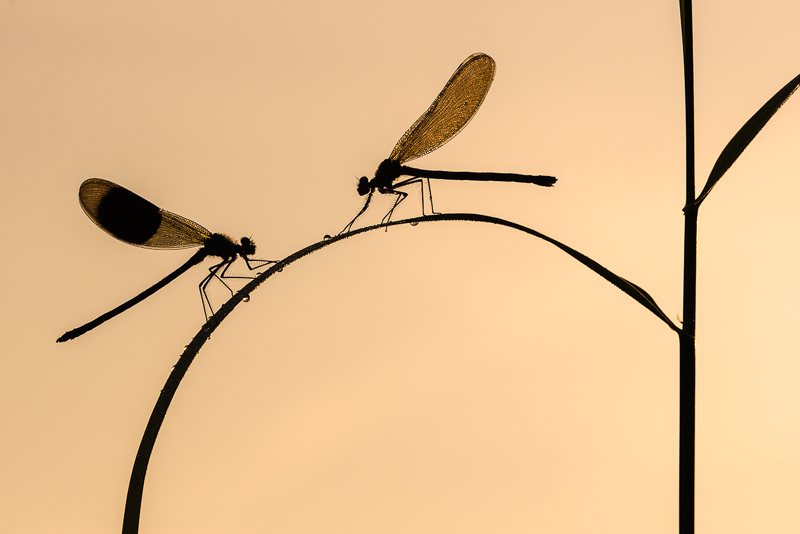
Regardless of budget or experience, great macro photographs are within your capabilities. Many modern tele and standard zooms boast an impressive and useful reproduction ratio of up to 1:4 (quarter life-size). This is useful, and potentially adequate, for larger subjects, for example dragonflies and orchids. However, if you wish to shoot smaller subjects, and get closer to the realms of true macro photography (1:1 life-size) you will need to invest in dedicated kit.
Close-up Filters
Close-up filters offer the cheapest introduction to shooting close-ups and are a good option for beginners – in fact, I started-out using them. Close-up filters – or diopters – are circular, screw-in filters that attach to the front of a normal lens and act like a magnifying glass. By reducing a lens’ minimum focusing distance, its effective magnification is increased. They are available in different diameters and strengths. The most popular strengths are +2, +3 and +4 – the higher the number, the greater the level of magnification. +10 versions are also available, but tend to be lower in quality – with softness towards the edges being a common problem. A good choice would be a Hoya close-up filter, or a slightly cheaper version by Polaroid Optics.

Extension Tubes

Take a look at these extension tubes by Kenko (there is also a version for Canon cameras).
Macro Lens
Without doubt, the best option for shooting close-ups of wildlife is a macro lens.
A true macro provides a maximum reproduction ratio of 1:1 life-size (1x) or greater. Reproduction ratio is a common term when shooting close-ups, relating to the size of the subject in relationship to the size it appears on the sensor. For example, if an object 30mm long appears 15mm wide on the sensor, the reproduction is 1:2 half life-size. If it appears the same size, than the reproduction ratio is 1:1 life-size. This can also be expressed in terms of magnification, with a 1:1 equating to 1x life-size. All lenses have their maximum magnification listed among their specification and, with the exception of Canon’s MP-E 65mm macro (which provides a magnification of up to 5x) a reproduction ratio of 1:1 is fairly standard among macro lenses.
Macros can be loosely divided into two types – ‘short’ and ‘tele’. Macro lenses with a focal length between 40-90mm are generally considered short. Physically, they tend to be compact and lightweight, making them perfect for using handheld – ideal if speed and maneuverability are your biggest priorities. Some also have image stabilising. On the downside, they don’t provide a large working distance, meaning you have to get quite close to smaller subjects in order to fill the frame. This isn’t really a major problem when shooting static subjects like flowers, but if you wish to shoot skittish insects, it can be an issue. All major camera brands list macros within their range, together with third-party manufacturers, like Sigma and Tamron.
A tele-macro has a focal length upwards of 90mm, providing a more generous working distance. This is particularly useful for wildlife, helping to minimise the risk of disturbing your subject. Due to their narrower angle of view, they appear to produce a shallower depth of field than shorter versions, meaning focussing has to be pin-point accurate when using one. They are also more weighty and costly, but are the best choice if you wish to shoot bugs and creepy crawlies. Macros with a focal lengths of 150mm or longer are chiefly designed for tripod use.
Personally, I favour the superb Nikkor 200mm f/4D ED-IF AF Micro. It allows me to work from a practical distance away from insects and provides a lovely diffused backdrop at larger apertures. However, presuming you are new to macro, I would recommend a shorter length, as they are easier to use. One in the region of 100mm is a great choice, and if you’re using a digital SLR with APS-C size sensor, its effective focal length will be extended anyway thanks to the camera’s multiplication factor. It is worth noting that, due to their superb optics, macros are also excellent everyday lenses too.
Other Useful Items
There are other close-up attachments too, like reversing rings and bellows, but generally speaking they are less practical for in-the-field work – being better suited to the controlled environment of the studio. Some of the other key items of kit you require for close-ups are things you are likely to own already. As you would expect, a tripod is a great aid when it is possible to use. For close-ups, one with good low-level capabilities is best – for example, legs where the centre column can be positioned horizontally, or removed, to enable the tripod to be positioned close to the ground. A polariser can be useful for flowers and plants, as its ability to reduce glare and reflections helps restore natural colour saturation.
It might also be worth investing in a ‘Plamp’, such as this one. This is a segmented arm with a clamp at each end. You can attach one clamp to your tripod leg and use the other to position a reflector, or to hold a subject in place – like a branch or grasses. Basically, a Plamp acts like an extra hand. A right-angle finder can also be handy when taking photos from a low viewpoint, enabling you to compose and focus low-level images without having to look through the viewfinder itself. However, thanks to LiveView and Vari-angle screens, an angle finder is less important.
Now you know what kit you need to start taking close-ups, you next need to learn how to use it! In Part 2 of our Introduction to Close-up Photography, we will look at lighting, technique, and potential subjects.
Ross has published an eBook specifically about Macro Photography – take a look here.


