
How to Start Your Own Photography Website
Every photographer should have their own website. It’s the first place you will send potential customers, clients and anyone who wants to view your work. Having a website is far more professional and impressive than directing someone to your poorly organised Flickr account. Starting and running a website can be a daunting process, but it’s actually fairly simple – you just need to know where to look.


Step 1: Registering Your Domain Name
The first and most important thing to do is register your domain name. Nothing looks worse than having your website address as ‘johnsmith.websitehost.com’. Domain names are so very cheap and there’s really no excuse not to register a proper one!
What domain should you buy? Well, if it’s available, grab your full name with both .com and .co.uk extensions (should you reside in the UK). You should never let this go once you’ve registered it – you never know when you might need it, even if you end up using it for something else. So, for me, that’s www.willnicholls.co.uk, although I have lost out on the .com version… for now.
 To get your domain name, you need to buy it through a registrar. I use a company called 123-reg for both Nature TTL and my own personal domains. They are UK based and have never let me down. GoDaddy is another popular domain name registrar. It really doesn’t matter who you go with, as they all do the same very simple job.
Step 2: Hosting & Design
Once you’ve got your domain name, you need to give it somewhere to point to. Every website needs someone to host it on their servers, and there are endless companies that will try to entice you. Some are good, and some are awful. Luckily, we are here to give you our recommendations!
There are a couple of hosting routes to go down. Firstly, you could use a dedicated photography website host. This is the most expensive option, but they look great and are built for photographers. You choose from a selection of themes, apply them to your website and you’re good to go. There are a few market leaders in this industry – all of which offer free trials:
- Zenfolio (this is who hosts my personal website. See my review of them here)
- PhotoShelter
- SmugMug
BONUS: Go with Zenfolio and get 20% off your hosting package using coupon code 23P-DPE-78Q

Or, you could go with popular content management system Wordpress. This is what Nature TTL is built on and is highly customisable. It requires some more knowledge about how websites work, but it is fairly easy to get your head around. There are both free and paid themes available online, with a load of great ones to get at ThemeForest.
You’ll also need to get yourself a hosting package for this, on top of your domain name – but it is cheaper in the long run. GoDaddy offer cheap hosting packages for Wordpress users.
Step 3: The Basics
There are a few basic pages that you need to make sure you have: an ‘About’ page; a ‘Contact’ page; a gallery.
On your ‘About’ page you should include a biography that introduces you to your visitors. They don’t need to know your life story, but a bit of background about where your interest in photography first developed is always a nice touch. Make sure to include a photo of you with your camera.
Your ‘Contact’ page should be relatively simple – there is no need to make this complex. Include an email address and even a phone number. That’s all you need, as well as some accompanying text saying you are happy to talk etc.
Your gallery is the main element to your website. Using one of the dedicated hosts mentioned above will ensure that this looks attractive and shows off your photos in the best way possible (although it can be done well in Wordpress too). Include your best images – do NOT include hundreds of photos. Nobody is going to sit and sift through endless streams of photos. But if you do want to upload lots of images, you can have both a portfolio and a searchable archive by keyword with PhotoShelter.
Step 4: Further Additions & eCommerce
 Other things you may want to add to your website include an eCommerce system, allowing visitors to make purchases on your website. The dedicated photography hosts above are the best options for this, even offering a system where orders are automatically printed and sent out to customers. They take a commission, of course, but it takes the headache away for you. You can also offer self-fulfilled orders that you print and post yourself, if that takes your fancy.
Running an eCommerce system with Wordpress is a little more complex, but it is definitely possible using dedicated plugins. But for ease of use and functionality, at a very reasonable price, I would recommend the dedicated hosts.
You could also include a blog on your website, allowing you to post stories from the field and other information. Again, these are easy to implement on either hosting option.
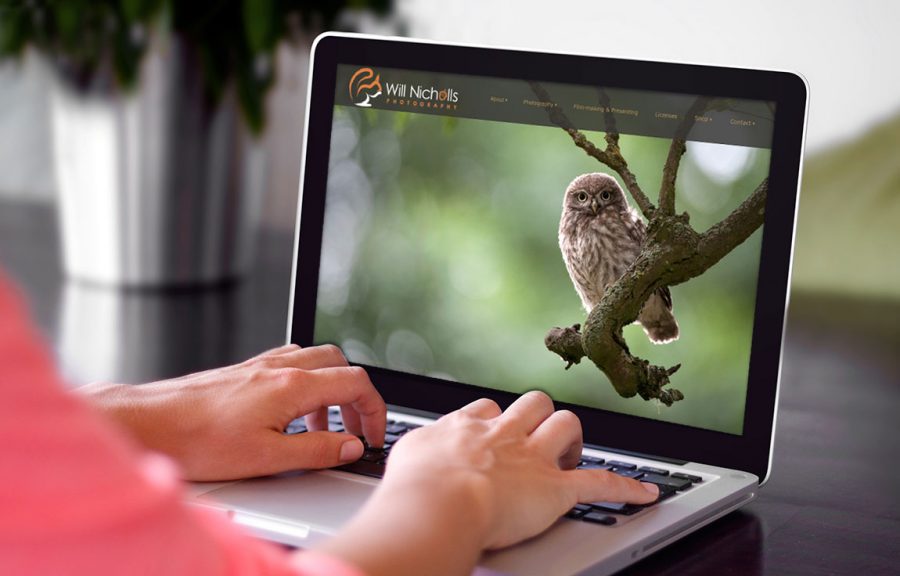
You can add further information pages, too. If you’re offering workshops to clients or giving talks, then you should have information about this on your website too. Take a look at my own website to see what I’ve done.
Step 5: Realistic Expectations
Setting up a website is not going to make you your million overnight. They are slow earners financially if you are selling your work, and unfortunately ‘if you build it, they will come’ does not apply to websites. You need to send people there yourself, which could be through the use of a Facebook Page or advertising.
Once you’ve got your website online, keep it updated with your latest photos and prune it occasionally by removing older, out of date images. Most importantly, be consistent and don’t chop and change everything all the time. Once you’ve picked a design, stick with it and resist the temptation of completely redesigning it on a regular basis!


