How to Photograph Seabirds

The British Isles are renowned for their breeding seabirds and host internationally important populations of a wide variety of species including gannet, atlantic puffin, razorbill, guillemot, kittiwake and Arctic tern, to name but a few. For decades these seabird cities around Britain’s coast have attracted photographers from around the world, and for good reason. There are few greater birding experiences than a visit to one of these thronging colonies during peak activity in June and July when parent birds are busy bringing in food for their rapidly-growing chicks. Photography at any one of the UK’s seabird hotspots is always a rewarding day out. Not only are the birds very approachable, but there is a constant hustle and bustle of activity providing limitless photo opportunities.


Having an accessible stream of subjects lined up to be photographed is great and means that you can concentrate on your photographic technique and composition without the worry of your subject disappearing. However, the scenario can be a bit overwhelming at first as there are so many subjects to photograph, with opportunities in every direction. It’s therefore worth taking a few moments to get tuned in and observe what’s happening before embarking on any photography, especially if visiting a location for the first time. That way you can pick out a particular shot that you want to try to capture and set about securing it before moving onto something else. This approach will help you to get the most from your visit and avoid the ‘headless chicken’ syndrome of dashing around trying to snap everything in sight without doing anything properly.
What you decide to photograph and how you go about capturing it will depend to a large extent on the prevailing lighting conditions. This is an important consideration as the quality of the light determines what’s possible (or at least what will work best). In this regard it can be better to think about the light before the subject and tailor your photography accordingly. Bright overhead sunlight, for example, may not be the best light for shooting portraits, but it may be perfect for capturing terns or gulls backlit in flight against a blue sky. Conversely, an overcast day is not so well suited for taking flight shots, but the soft, low contrast light is ideal for recoding fine plumage detail. By tailoring your photography to the light, you’ll ensure that you’re capturing your subject in the optimal conditions during your visit. This is even more relevant when visiting one of the seabird islands as your stay is likely to be restricted to certain times of the day so you have to deal with whatever lighting conditions prevail at the time.

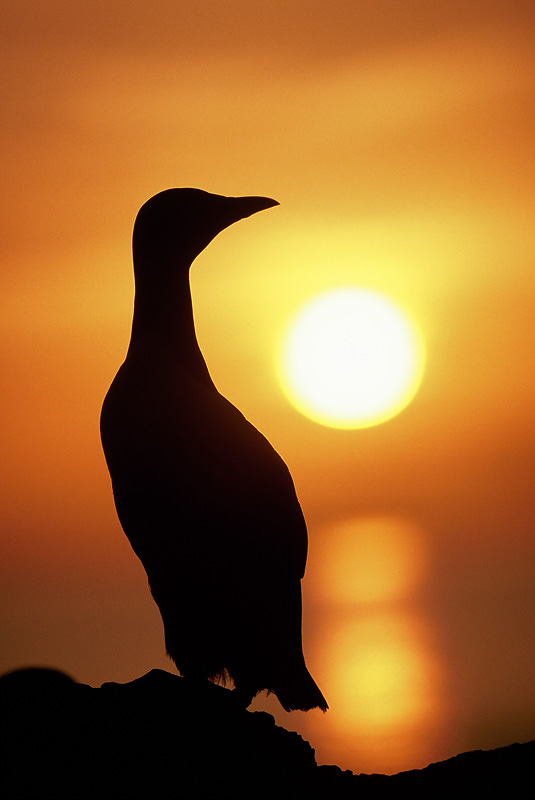
At locations that are accessible at any time of day, time your shoot for either early or late in the day to benefit from low angled light on sunny days. Low sunlight not only provides a more even illumination of your subject, but it is also a warmer light, adding to the appeal of the shot. It’s still important to consider the direction of the light however, and whilst low side-lighting can work in some situations, it can often lead to harsh shadows on one side of the subject or an unflattering shadow cast from the beak of the bird. Consequently, I prefer to shoot with the sun either coming from behind to create a fully front lit shot or alternatively with the subject backlit. The latter works really well with low sun to create a beautiful warm rim lit effect. Watch out for flare caused by sunlight directly striking the front of the lens. Repositioning yourself to create a different shooting angle can solve this problem, but the backlit effect may be lessened somewhat.

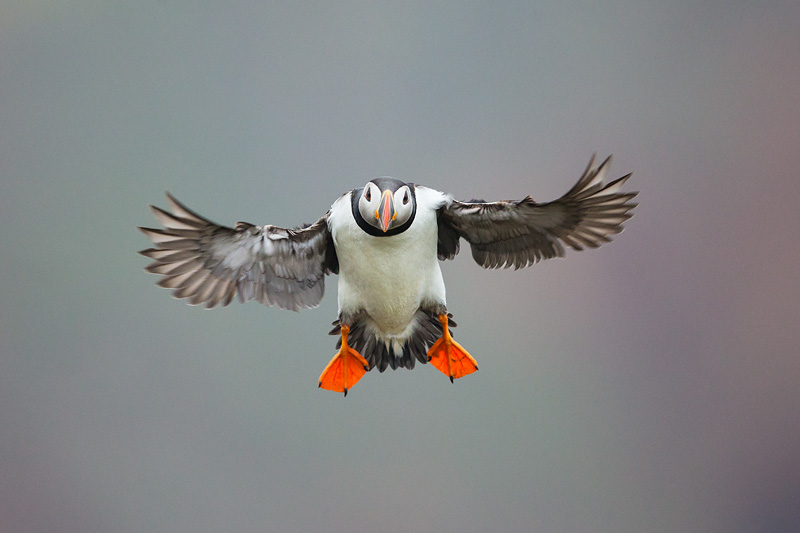
The majority of seabirds are a mixture of white and black plumage, and this presents certain difficulties when it comes to exposure and recording feather detail. This is more extreme in bright sunlight because contrast is increased and it is more difficult for the camera to capture detail in both the dark and light toned plumage. For this reason softer light is better, but if you’re stuck with bright sunshine how do you deal with it? One way to help control the contrast is to shoot towards the light. If the sun is lighting the subject from behind then the front of the bird will mostly be in shadow and therefore there will be a lot less contrast on this part of the bird. By then exposing for the front (shadow side) of the bird you’ll get a more pleasing result with better detail in the white and black plumage. This technique can be enhanced by using a little fill-flash to lift the plumage detail and add a catchlight to the bird’s eye. When using fill-flash it can also help to expose for the highlights (i.e. underexpose the shadow areas) to get a more balanced result.

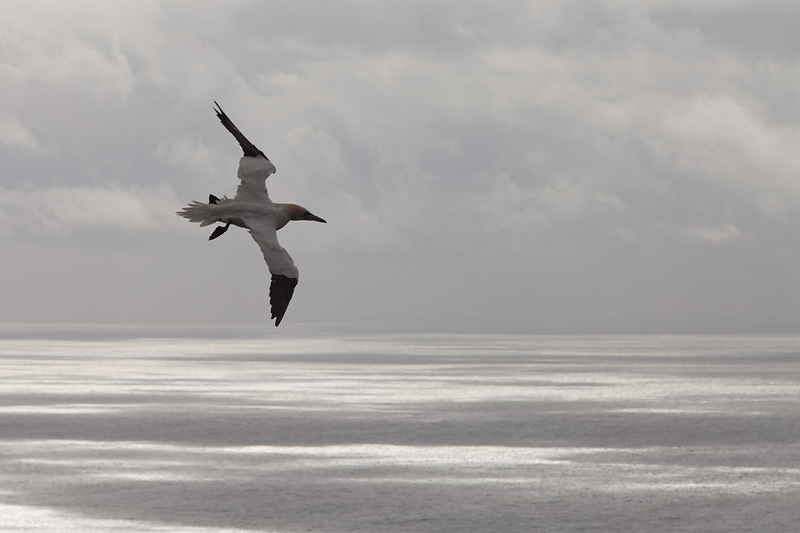
Bright light is also great for backlighting birds in flight and works particularly well for white birds, highlighting the effect of light coming through the bird’s wing feathers to dramatic effect. A blue sky is ideal for this type of shot but it can also work with a paler sky to create a high key effect. Again, fill-flash can be used to light the shadows on the underside of the bird but a word of warning here as most flash will by default sync at a shutter speed of 1/250th or slower. This will cause ghosting on moving subjects caused by the natural light registering a blurred image ‘over’ the sharp image captured by the flash. This effect can sometimes be used to creative effect but to avoid it you’ll need to enable the flash / camera to operate at a higher shutter speed, ideally 1/1000th sec or faster to prevent ghosting.

Correctly exposing seabirds can be tricky too and many cameras can easily be ‘fooled’ into either over or underexposure because of the predominance of white or black plumage. This can be countered in a number of ways but the most reliable is to use Manual metering mode as this allows you to take a precise meter reading from a mid-tone. The benefit of using Manual mode is that once you have established the correct aperture / shutter speed settings for your subject you can then concentrate on capturing images, knowing that the exposure will be consistently accurate. It’s best to use spot or partial spot metering to take a meter reading in Manual mode for greater accuracy. If you’re unsure how to do this then simply set the desired aperture e.g. f/5.6 and then point the centre of the viewfinder (spot metering area) at something that is mid-toned, such as a grey rock. Then adjust the shutter speed until the indicator aligns with the ‘0’ on the exposure scale. This should then provide the correct exposure for your subject irrespective of its tone. The settings will need tweaking if the light levels change or you shoot the subject from a different angle, but they can be quickly adjusted as necessary.
There are a host of great locations around the UK’s coastline where you can get up close to a host of seabirds. Here are just a few suggestions to get you started:
- Bempton Cliffs RSPB Reserve, Yorkshire
- The Farne Islands, Northumberland
- Skomer Island, Dyfed, Wales
- Skokholm Island, Dyfed, Wales
- South Stack RSPB Reserve, Anglesey
- Bass Rock, Lothian, Scotland
- Isle of May, Scotland
- Fowlsheugh RSPB Reserve, Aberdeenshire
- Hermaness, Shetland